
Sostituzione batteria Google Pixel 4

Introduzione
Vai al passo 1Questa guida di riparazione è stata redatta dallo staff di iFixit ma non è stata approvata da Google. Leggi di più sulle nostre guide qui.
Segui questa guida per rimuovere o sostituire la batteria del Google Pixel 4. Se la tua batteria è gonfia, prendi le precauzioni appropriate.
Per la tua sicurezza, scarica la tua batteria sotto il 25% prima di smontare il tuo telefono. Questo riduce il rischio di un evento termico pericoloso se la batteria viene danneggiata accidentalmente durante la riparazione.
Nota: Alcune immagini in questa guida mostrano il vassoio della scheda SIM rimosso dal telefono. Per questa procedura non ne è necessaria la rimozione.
Attenzione: Google avvisa che smontare il gruppo del laser anteriore può risultare in una pericolosa esposizione a delle emissioni laser invisibili ad infrarossi. Leggi le avvertenze sulla sicurezza qui.
Cosa ti serve
Kit di riparazione
Questo kit contiene tutti i ricambi e gli strumenti necessari per completare questa guida.

Ricambi


Strumenti


Mostra di più…
-
-
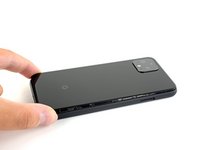
Prepara un iOpener e appoggialo al bordo inferiore del vetro posteriore per un minuto.
-
-
-
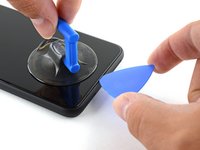
Applica una ventosa al bordo appena riscaldato premendola sul vetro il più vicino possibile al bordo.
-
-
-
Tira la ventosa verso l'alto con forza elevata e costante per creare una fessura tra il pannello posteriore e il telaio.
-
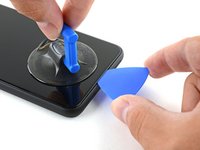
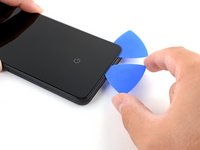
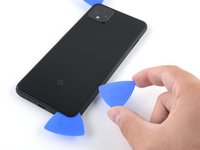
Infila la punta di un plettro nella fessura.
-
-
-
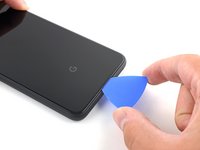
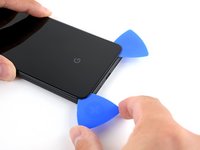
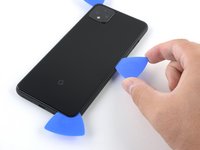
Fai scorrere il plettro sotto il bordo inferiore verso l'angolo sinistro per tagliare l'adesivo.
-
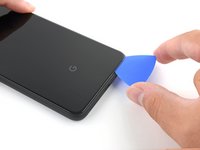
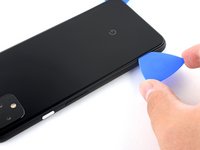
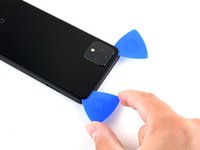
Ora fai scorrere il plettro sotto il vetro dall'angolo sinistro a quello destro per tagliare completamente l'adesivo sotto il bordo inferiore.
-
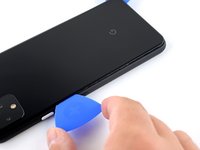
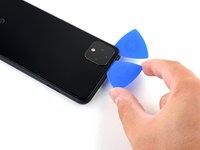
Lascia il plettro sotto l'angolo in basso a destra per evitare che l'adesivo si reincolli.
-
-
-
Prepara un iOpener e appoggialo al bordo sinistro del telefono per un minuto.
-
-
-
Prepara un iOpener e appoggialo al bordo destro del telefono per un minuto.
-
-
-
-
Con i primi due plettri ancora inseriti, infila un terzo plettro sotto la parte inferiore del bordo destro del vetro.
-
Fai scorrere il plettro verso l'angolo in alto a destra, tagliando l'adesivo sotto il bordo destro.
-
Fermati quando raggiungi l'angolo in alto a destra e lascia il plettro infilato sotto il vetro.
-
-
-
Fai scorrere il terzo plettro attorno all'angolo in alto a destra e lungo il bordo superiore, tagliando l'adesivo rimasto sotto il vetro.
-
-
-
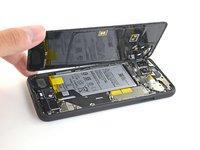
Una volta tagliato l'adesivo lungo tutto il perimetro del telefono, solleva attentamente il bordo destro del pannello posteriore in vetro, aprendolo come un libro.
-
Non cercare ancora di rimuovere del tutto il pannello: è ancora collegato al telefono.
-
-
-
Continua ad aprire il pannello posteriore finché riesci ad appoggiarlo al bordo sinistro del telefono, stando attento a non tirare troppo i cavi a nastro ancora collegati.
At this point I suggest taking a photo of what you're seeing in there. This way you can make sure you put it all back the way it was when you're done.
-
-
-
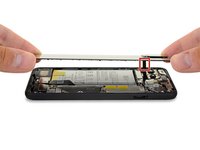
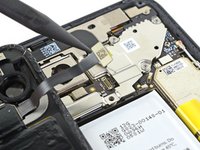
Svita le cinque viti Torx T3 che tengono ferma la copertura del connettore della batteria:
-
Quattro viti da 4,0 mm
-
Una vite da 2,1 mm
Does anyone know where I can get a replacement T3 - 2.1mm screw (the one circled in orange)? I lost this screw during the battery replacement. Had it, dogs fought, had to get up to break it up, and couldn’t find it. I swore I put it on the mat, but I couldn’t find it when I got back to the table. :(
-
-
-
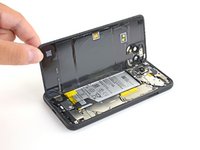
Usa un cacciavite Torx T3 per svitare le due viti da 4 mm che tengono ferma la copertura del connettore del pannello posteriore.
-
-
-
Rimuovi il pannello posteriore.
Why does the kit not come with the back panel adhesive?
It's not cheap to get the full kit, and it seems like it's such a small thing to include.
I ended up re-using the existing back panel adhesive and now a bit worried that it's not as strong and I will have issues with water or moisture getting into the device more easily.
-
-
-
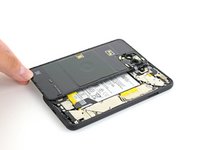
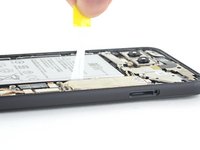
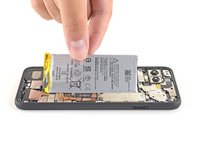
Tira le linguette gialle delle strisce adesive estensibili con forza costante.
-
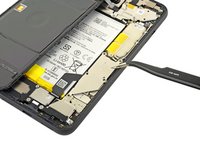
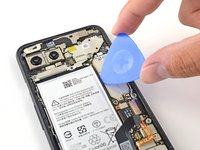
Continua a tirare con decisione la striscia adesiva con forza costante. Se stai usando uno spudger, giralo ogni tanto per mantenere la parte esposta della striscia la più corta possibile.
-
Ripeti questa procedura per ognuna delle tre strisce adesive estendibili, fino ad averle rimosse tutte o fino a che non si sono rotte.
These are basically like command adhesive strips. If you don't get them off by pulling the tab you can pry them up but it is not easy. This is three strips of strong adhesive.
I pulled the adhesive strips upwards and they just torn leaving most of the adhesive beneath the battery. Battery is impossible to remove now.
I too have experienced something like that. In this case I followed step 22 below to push the opening pick in and force it away from the adhesive. Some strength will be required. The key is to apply balanced force to prevent the battery from being deformed and damaged.
-
-
-
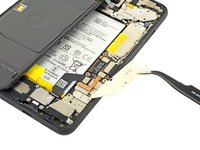
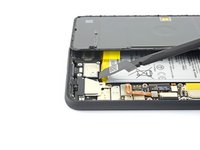
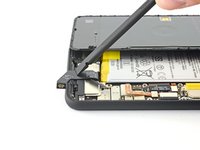
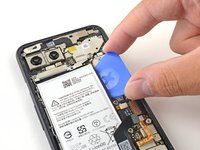
Se le strisce adesive estensibili della batteria si sono rotte durante la rimozione, infila un plettro sotto la parte superiore del bordo destro della batteria, tagliando l'adesivo sottostante.
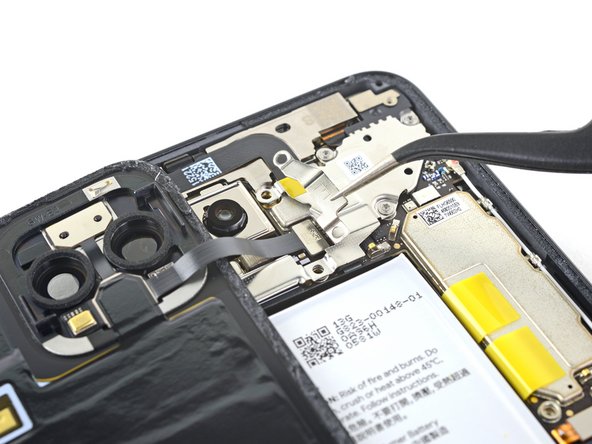
The grip sensor cable picture here is incorrect for my pixel 4; on mine it runs straight from the connector on the right to the left edge of the case, then makes a 90° turn downward to where it connects to the sensor. The result was that I tore the cable because I was using the picture as a guide. I've taken a picture of the alternative placement on mine and I'll send it to the iFixit people to update this guide.
At the bottom end of the battery there is a thin white antenna cable, somewhat hidden between battery and speaker / charging unit. It is also a bad idea to use a pick on the lower adhesive strip. In my case the cable glued to the rest of the strip and I damaged it when lifting the battery.
-
-
Attrezzo utilizzato in questo passaggio:Tesa 61395 Tape$5.99
-
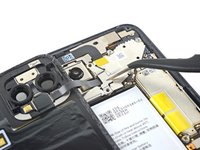
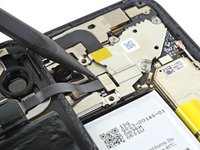
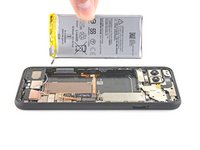
Solleva la batteria dal telefono per rimuoverla. Potresti doverla staccare da dell'adesivo residuo.
-
Se stai usando delle strisce adesive estensibili, applicale sulle batteria. Altrimenti applica del nastro biadesivo o un foglio adesivo pretagliato nell'alloggio della batteria, stando attento a non coprire il cavo a nastro della porta di carica. Rimuovi la protezione dell'adesivo per espellerlo.
-
Ricollega momentaneamente il connettore della batteria sulla sua presa sulla scheda madre. Questo garantisce che la batteria venga posizionata correttamente.
-
Appoggia la batteria in posizione e premila con fermezza.
-
Scollega il connettore della batteria dalla sua presa sulla scheda madre e riprendi il rimontaggio.
There is a better guide for applying the back adhesive. Search out the guide for the pixel 4 back adhesive on this website. It sucks that they didn't include it here, and I messed it up by trying to decipher these generic instructions.
Thanks for this @joegaughran - saved me a problem. For others, the guide can be found here: How to Replace the Back Panel Adhesive on Your Google Pixel 4
phzdw -
-


Per avere prestazioni ottimali, calibra la tua nuova batteria appena installata dopo aver completato la procedura.
Confronta la tua parte di ricambio con quella originale: potrebbe essere necessario il trasferimento di alcuni componenti o la rimozione di protezioni adesive dalla nuova parte prima di installarla.
Per rimontare il dispositivo, segui le istruzioni in ordine inverso.
Porta i tuoi rifiuti elettronici a un riciclatore certificato R2 o e-Stewards.
La riparazione non è andata come previsto? Prova delle soluzioni di base ai problemi, oppure rivolgiti alla nostra comunità Risposte per trovare aiuto.
Annulla: non ho completato questa guida.
Altre 61 persone hanno completato questa guida.
Un ringraziamento speciale a questi traduttori:
100%


Questi traduttori ci stanno aiutando ad aggiustare il mondo! Vuoi partecipare?
Inizia a tradurre ›


28 Commenti
If you are gonna sell me your tool kit at least supply a *!&$!&$^ T3 Tork bit to complete the job.
Hi Nicholas,
The iFixit kit should definitely have a T3 bit. Please contact our customer support and we will get the issue resolved!
Hey Keith,
When putting the phone back together and reinstalling the back panel, we recommend removing the old adhesive and installing new adhesive. The Pixel 4’s back panel adhesive can be found here, and a guide on how to install it can be found here!
If you’d like to reuse your old adhesive, try removing any large uneven chunks, reheat the adhesive, and press the back panel back into place.
Does the kit include replacement battery adhesive strips? I don’t recall seeing it in mine.
Hey Nikki!
The kit should come with a pre-cut adhesive card. You can pull strips from the card to adhere your battery to the frame.
@arthurshi Thanks, I figured as much. However, I thought it would be nice if they included this instead of the pre-cut adhesive card. This way the battery can still be removed the Google factory way. [prodotto collegato mancante o disabilitato: IF356-191]
That’s a great idea! We got the battery strips recently and haven’t had a chance to incorporate them into the kit. We’ll definitely do that.
After putting in the new battery the phone doesn’t turn on. If I plug in a charger I get the splash screen and then the battery icon indicating the charge level (85%). What am I missing here?
For anyone who may find this later - my issue was the side button connector ribbon cable came loose in the process of removing the old battery. I had to remove the cover for that and then re-seat the connector. I put it all back together and it’s working great now.
Bryan P -
After replacing the battery and putting it back together, the WIFI is no longer working. It only works when the phone is on top of the WIFI router now.
I cleaned the contacts for the WIFI on the back cover, but still nothing. I reformed the contacts on the board and that didn’t help either.
Anyone else have WIFI issues after replacing the battery?
Great tutorial and I followed step by step successfully. But I did (and recommend to do) steps 17 - 20 first, and 13 - 16 afterwards. If you remove the back panel first, it is easier to unconnect the battery than vice versa.
I have successfully completed this repair guide twice. Thanks a lot for providing the guide!
One thing: One of the iFixit batteries had a charge level of 1%, so it was about to be completely discharged. If you have other rechargeable batteries in stock, you should charge them from time to time, otherwise they may get destroyed.
Very good guide and the fixit kit is awesome.
All went well and battery works like the first day!
I recently replaced the battery on my pixel 4 and it was a simple fix with this kit. However, my back panel is not remaining stuck down. Particularly the corner around the camera starts to separate when my phone gets hot. This was the first indication that my old battery was bulging, and I'm hoping that's not the case again so soon. (It's only been 3 days!).
It could also be that I didn't properly seal the back. I have been unable to find good instructions for using the supplied back panel adhesive. I had to basically make it up.
Did I need to heat it? Clamp it? How to properly close the back? Yesterday I tried applying the iOpener again, then clamping the back closed and putting the phone in the fridge for 5 min. Doesn't seem like it worked.
Any tips? I could buy another back panel adhesive ($8 cdn) but maybe I can still fix this?
This guide is great. After reading it, I'm confident enough to buy the parts to fix my phone myself!
I just changed the battery of my pixel 4 and it was the easiest phone repair I’ve ever done, all thanks to this guide and the kit available. Thanks!
Ugh! My camera has spots all over it now! I guess my battery is ok though.
It took me approximately 2 hours to complete this guide including the significant amount of time cleaning the previous adhesives off the phone. In my case I may not have needed to be so thorough but am happy with the results - resealing the back cover had zero issues.
A pretty reasonable repair for someone with steady hands. I am happy to see a significant performance increase from the replaced battery compared to the 4 y/o one.
Das Auseinandernehmen des Gerätes mit Hilfe des "Wärmekissens" und der Plektren war kein Problem, ebenso wie der Ausbau des Akkus. Das nervigste an der ganzen Reparatur war das Entfernen der Klebereste der Gehäusedichtung. Trotz der Zuhilfenahme von Q-Tips mit Klebstoff-Löser hat mich dieser Schritt ganze 2 Stunden gekostet!
Nach dem Einbau des Akkus dann für einen kurzen Moment Herzrasen, als das Gerät nach dem Einschalten mit einem roten Akku-Symbol sofort wieder ausging. WT...?? Dann Ladekabel angeschlossen und Erleichterung genossen: das Gerät begann bei 1% zu laden! Anscheinend wird der Akku im entladenen Zustand geliefert. Ich hoffe nur, er war nicht tiefentladen!
Beim Hantieren mit der neuen Gehäusedichtung sollte man vorsichtig und sehr behutsam vorgehen, um sie nicht verkehrt anzusetzen. Das war ein Moment, in dem ich mir mein altes S3 zurückwünschte: Rückwand ab, Akkus wechseln, Rückwand wieder anstecken, fertig! Kein Kleber, keine Schrauben. Früher war manches doch besser als heute...
English version:
Taking the device apart using the "heat pad" and picks was easy, as was removing the battery itself.
The most annoying part of the whole procedure was the removing of the adhesive residue from the housing seal. Despite using q-tips and glue remover, this step took me 2 hours!
After installing the new battery, there was a brief moment of palpitations when the device immediately switched off again with a red battery symbol on the screen. WT...?? Then I connected the charging cable and relief was felt: the device started charging at 1%! Apparently the battery is delivered in a discharged state. I just hope it wasn't deeply discharged!
When handling the new housing gasket, you should be careful not to put it on incorrectly. That was a moment when I was mourning for my old S3: removing the back panel, changing the battery, reconnecting the back panel, done! No glue, no screws!
Some things used to be better than today...
The fitting kit and the instructions were fantastic. First time stripping down a phone and after this it won’t be my last. The kit contains everything you need. Check all the boxes as I thought my triangular openers were missing but I found them at the bottom of the heater pack. To remove the old seal from around the edge of the phone use the heater pad to warm the old seal first then use a sharp blade to remove it with ease. Thank you.
it helps to have a partner when installing the first pick at the bottom. I had to heat my bottom edge 4 times and then hold the front while pulling on the suction cup. My partner was able to get the first pick in and then I could proceed with the rest of the instructions. I agree with the person above that getting the old battery out was a pain. My bottom tab broke right away but my dual side tabs stretched without breaking and I was able to get a pick under the upper right quarter and then use a pry pick to get it the rest of the way.
0 Experience here. Followed the instructions, checked some youtube tutorials too, and managed to replace the battery easily. The adhesive strips on the original battery were somewhat hard to remove but as clumsy as I am, managed to take out the battery without destroying other parts. 10/10.
Great guide, thanks a lot!