Questa traduzione potrebbe non riflettere gli aggiornamenti più recenti dalla guida originale. Aiuta ad aggiornare la traduzione o visualizza la guida d'origine.

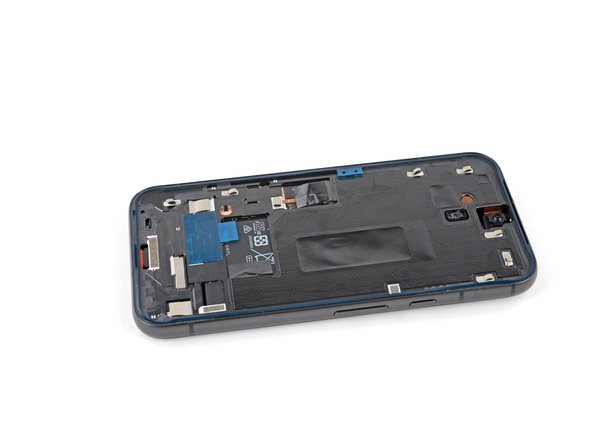
Sostituzione schermo Google Pixel 8a

Introduzione
Vai al passo 1Questa guida è stata scritta dallo staff di iFixit e non è stata approvata da Google. Puoi saperne di più sulle nostre guide di riparazione qui.
Segui questa guida per sostituire lo schermo rotto, crepato o che non funziona del tuo Google Pixel 8a.
Per calibrare il lettore delle impronte digitali dello schermo, segui questa guida. Le parti sostitutive originali di Google hanno il lettore delle impronte già installato. Se il tuo schermo sostitutivo non ha il lettore delle impronte già installato, dovrai trasferire il lettore originale al nuovo schermo e ricalibrarlo per mantenerne la funzionalità.
"Avrai bisogno di un adesivo per schermi di ricambio per completare la riparazione."
Nota: Questa guida è stata realizzata con il modello con antenna 5G mmWave del Pixel 8. Se possiedi un modello diverso da quello mmWave, puoi comunque usare questa guida, ignora soltanto i passaggi che menzionano l'antenna 5G mmWave.
Cosa ti serve
Kit di riparazione
Questo kit contiene tutti i ricambi e gli strumenti necessari per completare questa guida.

Ricambi


Strumenti


Mostra di più…
-
-
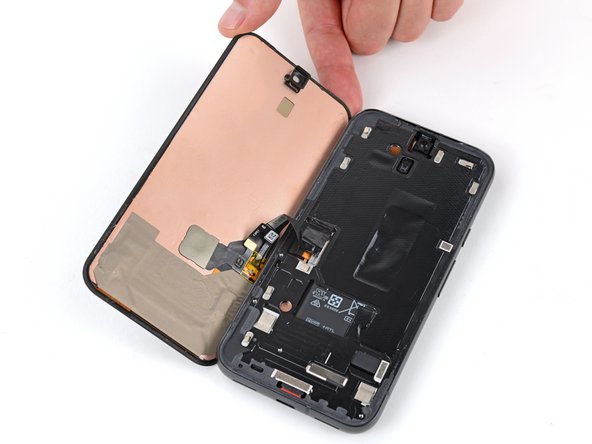
Scollega tutti i cavi dal tuo telefono.
-
Spegni completamente il tuo telefono.
-
-
-
Applica strisce sovrapposte di nastro da imballaggio sul vetro rotto fino a coprire l'intero schermo: questo permetterà alla ventosa di aderire allo schermo.
-
Indossa occhiali protettivi per proteggere gli occhi da frammenti di vetro che possono liberarsi durante la riparazione.
-
-
-
Usa un asciugacapelli, una pistola termica o una piastra calda per scaldare il bordo superiore dello schermo finché è quasi troppo caldo per toccarlo.
-
-
-
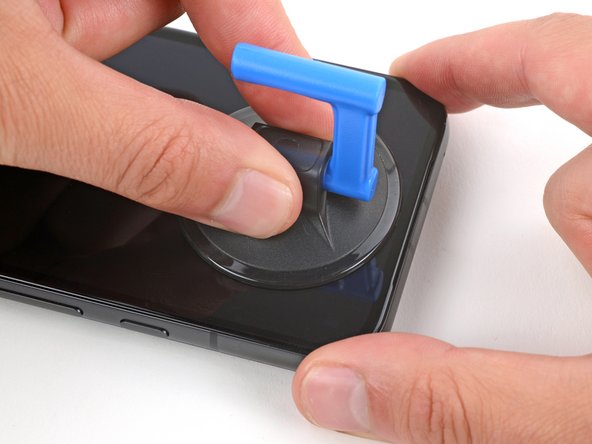
Applica un manico a ventosa al centro del bordo superiore dello schermo.
-
-
Attrezzo utilizzato in questo passaggio:Jimmy$7.95
-
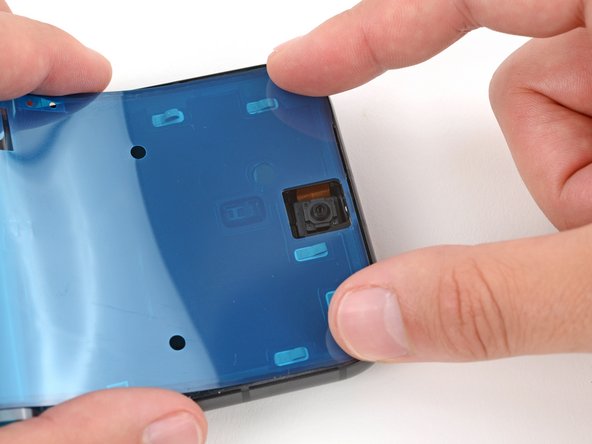
Inserisci la punta di un Jimmy nel lato sinistro dell'intaglio dell'altoparlante auricolare.
-
Tira verso l'alto la ventosa con molta forza costante.
-
Premi saldamente il Jimmy nell'intaglio e abbassalo finché la punta scorre sotto il vetro.
-
-
-
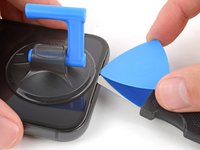
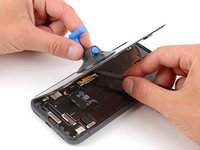
Fai scorrere il plettro avanti e indietro lungo il bordo superiore dello schermo per separare l'adesivo.
-
-
-
Continua a far scorrere il tuo plettro intorno il perimetro del telefono per separare l'adesivo rimasto.
-
-
-
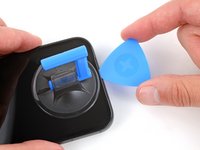
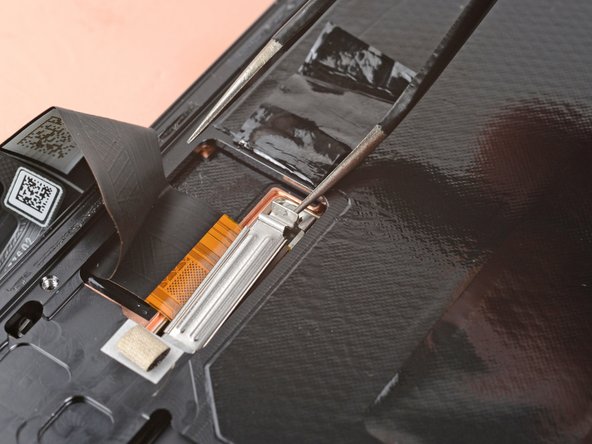
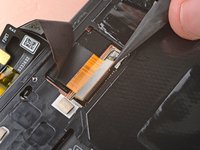
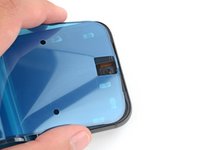
Allontana il lembo di pellicola di grafite dal connettore dello schermo.
-
-
-
-
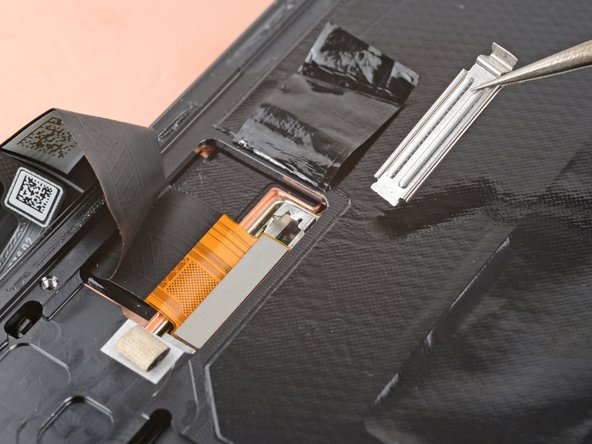
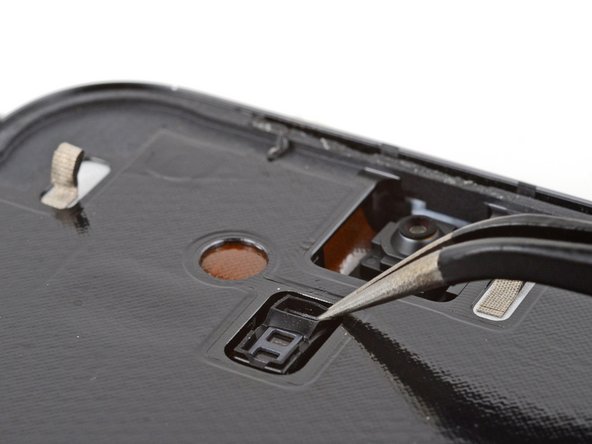
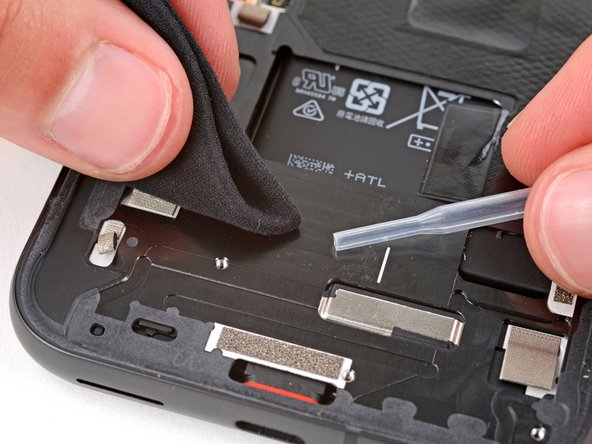
Usa delle pinzette e uno spudger per grattare via e rimuovere tutti i pezzi rimanenti di adesivo sotto la finestrella della batteria.
-
-
Attrezzo utilizzato in questo passaggio:Microfiber Cleaning Cloths$3.99
-
Usa una pipetta o una siringa per applicare qualche goccia di alcool isopropilico ad alta concentrazione (oltre il 90%) al perimetro del telaio e sull'area sotto la finestrella della batteria.
-
Puliscine i residui con un panno senza lanugine o in microfibra.
-
-
-
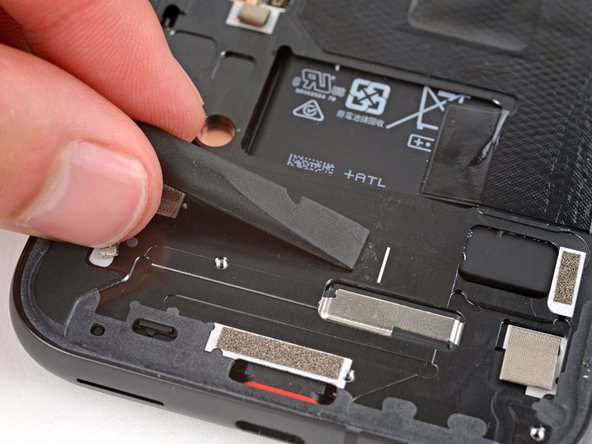
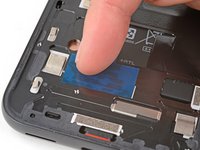
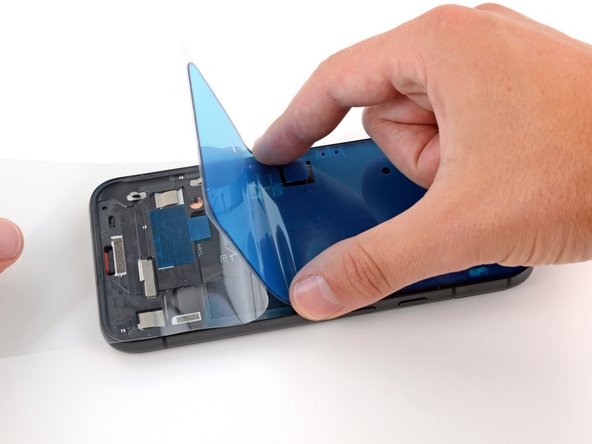
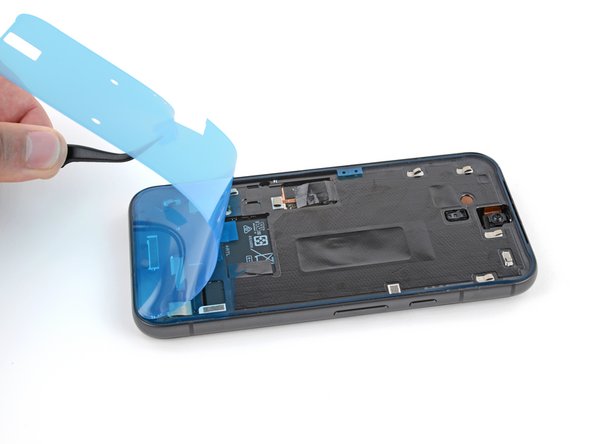
Rimuovi il pezzo di adesivo rettangolare dalla sua pellicola protettiva più grande.
-
Applica l'adesivo al telaio nella stessa posizione del vecchio adesivo, appena sotto l'intaglio della batteria.
-
Usa le dita per premere verso il basso e fissare l'adesivo al telaio. non rimuovere ancora la pellicola superiore.
-
-
-
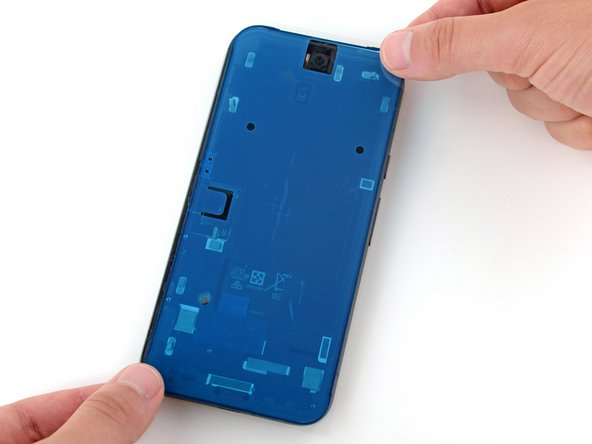
Prima di rimuovere le pellicole dall'adesivo dello schermo, tienilo sopra al telaio per accertarti sia orientato correttamente. Usa l'intaglio della fotocamera sul bordo superiore per allinearlo correttamente.
It's probably just me, but the large blue sheet looks very similar to other blue protective sheets covering the adhesive. I think it should be stated earlier that it is only the black edge which is the adhesive.
Or remove these steps into a link and make the newer screens with adhesive the main instruction
-
-
-
Applica un manico a ventosa sul lato sinistro dello schermo sostitutivo, con il manico rivolto verso sinistra.
-
Solleva lo schermo sul bordo sinistro del telaio.
-
-
-
Collega il cavo dello schermo allineandolo sopra la presa e premendo su un lato finché non scatta in posizione prima di premerlo giù completamente.
-
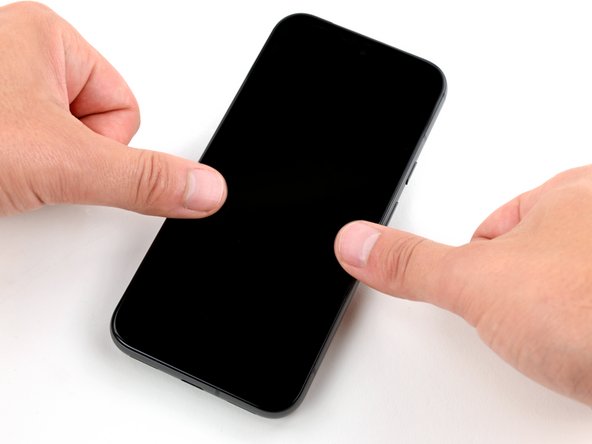
Questo è un buon momento per provare il telefono prima di richiuderlo. Accendilo e controlla che funzioni. Spegnilo di nuovo prima di continuare il rimontaggio.
It really should be stressed here to be extremely careful!
There is almost no feedback through your fingers or tools whether the cable is in the correct position before pressing down.
100% this was the hardest/nerve-wracking part of the job
-
-
-
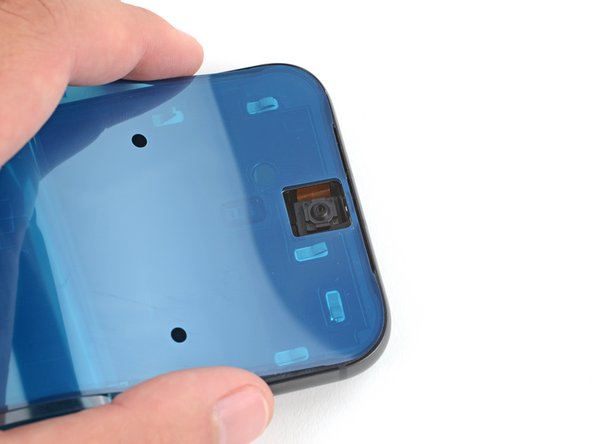
Rimuovi tutte le pellicole dall'alloggiamento della fotocamera interna sulla parte superiore dello schermo.
-
-
-
Tieni lo schermo appena sopra il telaio con il manico a ventosa.
-
Usa uno spudger per piegare la linguetta di grafite sul cavo dello schermo.
-
Premi lo schermo in posizione.
-


Per calibrare il lettore delle impronte dello schermo, usa lo strumento di aggiornamento e riparazione software di Pixel di Google.
Porta i tuoi rifiuti elettronici a un riciclatore certificato R2 o e-Stewards.
Per eseguire un test diagnostico con lo strumento di Diagnostica Pixel integrato, clicca qui.
Qualcosa è andato storto? Prova delle soluzioni ai problemi di base, o chiedi aiuto alla nostra comunità Risposte Google Pixel 8a.
Annulla: non ho completato questa guida.
Altre 26 persone hanno completato questa guida.
Un ringraziamento speciale a questi traduttori:
97%


Questi traduttori ci stanno aiutando ad aggiustare il mondo! Vuoi partecipare?
Inizia a tradurre ›


13 Commenti
so where is the replacement screens??
You can purchase a new screen from iFixit here.
I think my screen was defective. It shows the boot up animation extremely yellowed out and dim/dark. Then it shows my lockscreen with the time for less than a second and goes complete black. I can still make my phone vibrate with the buttons, and do a reset to get the boot up animation again. It's just so frustrating because I really needed this to work and did so much of the hard work to get to the final steps, to find out... that the replacement screen is defective!!!!
Hi John. I'm sorry to hear you're having issues with the replacement screen—that's very frustrating after taking the time to do the repair. My first thought is that the screen connector may not be fully seated (this connector in particular can be quite tricky to reconnect). If that's not the case, you can contact our customer support (support@ifixit.com) about a defective screen.
I've contacted support and they have yet to get back to me. I will be initiating a return. I don't think I would have attempted this repair again, taking the screen off was far far more difficult than it's worth. I'd take it to a repair shop.
John -
Excellent support and great company. I had a problem with the fingerprint sensor, which after starting it up indicated that it was faulty. I requested a replacement and everything went great. Thanks!
You should add the part to recalibrate the fingerprint (pixelrepair.withgoogle.com/udfps) in your tutorial.
Thank you so much! As a first time screen repairer, it wasn't clear to me how deep I should insert the jimmy in the earpiece cutout. The screen assembly is much thinner than I imagined. Also, the screen was badly cracked so removal was overall messy. In the end I figured it out and after that it was all smooth sailing, but some additional clarifying notes in that section might be useful :)
That's exactly what happened to me. I was super frustrated with their manual. to be honest, i'm not sure I'd choose this option again.
Did this as my first screen repair. Thanks heaps Spencer.
The only feedback I would suggest for this manual is how to handle massively cracked edges. Non cracked edges separated easily, but the blue pick looses its way when it gets to the cracked edges - I had a few - and for my first screen repair I was stuck.
I did end up applying some heat, and using the tweezers to carefully pry the screen away from the phone by grabbing the backing of the screen where it was stable. This worked. Most of the glass complied with the tweezers/heat method. The left over glass stuck to the frame was easy to remove with the spudger. Please let me know if there was a better way to do this.
The pixel 8a I have cost me $679 on special from JB-HifI. A local repairer quote me $700 - $800 to fix the screen - but I had to commit to a $99 diagnostic fee first.
Much much cheaper to fix it myself.
Thanks again!
Attempting this repair with the full ifixit kit has been a disaster. First off, the guide is not fit for purpose - if you have any cracks that run to the edge of the screen it is impossible to proceed past them with undoing the glue rim. Trying to just shatters the glass further. Also the suction cup is useless, does not adhere at all, even when using the tape as described. Now I have a completely broken phone screen that I cannot even use to recover the data (I should have backed up, but seemed like an easy enough repair for someone who has already had experience with these) and then I have an unused new screen i have no use for as I cannot repair this phone anymore. Urgh... 1/10 !!
Mein Bildschirm ist schwarz - das Smartphone reagiert jedoch. Wie kann ich es ausschalten wenn ich kein Bild nicht sehe?
Ulises - Replica