Salta al contenuto principale

Sostituzione schermo Google Pixel 8a

Inglese
Italiano

Traduzione in corso passo 10

Passo 10
Google Pixel 8a Screen Replacement: passo 0, immagine 1 di 3 Google Pixel 8a Screen Replacement: passo 0, immagine 2 di 3 Google Pixel 8a Screen Replacement: passo 0, immagine 3 di 3
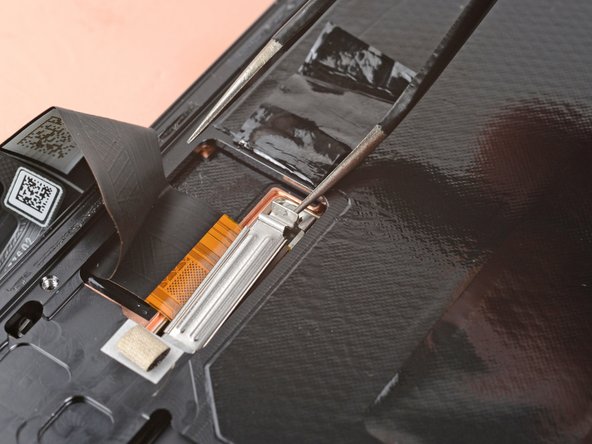
  • Hold one hand above the display bracket when prying it up, as the bracket can easily eject.

  • Use the tip of one arm of your angled tweezers to pry up the top edge of the display cable bracket from the center of the logic board.

  • Be very careful not to damage the board under the bracket's socket. Only insert your tweezers just enough to pry up the bracket.

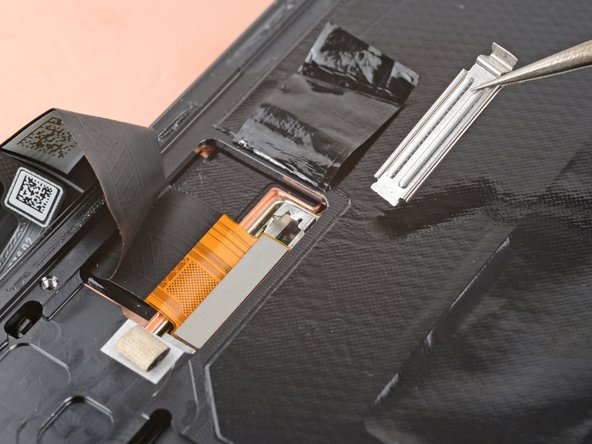
  • Remove the bracket.

Tieni una mano sopra la staffa dello schermo mentre la sollevi verso l'alto, poiché la staffa può facilmente saltare via.

Usa la punta di un braccio delle tue pinzette angolate per sollevare il bordo superiore della staffa del cavo dal centro della scheda logica.

Fai molta attenzione a non danneggiare la scheda sotto la presa della staffa. Inserisci solo le pinzette quanto basta per sollevare la staffa.

Rimuovi la staffa.

I tuoi contributi sono usati su licenza in base alla licenza open source Creative Commons.