
Come aprire il Logitech G502 Lightspeed

Introduzione
Vai al passo 1Segui questa guida per aprire un Logitech G502 Lightspeed.
Per aprire il mouse, è necessario rimuovere i piedini di gomma. Se pensi di riutilizzarli, dovrai scaldarli per ammorbidire l'adesivo e non piegarli durante la rimozione. I piedini piegati o strappati dovranno essere sostituiti.
Cosa ti serve
Kit di riparazione
Questo kit contiene tutti i ricambi e gli strumenti necessari per completare questa guida.

Ricambi

Strumenti


Mostra di più…
-
-
Prima di iniziare, sposta l'interruttore di accensione nella posizione OFF.
-
-
-
Scalda un iOpener e applicalo sui piedini del mouse per un minuto.
-
-
-
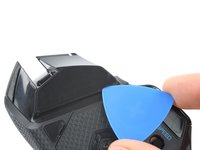
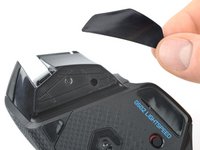
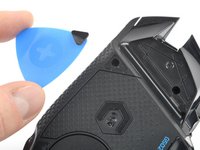
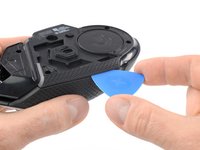
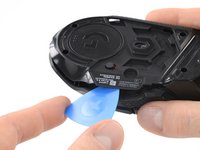
Inserisci la punta di un plettro di apertura sotto il piedino anteriore, nello spazio del suo incavo.
-
Quando possibile, afferra con le dita e tira lentamente per staccarlo completamente.
-
-
-
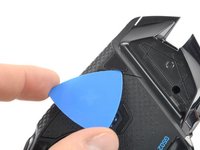
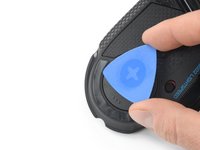
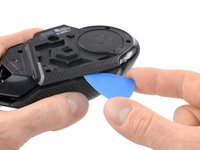
Inserisci la punta di un plettro di apertura sotto il piccolo piedino anteriore destro, nello spazio del suo incavo.
-
-
-
-
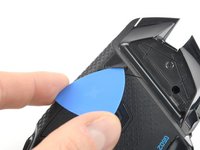
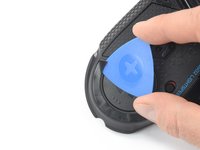
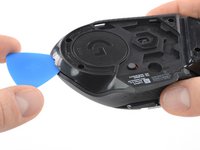
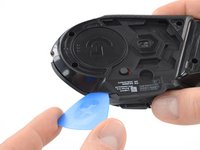
Inserisci la punta di un plettro di apertura sotto il piedino posteriore, partendo dallo spazio nel suo incavo.
-
Quando possibile, afferra con le dita e tira lentamente per staccarlo completamente.
-
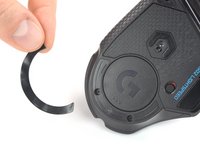
Usa uno spudger per grattar via con attenzione tutti i pezzi di adesivo rimasti.
-
Usa alcool isopropilico e un panno in microfibra per pulire accuratamente tutti i residui di adesivo dagli alloggiamenti dei piedini. Lascia che la superficie si asciughi completamente.
-
Rimuovi i piedini dalle loro pellicole dell'adesivo e premi saldamente in posizione.
-
-
-
Usa le dita per rimuovere i pesetti tirando verso il basso la parte inferiore del poggia-pollice.
-
-
-
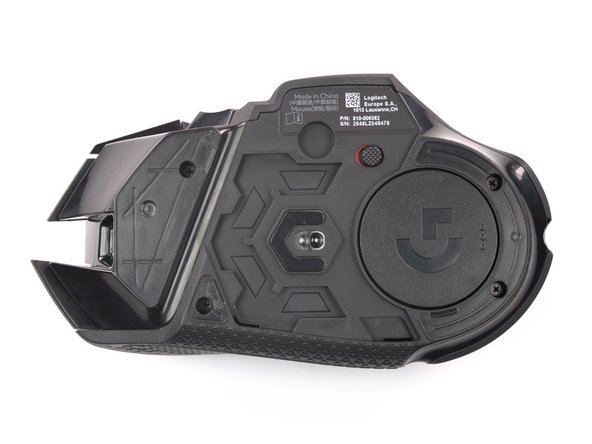
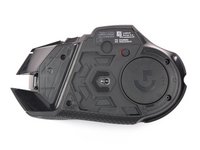
Rimuovi le quattro viti a croce Philips da 5,4 mm al di sotto del mouse.
-
-
-
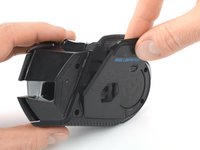
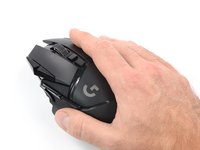
Inserisci un plettro d’apertura tra la parte inferiore e il guscio superiore iniziando dalla parte posteriore del mouse.
-
Fai scorrere il plettro d’apertura lungo la fessura tra le due metà verso il fianco esterno del mouse.
-
Ruota il plettro d’apertura per sganciare le clip che tengono insieme le due metà.
-
-
-
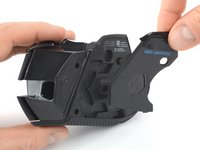
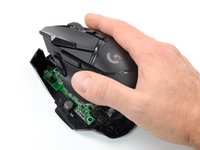
Inserisci di nuovo la punta del plettro tra la parte inferiore e il corpo superiore iniziando dalla parte posteriore.
-
Fai scorrere il plettro nello spazio fra le due metà verso la zona dove il pollice riposa in una normale presa del mouse.
-
Esegui una torsione del plettro per separare i ganci rimanenti.
-
-
-
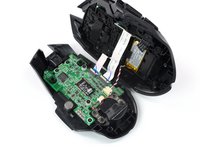
Capovolgi il mouse sulla sui suoi piedini (ormai rimossi) e rimuovi la parte superiore aprendola verso il lato destro.
-
-
-
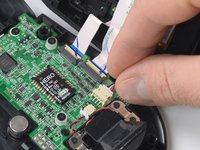
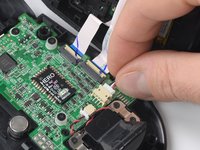
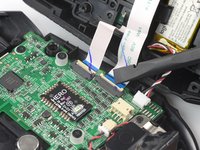
Mantieni il cavo della batteria vicino al connettore e con molta attenzione "accompagnalo fuori" tirandolo parallelamente alla scheda madre e facendo oscillare il connettore da un lato all'altro.
-
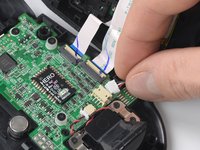
Puoi usare anche un paio di pinzette angolate per afferrare la testa del connettore e tirarla fuori dalla sua presa.
-
-
-
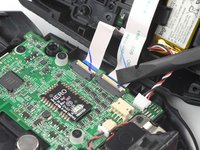
Usa uno spudger o un'unghia per sollevare aletta di blocco di entrambi i connettori ZIF per scollegare e liberare i cavi di interconnessione.
-


Per rimontare il dispositivo, segui i passaggi precedenti in ordine inverso. Applica nuovo adesivo dove necessario, dopo aver pulito le aree interessate con dell'alcool isopropilico (>90%).
Porta i tuoi rifiuti elettronici a un riciclatore certificato R2 o e-Stewards.
La riparazione non è andata secondo i piani? Prova delle soluzioni ai problemi di base, o chiedi alla nostra comunità Risposte per trovare aiuto.
Annulla: non ho completato questa guida.
Altre 23 persone hanno completato questa guida.
Un ringraziamento speciale a questi traduttori:
100%


Questi traduttori ci stanno aiutando ad aggiustare il mondo! Vuoi partecipare?
Inizia a tradurre ›

Team

Tobias Isakeit - Repairability Engineer Membro di Tobias Isakeit - Repairability Engineer
Business
1 Membro
1.132 Guide realizzate
12Commenti sulla guida
Needs top half disassembly for micro switch swap
Check my link at the bottom
This helped so much! I had the button to turn on infinite scroll for the scroll wheel stuck and this allowed me to get it most of the way taken apart so I could take the rest apart myself.
Well, we've got it half way apart... Now where's the second half of the guide? lol
comes in a paid dlc