
Google Pixel 8a Screen Replacement

Introduzione
Vai al passo 1This repair guide was authored by the iFixit staff and hasn’t been endorsed by Google. Learn more about our repair guides here.
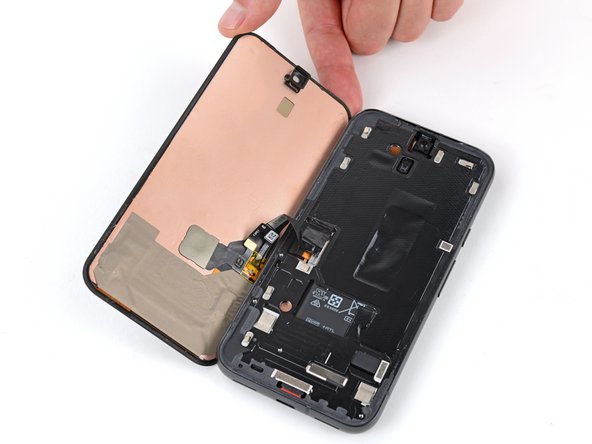
Follow this guide to replace a broken, cracked, or unresponsive screen on your Google Pixel 8a.
To calibrate the display’s fingerprint reader, follow this guide. Genuine Google replacement screens come with the fingerprint reader already attached. If your replacement screen doesn’t have a pre-installed fingerprint reader, you’ll need to transfer the original fingerprint reader to your new screen and recalibrate it to retain functionality.
You'll need replacement screen adhesives in order to complete this repair.
Note: Any repair can compromise the water resistance of your phone. Retaining water resistance after the repair will depend on how well you reapply the adhesive.
Cosa ti serve
Kit di riparazione
Questo kit contiene tutti i ricambi e gli strumenti necessari per completare questa guida.

Ricambi


Strumenti


Mostra di più…
-
-
Unplug all cables from your phone.
-
Completely power off your phone.
-
-
-
Apply overlapping strips of packing tape to the cracked glass until the whole screen is covered—this will allow the suction cup to stick to the screen.
-
Consider wearing safety glasses to protect your eyes from any glass shaken free during the repair.
-
-
-
Use a hair dryer, heat gun, or hot plate to heat the top edge of the screen until it's almost too hot to touch.
-
-
-
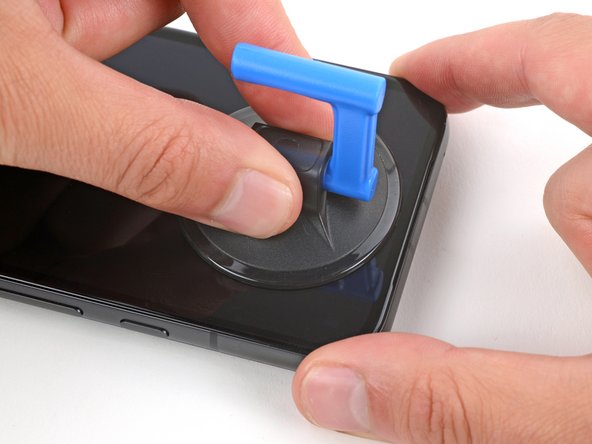
Apply a suction handle to the center of the top edge of the screen.
-
-
Attrezzo utilizzato in questo passaggio:Jimmy$7.95
-
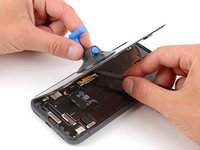
Insert the tip of a Jimmy into the left side of the earpiece speaker cutout.
-
Pull up on the suction handle with a strong, steady force.
-
Firmly press the Jimmy into the cutout and lower it until the tip slides under the glass.
-
-
-
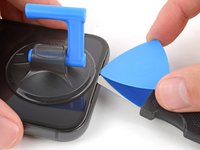
Slide your pick back and forth across the top edge of the screen to separate the adhesive.
-
-
-
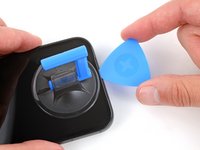
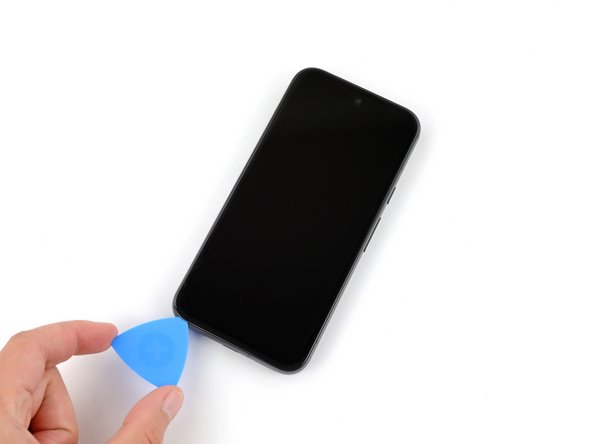
Continue sliding your pick around the perimeter of the phone to separate the remaining adhesive.
Könnt ihr am Plektrum abschnitte für die Millimeter direkt draufdrucken?
-
-
-
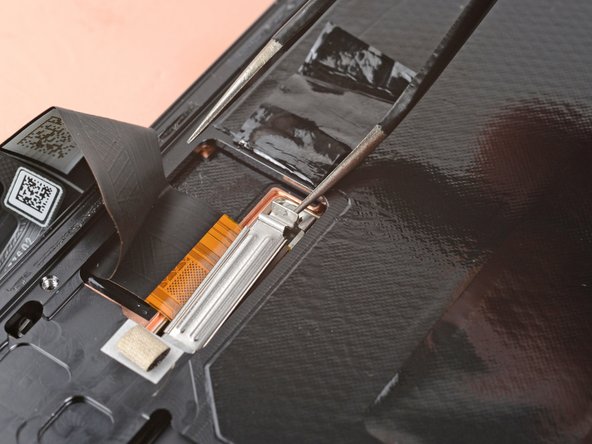
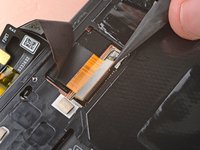
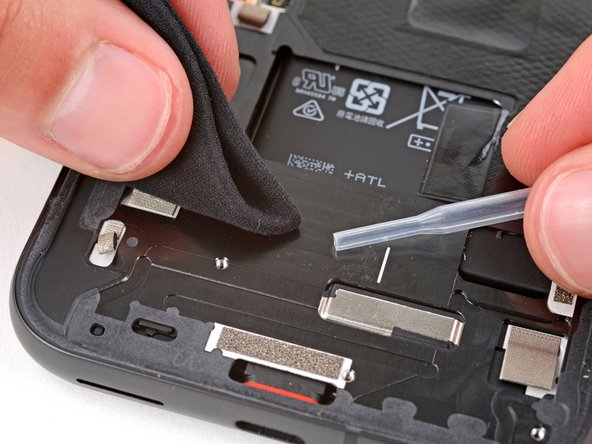
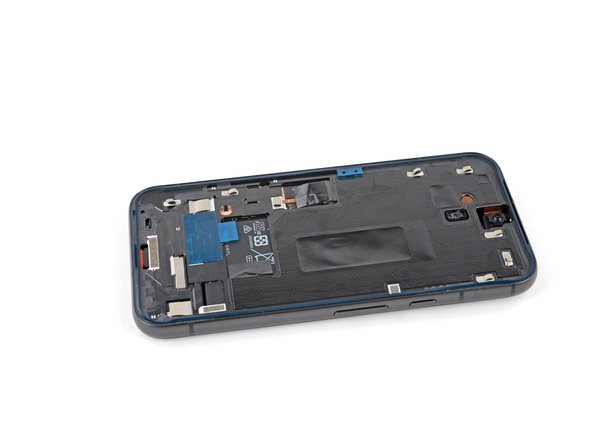
Move the flap of graphite film away from the screen connector.
-
-
-
-
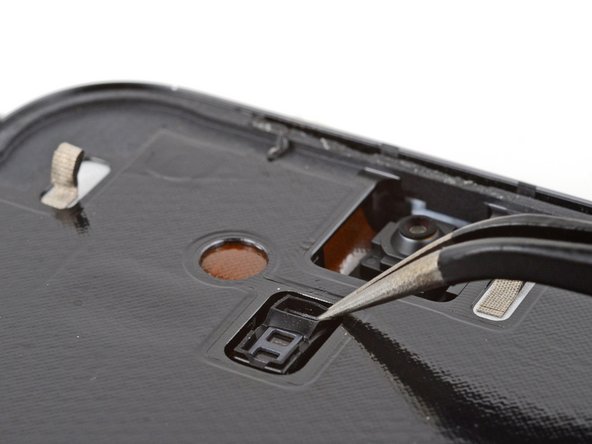
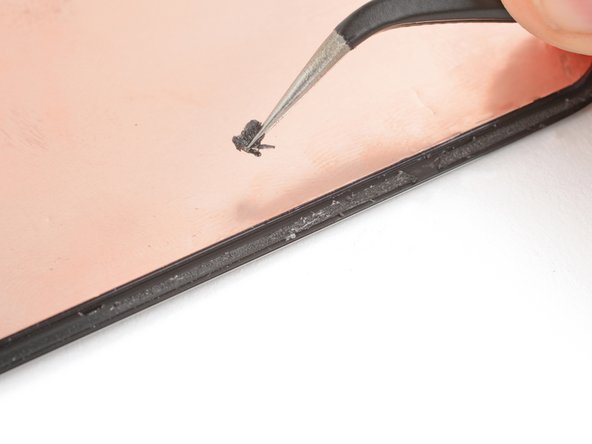
Use tweezers and a spudger to scrape up and remove any remaining pieces of adhesive below the battery cutout.
-
-
Attrezzo utilizzato in questo passaggio:Microfiber Cleaning Cloths$3.99
-
Use a pipette or syringe to apply a few drops of highly-concentrated isopropyl alcohol (over 90%) to the perimeter of the frame and the area below the battery cutout.
-
Wipe the residue away using a lint-free or microfiber cloth.
-
-
-
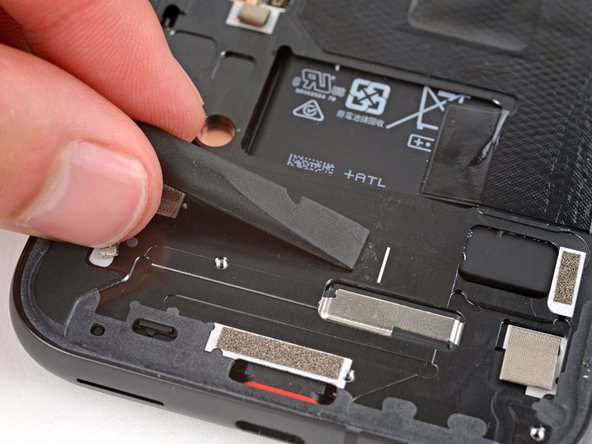
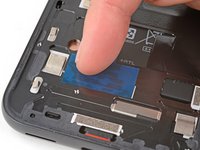
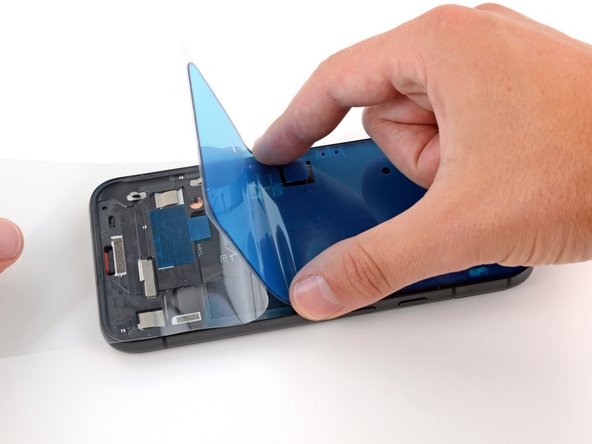
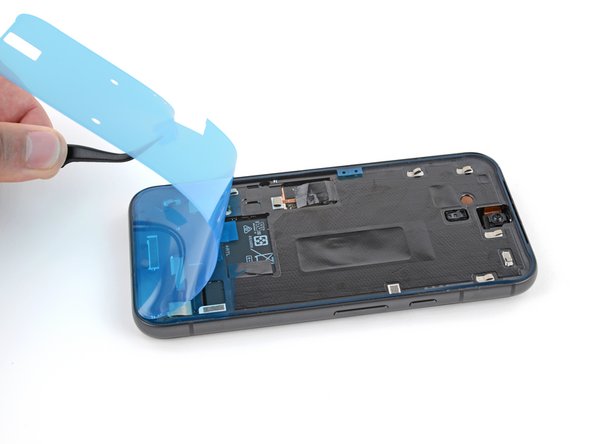
Peel the rectangular display enclosure adhesive from its large liner.
-
Apply the adhesive to the frame in the same location as the old adhesive, just below the battery cutout.
-
Use your fingers to press down and secure the adhesive to the frame—don't remove the top liner yet.
-
-
-
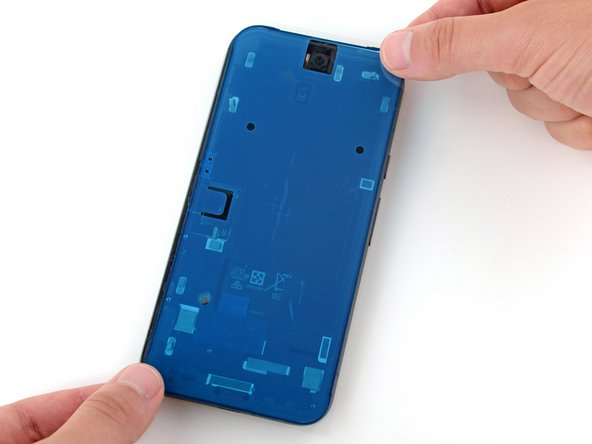
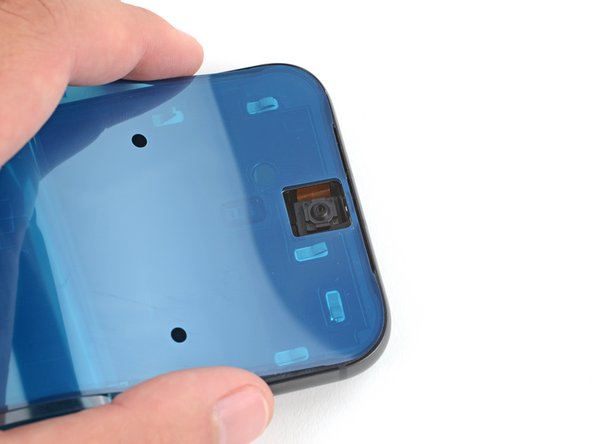
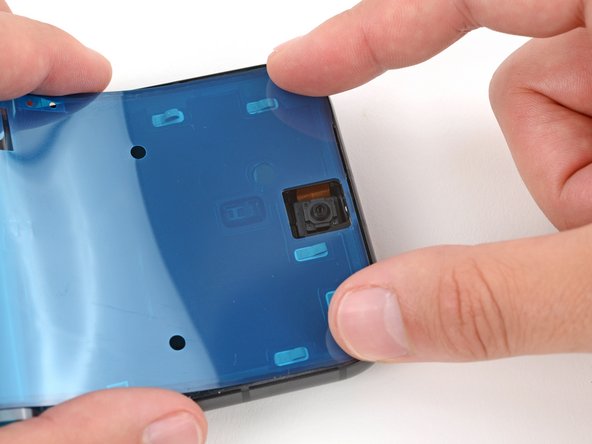
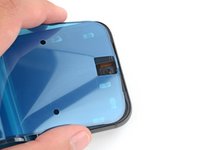
Before removing any liners from the screen adhesive, hold it over the frame to make sure it's oriented correctly. Use the camera cutout on the top edge to line it up correctly.
It's probably just me, but the large blue sheet looks very similar to other blue protective sheets covering the adhesive. I think it should be stated earlier that it is only the black edge which is the adhesive.
Or remove these steps into a link and make the newer screens with adhesive the main instruction
-
-
-
Apply a suction handle to the left side of the replacement screen, with the handle facing left.
-
Prop up your screen on the left side of the frame.
-
-
-
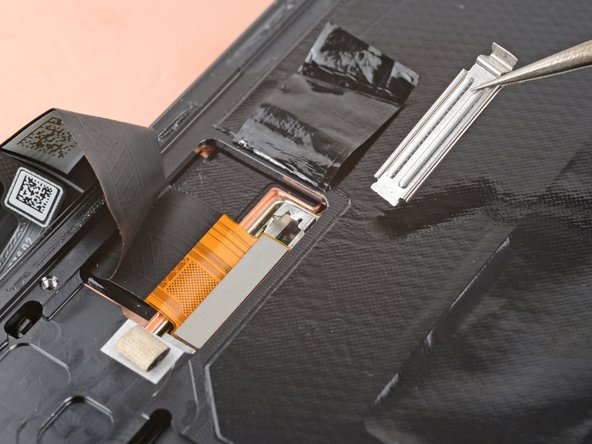
Connect the screen cable by aligning it over the socket and pressing on one side until it clicks into place before fully pressing it down.
-
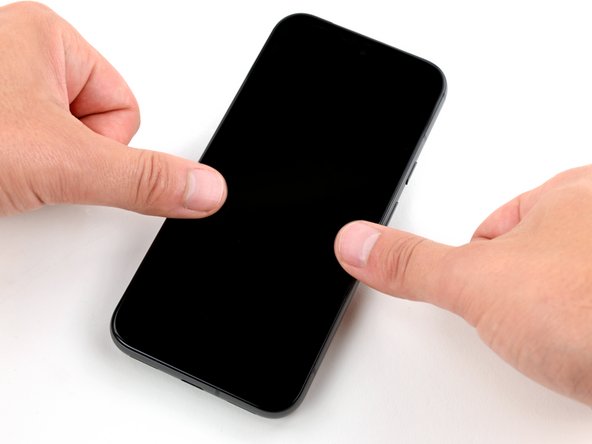
Now is a good time to test your phone before sealing it up. Power it on and check that it works. Power it back down before you continue reassembly.
It really should be stressed here to be extremely careful!
There is almost no feedback through your fingers or tools whether the cable is in the correct position before pressing down.
100% this was the hardest/nerve-wracking part of the job
-
-
-
Remove any liners from the front camera housing on the top edge of the screen.
-
-
-
Hold the screen just above the frame by the suction handle.
-
Use a spudger to fold the flap of graphite film back over the screen cable.
-
Press the screen into place.
-


To calibrate the display’s fingerprint reader, use Google’s Pixel Update and Software Repair tool.
Take your e-waste to an R2 or e-Stewards certified recycler.
To run a diagnostics test with the built-in Pixel Diagnostic tool, click here.
Repair didn’t go as planned? Try some basic troubleshooting, or ask our Answers community for help.
Annulla: non ho completato questa guida.
Altre 28 persone hanno completato questa guida.


15Commenti sulla guida
so where is the replacement screens??
You can purchase a new screen from iFixit here.
I think my screen was defective. It shows the boot up animation extremely yellowed out and dim/dark. Then it shows my lockscreen with the time for less than a second and goes complete black. I can still make my phone vibrate with the buttons, and do a reset to get the boot up animation again. It's just so frustrating because I really needed this to work and did so much of the hard work to get to the final steps, to find out... that the replacement screen is defective!!!!
Hi John. I'm sorry to hear you're having issues with the replacement screen—that's very frustrating after taking the time to do the repair. My first thought is that the screen connector may not be fully seated (this connector in particular can be quite tricky to reconnect). If that's not the case, you can contact our customer support (support@ifixit.com) about a defective screen.
I've contacted support and they have yet to get back to me. I will be initiating a return. I don't think I would have attempted this repair again, taking the screen off was far far more difficult than it's worth. I'd take it to a repair shop.
John -
Excellent support and great company. I had a problem with the fingerprint sensor, which after starting it up indicated that it was faulty. I requested a replacement and everything went great. Thanks!
You should add the part to recalibrate the fingerprint (pixelrepair.withgoogle.com/udfps) in your tutorial.
Thank you so much! As a first time screen repairer, it wasn't clear to me how deep I should insert the jimmy in the earpiece cutout. The screen assembly is much thinner than I imagined. Also, the screen was badly cracked so removal was overall messy. In the end I figured it out and after that it was all smooth sailing, but some additional clarifying notes in that section might be useful :)
That's exactly what happened to me. I was super frustrated with their manual. to be honest, i'm not sure I'd choose this option again.
Did this as my first screen repair. Thanks heaps Spencer.
The only feedback I would suggest for this manual is how to handle massively cracked edges. Non cracked edges separated easily, but the blue pick looses its way when it gets to the cracked edges - I had a few - and for my first screen repair I was stuck.
I did end up applying some heat, and using the tweezers to carefully pry the screen away from the phone by grabbing the backing of the screen where it was stable. This worked. Most of the glass complied with the tweezers/heat method. The left over glass stuck to the frame was easy to remove with the spudger. Please let me know if there was a better way to do this.
The pixel 8a I have cost me $679 on special from JB-HifI. A local repairer quote me $700 - $800 to fix the screen - but I had to commit to a $99 diagnostic fee first.
Much much cheaper to fix it myself.
Thanks again!
Attempting this repair with the full ifixit kit has been a disaster. First off, the guide is not fit for purpose - if you have any cracks that run to the edge of the screen it is impossible to proceed past them with undoing the glue rim. Trying to just shatters the glass further. Also the suction cup is useless, does not adhere at all, even when using the tape as described. Now I have a completely broken phone screen that I cannot even use to recover the data (I should have backed up, but seemed like an easy enough repair for someone who has already had experience with these) and then I have an unused new screen i have no use for as I cannot repair this phone anymore. Urgh... 1/10 !!
Vielen Dank - Der Displaytausch hat perfekt funktioniert.
Die Werkzeuge im Set sind super und nichts fehlt. Selbst als Neuling hat in knapp zwei Stunden alles funktioniert.
ABER VORSICHT: Das Google update und repair tool hat einen schwerwiegenden Fehler. Die Software arbeitet nicht mit der aktuellsten Androidversion zusammen. Das wäre nicht so schlimm, wenn man im Fast-Modus nicht in einer Boot-Schleife landen würde!
Nach einer verzweifelten Stunde mit dutzenden Fehlversuchen habe ich aufgegeben. Das war mein Glück. Nach einer halben Stunde Inaktivität beendet sich der Fastmodus selber.....
Mein Bildschirm ist schwarz - das Smartphone reagiert jedoch. Wie kann ich es ausschalten wenn ich kein Bild nicht sehe?
Ulises - Replica