
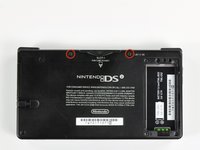
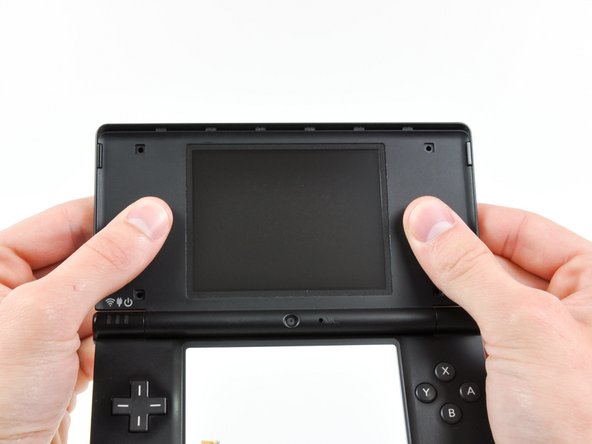
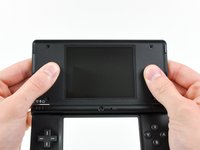
LCD superiore/altoparlanti Nintendo DSi

Introduzione
Vai al passo 1Questa guida ti aiuterà nella sostituzione dell'LCD superiore del tuo DSi.
Cosa ti serve
Ricambi


Strumenti


Mostra di più…
-
-
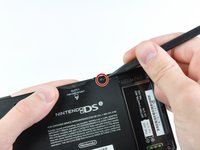
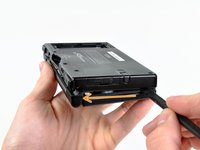
Svita le due viti a croce Philips che fissano il copribatteria al case inferiore.
-
Prendi il copribatteria e sollevalo dal case inferiore.
-
-
-
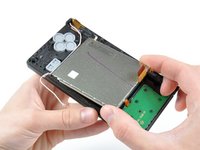
Usando uno spudger (o un'unghia), solleva la batteria dalla parte superiore.
-
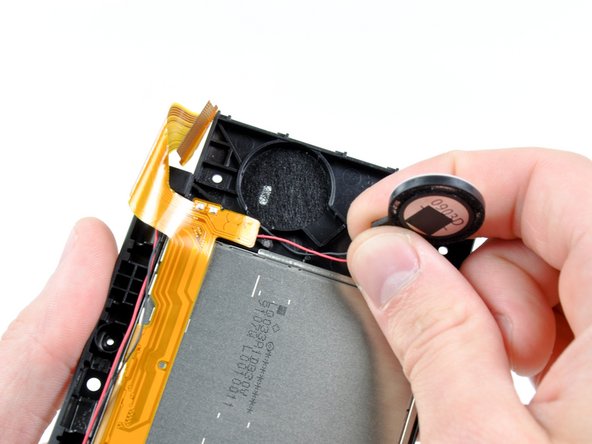
Prendi la batteria e rimuovila dal DSi.
-
-
-
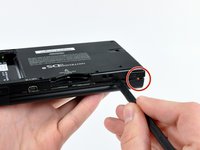
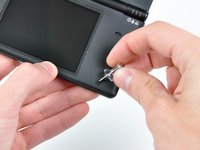
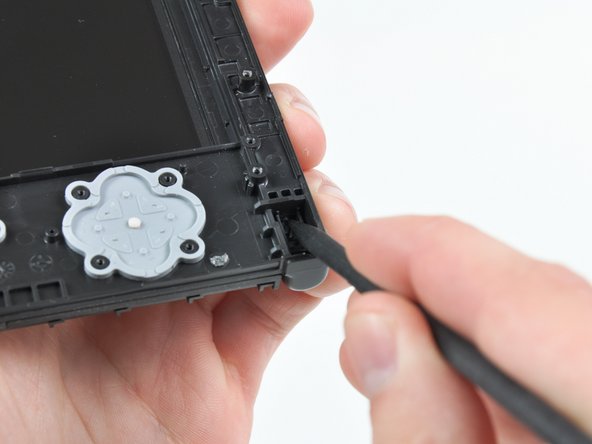
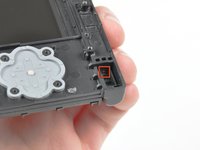
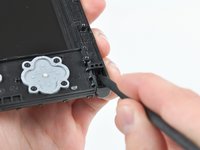
Ci sono due viti nascoste sotto i due gommini cerchiati in rosso.
-
Usa la punta dello spudger per estrarre i due gommini dal case inferiore.
One of the feet did break on me, tweezers came in handy for picking it out
I unfolded and sharpened a paperclip. You can use that to stab and hook the rubber without tearing it, as the rubber is thick enough to reseal when reinserted.
-
-
-
Rimuovi le viti cerchiate che fissano il case inferiore al resto del DSi:
-
Sei viti a croce Phillips #00 da 5,2 mm
-
Una vite a croce Phillips #00 da 2,7 mm
Impossible d'enlever les vises… trop serré! comment faire?
i can't get the screw by the gamecard slot out, PH#00 is too small and PH#0 is too big
same problem here. maybe try a JIS?
-
-
-
Inserisci lo spudger tra il case inferiore e il pannello inferiore vicino all'angolo in alto a destra del DSi.
-
Passa delicatamente lo spudger lungo il margine del case esterno, creando uno spazio tra il case e il dispositivo.
-
Continua a passare lo spudger intorno al dispositivo fino a separare il case inferiore quasi del tutto.
-
-
-
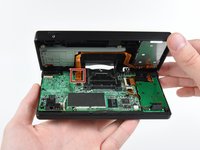
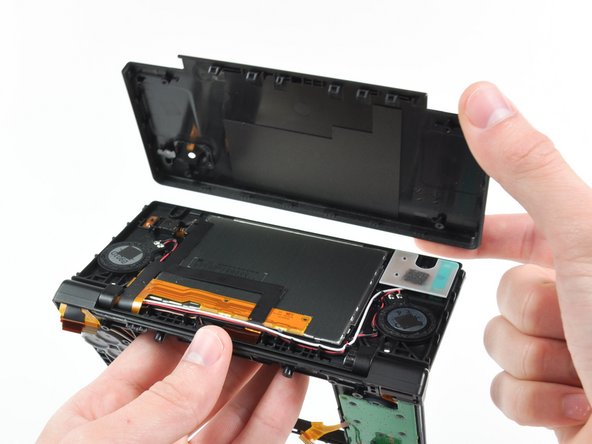
Solleva delicatamente il case dal bordo inferiore.
-
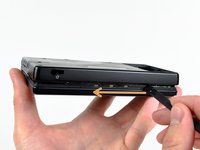
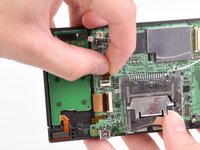
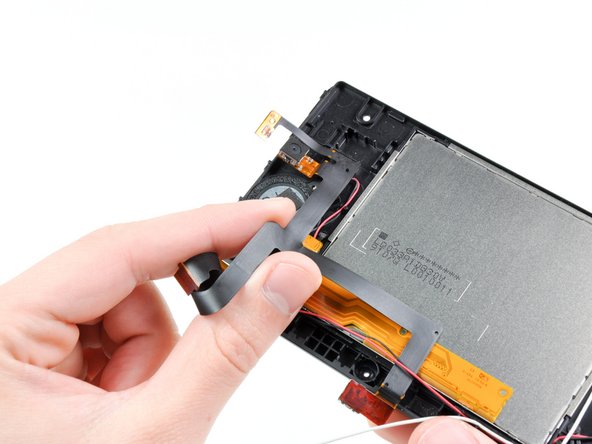
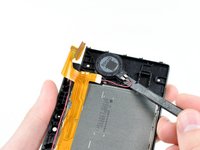
Usa uno spudger per sollevare il cavo del volume e della scheda SD dalla sua presa sulla scheda madre.
-
Una volta che il cavo è stato rimosso del tutto puoi rimuovere il case estero.
Any help removing the ribbon cable, I have absolutely no clue how to remove this.
-
-
-
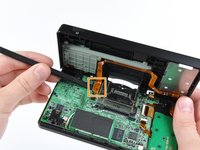
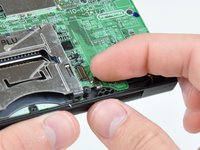
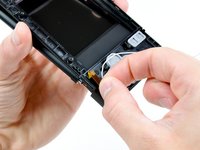
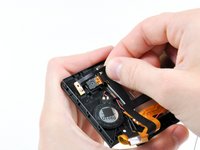
Stacca la scheda del Wi-Fi dalla scheda madre prendendola dal bordo più vicino al jack cuffie.
-
-
-
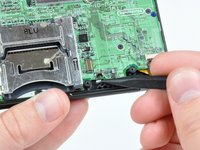
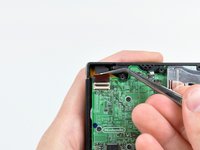
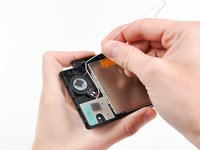
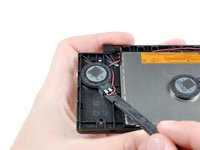
Usa la punta di uno spudger per staccare il connettore della scheda di alimentazione dal suo posto sulla scheda madre.
do not pry up! pull to one side so you don't disconnect the clip from the motherboard!
Actually Lisa, you are incorrect. If you pull to one side you WILL end up pulling the connector off the motherboard. It is designed so that you ARE MEANT TO pry it upwards out of the connector. All you need to do is use the point or corner of the flat edge of a spudger (or a small flat-headed screwdriver), push it ever so slightly under the middle of the small white plug where there is a small recess in the connector for just this purpose. Prying the plug up in this fashion you should clear the connector with the spudger by prying it up through the recess rather than catching the connector and pulling it off the board.
If the socket comes off the motherboard along with the connector, what’s the best way to fix it?
it has to be soldered back on, so if you can't do it yourself, find someone who can (maybe a local repair shop).
I already pull it off from board new i have to learn how to weld it back
-
-
-
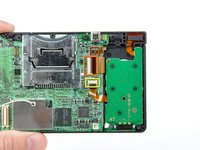
Usa l'unghia o il bordo di uno strumento di apertura in plastica per sollevare la linguetta di fissaggio sulle seguenti tre prese ZIF:
-
Cavo touchscreen inferiore
-
Cavo LCD inferiore
-
Cavo scheda di alimentazione
-
Dopo aver sollevato le linguette di bloccaggio su tutti e tre i socket, usa le dita o un paio di pinzette per estrarre delicatamente i cavi dai rispettivi socket.
I accidentally broke the retaining flap off of the lower touchscreen’s socket. Is it possible to reattach it?
Mine broke off too. At first I thought it would just pop back in, but when I looked at it under magnification, I can see that a tiny piece of plastic actually snapped off the flap. I think we're farked. Looks like the only way to fix would be to solder on a new cable connector.
-
-
-
Usa l'unghia o il bordo di uno strumento di apertura in plastica per sollevare con attenzione lo sportello di fissaggio del cavo a nastro del touchscreen.
-
Usa la punta di uno spudger per estrarre il cavo a nastro del touchscreen direttamente dalla sua presa.
When I was putting mine back together, the flap popped off and when I tried to put it on with a tweezers, it snapped. Any suggestions other than scrap it or use it without the touchscreen? Pictures at https://sites.google.com/site/memesbyluc...
This little flap is a pain in the butt to get back in! If there is any way to bypass the removal of this, my advise is to do it!
Adding on: The cable actually ended up breaking as the tweezers I used to put it back in scraped part of the gold ribbon off. Be extremely careful!!!
-
-
-
-
Usa l'unghia o il bordo di uno strumento di apertura in plastica per sollevare con attenzione lo sportello di fissaggio del cavo a nastro della doppia fotocamera.
-
Usa la punta di uno spudger per estrarre il cavo a nastro della doppia fotocamera direttamente dalla sua presa.
-
-
-
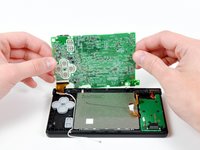
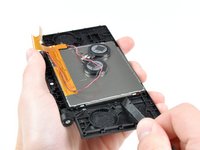
Solleva leggermente la scheda madre verso l'alto per rivelare il cavo a nastro LCD superiore sopra i pulsanti ABXY.
-
Usa l'unghia o il bordo di uno strumento di apertura in plastica per sollevare con cautela l'aletta di fissaggio del cavo a nastro LCD superiore.
-
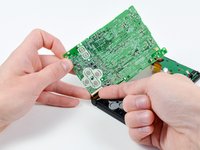
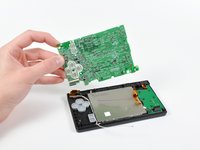
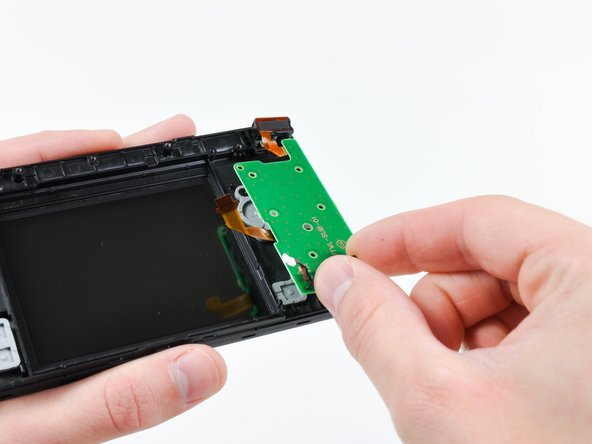
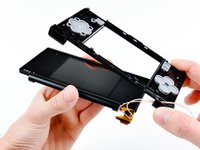
Rimuovi la scheda madre del DSi.
I actually chose to leave this ribbon cable connected, and had no issues completing the rest of the steps around this. Just be careful not to pull the cable!
-
-
-
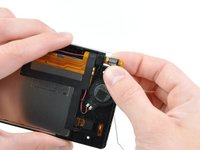
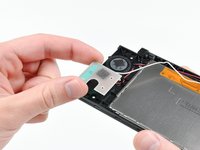
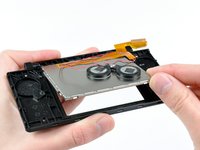
Usa la punta di uno spudger per sollevare il supporto metallico del display LCD inferiore dal telaio del DSi.
-
Solleva il pannello LCD inferiore dal DSi.
-
-
-
Usa una puntina per rimuovere le quattro coperture delle viti in plastica sulla lunetta anteriore.
-
-
-
Continua a far passare i cavi del microfono e dell'antenna Wi-Fi attraverso l'apertura situata nella parte inferiore della struttura del DSi.
-
-
-
Avvolgi strettamente i cavi a nastro del display e della doppia fotocamera quanto basta per spingerli attraverso il tubo in acciaio della cerniera.
-
Rimuovi il tubo in acciaio della cerniera.
-
Spingi con attenzione entrambi i cavi a nastro avvolti attraverso il tubo stampato nel pannello superiore anteriore.
When reversing this after putting the new screen in, the larger of these two ribbon cables will be built into the new screen.
I found it easiest to spend some time coiling the new ribbon cable from the middle up to the end, similar to how the old screen’s ribbon cable is coiled.
This makes moving it back through the molded tube in the housing and then slipping the steel hinge tube a lot easier.
Surprisingly, these cables are pretty sturdy - I’ve kinked one or two and it still functions, however I’d still say take it slow and try to avoid anything like that.
-
-
Attrezzo utilizzato in questo passaggio:Tweezers$4.99
-
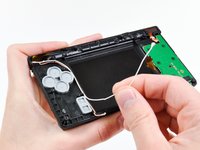
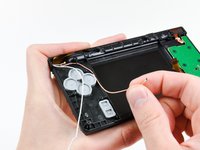
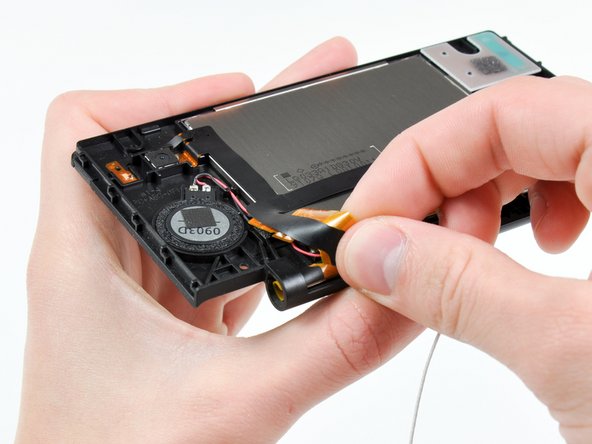
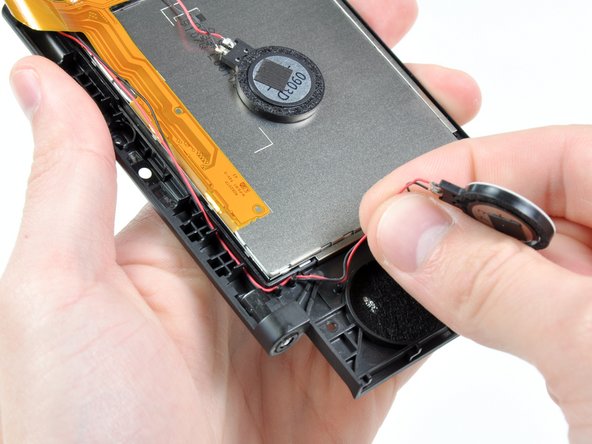
Dissalda gli altoparlanti dal display LCD superiore riscaldando i giunti di saldatura con un saldatore e contemporaneamente usando un paio di pinzette per staccare i fili degli altoparlanti dalla scheda logica.
On step 10: I accidentally pried up the "Power Board Cable." (Be sure you are prying up on the hinged retaining flaps, not the sockets themselves.) Is there an easy way to make it reconnect? I can't get it to stay back on mother board. I've attempting to get my DSI repaired, but many local stores and including manufacture Nintendo aren't offering assistance so I figured I'd fix it myself. Please assist if you can.
-


Per rimontare il dispositivo segui le seguenti istruzioni in ordine inverso.
Per rimontare il dispositivo segui le seguenti istruzioni in ordine inverso.
Annulla: non ho completato questa guida.
Altre 33 persone hanno completato questa guida.
Un ringraziamento speciale a questi traduttori:
100%

Questi traduttori ci stanno aiutando ad aggiustare il mondo! Vuoi partecipare?
Inizia a tradurre ›

14Commenti sulla guida
The tricky part is getting the upper screen and black ribbon through the hinge. I found that curling them and pushing them through a drinking straw that was cut short first and then pushing the straw through the hinge hole made it a whole lot easier.
So true. I just broke my second ribbon cable while replacing the case. While most repairs on the dsi are relatively easy, this ribbon cable makes any repairs that involve it a nightmare.
I curled the larger (new) cable the same way the smaller one was already curled. Just spend some time doing that until it was shaped that way and it was a lot easier to get both through the molded tube and ring.
Tplan -
While doing this I accident messed something up. When I power on the DSi, the bottom screen just flashes and the DS turns off. What did I do wrong?
I think you broke the ribbon cable, it also happened to me, sadly the ribbon cable is soldered into the top screen so you need to buy a new top screen
make sure you plugged in the screen correctly, it's a bit fiddly because of how there's another cable overlaid on top of it, but both need to be properly seated otherwise you won't get a boot
Hey guys, i have two problems....
I have ordered a replacement housing for my daughter, so i hat to completely and fully disassemble everything.
Now I put it back together and first off, i have two strange square washer left AND, the upper screen turns on fine, the lower too.. but after 1 second, the upper screen gets all strange... colors are wrong.. I close the Lid, open it up and again, 1 second perfect, after that it turns discolored...
Any idea where the two washer could come from as i cant find them in the Description here and also what could be wrong with the display now?
Why do you need to disassemble your DSi on the bottom? Why is that important on every DS/3DS console? I would never do something with "Very difficult" tasks.
Great guide.
it was hard, i ripped the broken lcd flat cable and it was hard to put the new one through the hinge, but i did it.
Then, when putting everything back together, i broke the sd card flat cable, %#*@ you manufacturer.. why such a flimsy cable with strong glue to the case?
be careful, the sd card connector is hard to reconnect and when you try to release it from the case, it may break
"Just do it backwards" is NOT helpful reassembly instructions because the hinge doesn't work that way. To "do it backwards" would be somehow sucking it in via the area above the dpad which is physically impossible. In order to reinsert the hinge, you need to get all the ribbon cables threaded through and the wires on the other side, before putting the top front plate back on, then slide the hinge piece into the top inner shell from the outside until it is flush with the hole it goes into. Then line back up the bottom inner plate, and push it "out" towards the place the LEDs will be, from the gap below the top LCD. I had to look up a separate video of someone doing this, and I'm afraid that in trying to figure it out myself using this guide I might have deformed the hinge somehow because I cannot for the life of me get it to go back where it needs to go.
Your last comment is what I am literally struggling with right now. I cannot get the hinge to go back where it needs to go.
This is a terrible guide that is guaranteed to break your top screen ribbon cable if you follow it. The cable will not go through the slot as easy as they'd imply based on the positioning they suggest and curling it and pushing it through the hinge will absolutely break it if you didn't break it following that prior step.
A smarter way to do this would have been to remove the LCD screen and other attachments first and then gently curl the cable and pull it through. Would have resulted in far less force on the cable and far less risk of breakage.
Beyond that, this guide isn't even finished as it's missing the entire remaining half of how to actually put in a new screen. I'm noting a trend of that on all of the DSi guides.
Really abysmal work here. Really shocked that this is an official guide, I thought you guys were better than this.
I've never replaced a screen like this before and I got it done just fine following the guide. Sounds like a you problem.