Salta al contenuto principale
Unisciti alla Community delle riparazioni - Crea un account
Asus ROG Ally SSD Replacement

Asus ROG Ally SSD Replacement

Spencer Day

Spencer Day e 2 altri collaboratori

Ultimo aggiornamento il 24 apr 2025

20 - 30 minuti
Moderato
Guida In Evidenza

Introduzione

Vai al passo 1

Follow this guide to replace or upgrade the M.2 2230 SSD in your Asus ROG Ally.

The ROG Ally has an M.2 2230 NVMe PCIe 4.0 port. The included SSD is 256GB or 512GB, but the Ally supports up to 2TB.

This guide only describes how to physically remove and replace your SSD. You'll need to use Asus Cloud Recovery to set up your new SSD and get your device working again, which requires an internet connection.

If the SSD you're installing has previously been used and still has data on it, back up the data before installing the SSD. The formatting process during setup will fully erase the drive.

Cosa ti serve

Kit di riparazione

Questo kit contiene tutti i ricambi e gli strumenti necessari per completare questa guida.

Ricambi

Strumenti

Mostra di più…

  1. Asus ROG Ally SSD Replacement, Prepare your device for disassembly: passo 1, immagine 1 di 3 Asus ROG Ally SSD Replacement, Prepare your device for disassembly: passo 1, immagine 2 di 3 Asus ROG Ally SSD Replacement, Prepare your device for disassembly: passo 1, immagine 3 di 3
    • Let your device's battery drain below 25% before starting this repair—a charged lithium‑ion battery may catch fire if damaged.

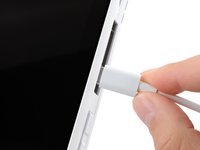
    • Completely power off your device and unplug all cables.

    • Consider laying your device on a soft cloth to prevent scratching or damaging the screen during your repair.

  2. Asus ROG Ally SSD Replacement, Unfasten the back cover: passo 2, immagine 1 di 2 Asus ROG Ally SSD Replacement, Unfasten the back cover: passo 2, immagine 2 di 2
    Attrezzo utilizzato in questo passaggio:
    FixMat
    $36.95
    • Throughout this repair, keep track of each screw and make sure it goes back exactly where it came from.

    • Use a Phillips #0 screwdriver to remove the five 17.2 mm‑long screws securing the top edge and bottom corners of the back cover.

    • Use a Phillips #0 screwdriver to fully loosen the remaining captive screw at the center of the bottom edge. This should create a small gap between the back cover and chassis.

    • Don't try to remove this screw.

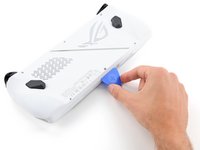
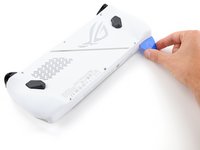
  3. Asus ROG Ally SSD Replacement, Insert an opening pick: passo 3, immagine 1 di 3 Asus ROG Ally SSD Replacement, Insert an opening pick: passo 3, immagine 2 di 3 Asus ROG Ally SSD Replacement, Insert an opening pick: passo 3, immagine 3 di 3
    • Insert the flat edge of an opening pick between the bottom edge of the back cover and chassis, near the captive screw.

    • Angle the pick upward and push it under the back cover.

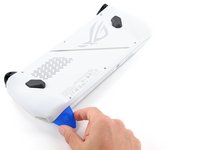
  4. Asus ROG Ally SSD Replacement, Release the back cover's clips: passo 4, immagine 1 di 3 Asus ROG Ally SSD Replacement, Release the back cover's clips: passo 4, immagine 2 di 3 Asus ROG Ally SSD Replacement, Release the back cover's clips: passo 4, immagine 3 di 3
    • Plastic clips secure the perimeter of the back cover. You should feel and hear them release during this step.

    • Slide the opening pick along the bottom edge and around the corners of the back cover to release the clips securing it.

    • Keep the pick at an upward angle under the back cover to help release the clips.

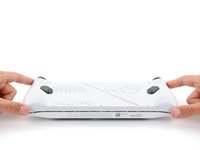
  5. Asus ROG Ally SSD Replacement, Remove the back cover: passo 5, immagine 1 di 3 Asus ROG Ally SSD Replacement, Remove the back cover: passo 5, immagine 2 di 3 Asus ROG Ally SSD Replacement, Remove the back cover: passo 5, immagine 3 di 3
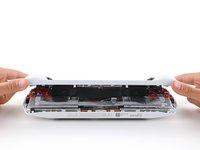
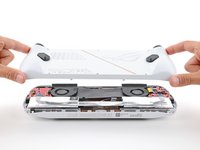
    • Lift the bottom edge of the back cover off the chassis to release the remaining clips.

    • Remove the back cover.

    • During reassembly, lay the back cover onto your device and firmly push down around the perimeter to engage the clips.

  6. Asus ROG Ally SSD Replacement, Remove the plastic cover: passo 6, immagine 1 di 3 Asus ROG Ally SSD Replacement, Remove the plastic cover: passo 6, immagine 2 di 3 Asus ROG Ally SSD Replacement, Remove the plastic cover: passo 6, immagine 3 di 3
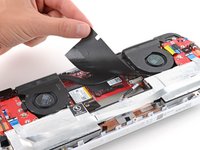
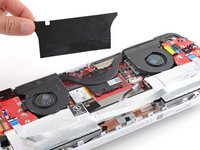
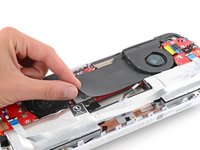
    • Use your fingers to peel up and remove the black plastic cover between the fans.

    • Put the cover aside—you'll use it during reassembly.

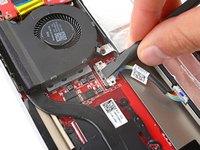
  7. Asus ROG Ally SSD Replacement, Unlatch the locking bar: passo 7, immagine 1 di 3 Asus ROG Ally SSD Replacement, Unlatch the locking bar: passo 7, immagine 2 di 3 Asus ROG Ally SSD Replacement, Unlatch the locking bar: passo 7, immagine 3 di 3
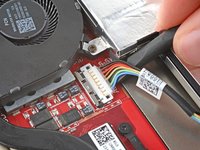
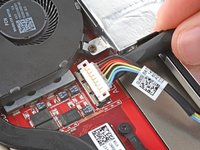
    • A metal locking bar secures the top edge of the battery connector

    • Use the flat end of a spudger to gently push the locking bar away from the connector to unlatch it.

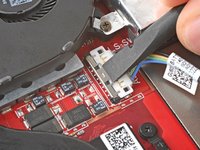
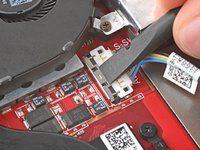
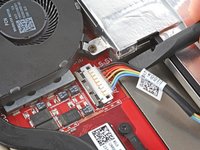
  8. Asus ROG Ally SSD Replacement, Disconnect the battery: passo 8, immagine 1 di 3 Asus ROG Ally SSD Replacement, Disconnect the battery: passo 8, immagine 2 di 3 Asus ROG Ally SSD Replacement, Disconnect the battery: passo 8, immagine 3 di 3
    • Make sure the locking bar is not covering the battery connector at all, or you may damage the socket and the locking bar.

    • Insert the flat end of a spudger under the center of the battery connector.

    • Lift the connector straight up and out of its socket to disconnect the battery.

    • During reassembly, use your fingers or the flat end of a spudger to firmly push the connector onto its socket until it clicks into place.

    This is incredibly risky as you can wedge the connector off the main board, and it's way easier/safer to disconnect the connector from the batter itself (other end)

    Steve M - Replica

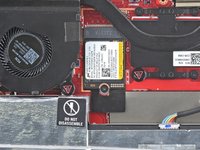
  9. Asus ROG Ally SSD Replacement, Unfasten the SSD: passo 9, immagine 1 di 2 Asus ROG Ally SSD Replacement, Unfasten the SSD: passo 9, immagine 2 di 2
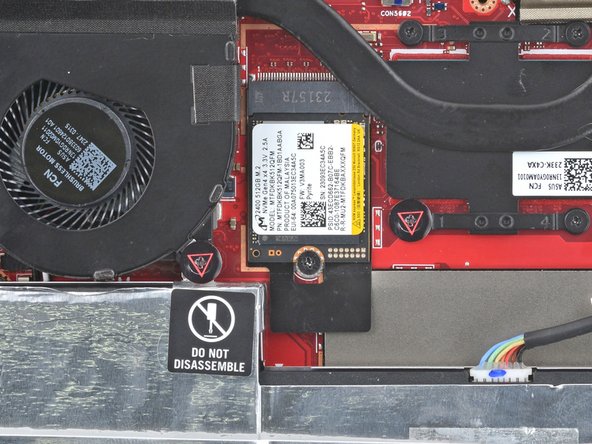
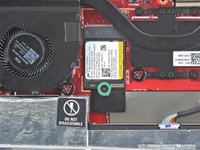
    • Use a Phillips #0 screwdriver to remove the 3.4 mm‑long screw securing the SSD.

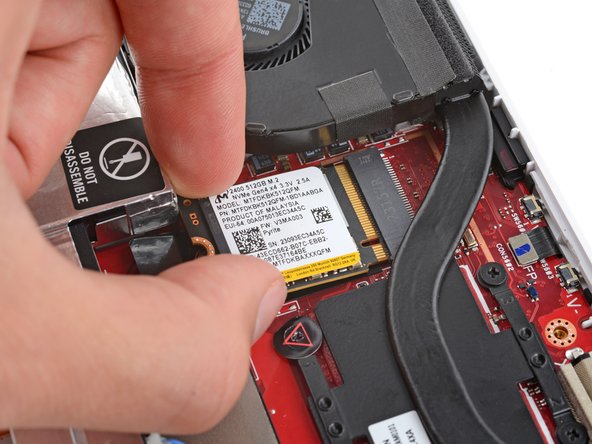
  10. Asus ROG Ally SSD Replacement, Remove the SSD: passo 10, immagine 1 di 2 Asus ROG Ally SSD Replacement, Remove the SSD: passo 10, immagine 2 di 2
    • If you have trouble removing the SSD, you can remove the battery for easier access.

    • Grip the bottom corners of the SSD and slightly lift until it clears the screw post.

    • Do not lift more than this or you may damage the SSD and its socket.

    • Pull the SSD straight out of its socket and remove it.

  11. Asus ROG Ally SSD Replacement: passo 11, immagine 1 di 2 Asus ROG Ally SSD Replacement: passo 11, immagine 2 di 2
    • Once you've reassembled your device:

    • Plug your device in and turn it on. It should boot into the BIOS menu.

    • Navigate to the Advanced tab and click ASUS Cloud Recovery.

    • Follow the prompts to finish setting up your device.

Conclusione

To reassemble your device, follow these instructions in reverse order.

Take your e-waste to an R2 or e-Stewards certified recycler.

Repair didn’t go as planned? Try some basic troubleshooting, or ask our Answers community for help.

Altre 5 persone hanno completato questa guida.

Spencer Day

Membro da: 09/14/22

114.459 Reputazione

824 Guide realizzate

Team

iFixit Membro di iFixit

Staff

121 Membri

20.435 Guide realizzate

1Commento della guida

Hi Spencer. Look, I wanted to ask you a question, it turns out that my Asus rog ally is stuck on its home screen, as if it could not boot, I checked everything, disk, motherboard and everything is in order, I imagine the bios menu is broken, you could help me with that?
Sebastian - Replica

Aggiungi Commento

Visualizza Statistiche:

Ultime 24 Ore: 47

Ultimi 7 Giorni: 256

Ultimi 30 Giorni: 972

Tutti i Tempi: 13,108