Questa traduzione potrebbe non riflettere gli aggiornamenti più recenti dalla guida originale. Aiuta ad aggiornare la traduzione o visualizza la guida d'origine.

Sostituzione gruppo tasto Home iPad Mini 4 LTE

Introduzione
Vai al passo 1Segui i passaggi in questa guida per sostituire il gruppo del tasto Home nel tuo iPad Mini 4 LTE.
Ricordati che il tasto Home dell'iPad Mini 4 è associato alla sua scheda madre originale, quindi sostituire il tasto Home originale con uno nuovo disabiliterà la funzione Touch ID sul tuo iPad. Comunque, un tasto Home nuovo funzionerà ancora come input alla pressione.
Alcune immagini di questa guida mostrano un modello WiFi, quindi le componenti interne possono sembrare leggermente diverse dal modello LTE. La procedura è la stessa per entrambi i modelli tranne dove segnalato.


-
-
Se il vetro del display è rotto, l'uso del nastro adesivo sulla superficie impedisce alla rottura di espandersi e previene danni fisici dovuti alle schegge di vetro.
-
Stendi delle strisce sovrapposte di nastro adesivo da pacchi trasparente sul display dell'iPad fino a coprire l'intera superficie. Per rotture molto serie, può essere necessario applicare due strati di nastro sovrapposti.
-
Cerca di seguire al meglio il resto della guida. Tuttavia, una volta che il vetro è crepato, continuerà a rompersi sempre di più mentre procederai alla riparazione. Potresti aver bisogno di strumenti metallici per rimuovere il vetro.
-
-
-
Riempi una pentola o una padella con abbastanza acqua per immergerci un iOpener.
-
Scalda l'acqua finché non bolle. Spegni il fuoco.
-
Posiziona l'iOpener nell'acqua calda per 2-3 minuti. Assicurati che l'iOpener sia completamente immerso nell'acqua.
-
Usa delle pinze per estrarre l'iOpener scaldato dall'acqua calda.
-
Asciuga accuratamente l'iOpener con un asciugamano.
-
Il tuo iOpener è pronto all'uso! Se devi scaldare di nuovo l'iOpener, scalda l'acqua fino all'ebollizione, spegni il fuoco e immergi l'iOpener in acqua per 2-3 minuti.
-
-
-
Scalda un iOpener e appoggialo al bordo sinistro per due minuti.
-
-
-
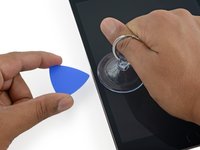
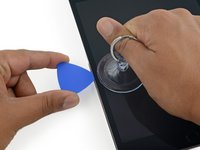
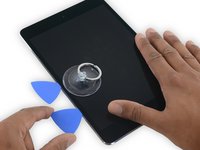
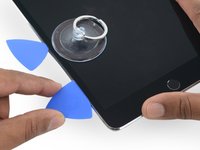
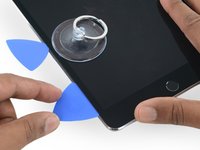
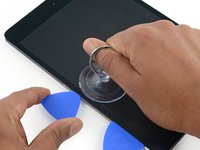
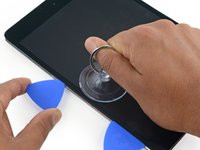
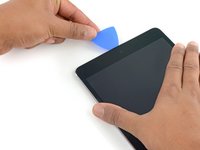
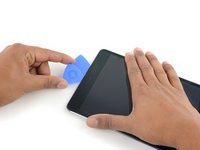
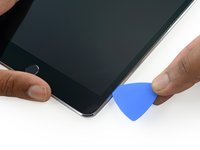
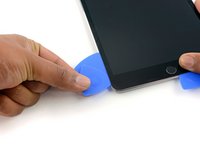
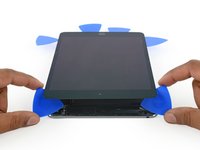
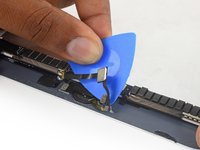
Mentre tieni sollevato il vetro con la ventosa, inserisci la punta di un plettro nella fessura tra il vetro e il corpo dell'iPad.
“Don't insert the opening pick any deeper than the black bezel on the side of the display. Inserting the pick too far may damage the LCD.”
Unfortunately, you only know you have inserted it too far when you have, and you start seeing little bubble veins form between the glass screen and the LCD.
The adhesive can be very stiff/hard, and if pushing through it can result in the pick plunging into the LCD when the adhesive finally gives way.
Take your time, use alot of heat, and if you need to try and push the pick in, try and do so in a slicing motion along the edge, use the wide edge, or hold the pick so that your finger will hit the edge of the screen before the pick tip will pass the bezel.
Adhesive strips are only 1mm wide on sides. Up to 5mm wide top and bottom. I used the Isclack. Screen seemed ok bending without breaking. Worth looking for a photo of the replacement adhesive strips so you know what you have to separate. Be extra careful at the lower right corner where the cables are.
This is a failure of a guide as it doesn’t tell you to insert at a downward angle so you don’t potrude into the LCD… Now I have to spend more money to replace the screen as I pushed adhesive between the LCD and the screen even though I went no farther than a millimeter short of the screen...
can you open the right side if the left is too cracked to use a suction cup on?
This guide needs amending urgently.
You MUST NOT put the pick or whatever you are using more than 2mm under the sides of the screen, or you will cut through the adhesive tape securing the backlight assembly to the LCD glass.
This will push adhesive into the viewable area of the LCD and cause the backlight assembly to no longer be secured against the LCD fully.
I now need a new screen.
This line below from the guide is absolutely INCORRECT and will ruin your expensive display:
”Don't insert the opening pick any deeper than the black bezel on the side of the display.”
The black bezel is 5mm to 6mm wide; you MUST NOT insert anything to that depth or you will destroy your display. 2mm maximum!
thanks. will take this into account for my repair
Adab Abu -
I too damaged my display because of this absolute nonsense (The German version, which I used, still had this INCORRECT portion in it). I can't believe how long it took iFixit to update this, even though people have been reporting this for years on end. Sadly iFixit still haven't updated a variety of other things that are still at the very least high risk instructions. I just messaged them the other day, but they don't seem to care about or understand the remaining issues that this guide has. At least they updated one of the most severe things, but they just plainly told me 'I'm wrong' about the rest. I liked iFixit it so far, and I've worked on a variety of (difficult) repairs - but this experience was a very huge let down.
A few thoughts after opening a number of Mini 4’s.
1) if the display is warm enough you can squeeze the digitizer and LCD back together after a minor incursion with the opening pick and it will reseal.
2) I’ve started going in at the top just to the right of the camera (I use an iFlex to get in then switch to a pick). Then I run down either side with my fingers choked up on the pick so there only a mm or 2 sticking out. Usually after running down one side, I can get the display open enough to get the pick in behind the LCD when I do the other side
-
-
-
Scalda di nuovo e riappoggia l'iOpener sul bordo sinistro per qualche minuto.
If your iPad is cold, consider leaving the iOpener on for longer than 5 minutes. The aluminum housing is a very large thermally dissipating mass and will quickly cool off the glass and make you have to start over and wait the 10 minutes to reheat. There’s a very slim window in which you’re able to insert the pick into the glass adhesive before it solidifies once again. I’ve been fighting with it for like 20 minutes following these instructions and it’s not working. You really need to leave it for longer than just 5 minutes to get the back housing hot too.
Heat is essential. I used a 3d printer’s heated set at 65 degrees. Chris Storer’s stip above saved me as you really need to let it sit for quite a while to soften the adhesive. Since I was doing a battery change, I heated both sides as the aluminum back is a huge heatsink that really sucks up the heat. Don’t try forcing it; if the suction cup isn’t pulling a gap in the screen, leave it on the heater for additional time.
Love the 3d printer idea, I hadn’t thought of that! I have used a heat gun as well but you have to be very careful to not use too much heat. Also watch for inserting the pick too far, it is really easy to delaminate glass from the display!
russ -
-
-
-
-
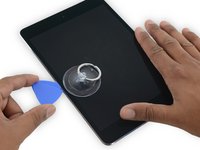
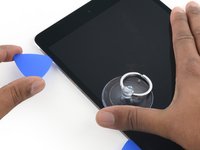
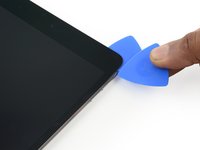
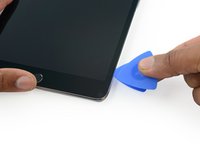
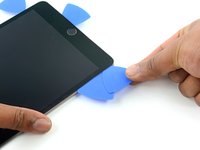
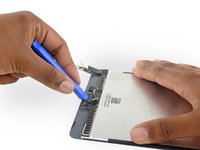
Lascia il plettro infilato nell'iPad leggermente dopo la fotocamera.
-
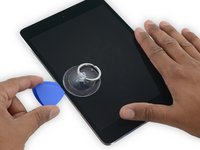
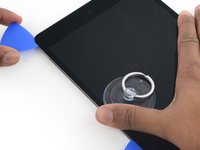
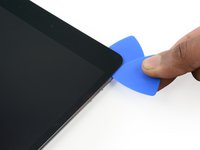
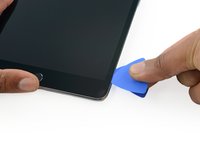
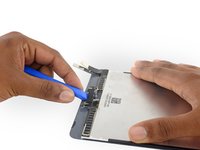
Prendi un secondo plettro ed infilalo a sinistra della fotocamera, dove sei già passato col primo plettro. Fallo scorrere verso l'angolo in alto a sinistra per tagliare del tutto l'adesivo rimasto.
-
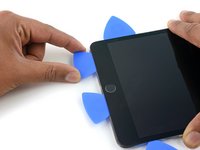
Lascia il secondo plettro sotto l'angolo per evitare che l'adesivo si reincolli raffreddandosi.
-
-
-
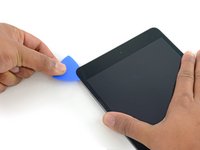
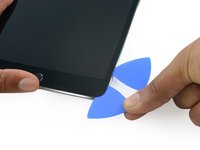
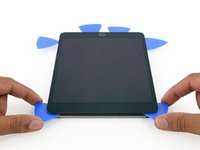
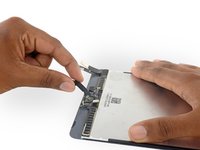
Ruota i due plettri sotto il bordo superiore dell'iPad per separare l'adesivo restante che tiene fermo lo schermo.
-
Solleva lo schermo dal bordo superiore per aprire il dispositivo.
"Twist the two picks at the top edge of the iPadTwist the two picks at the top edge of the iPad "
When I did this twisting motion, and I thought I was being gentle, one of the picks cracked nearly in half. That adhesive is very strong! I probably did not cut into it far enough before applying the twisting to open the screen.
-
-
-
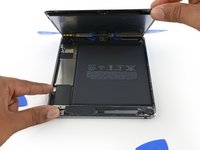
Rimuovi le quattro viti Phillips da 1,2 mm sopra la staffa del connettore della batteria/schermo.
-
-
-
Rimuovi la staffa che copre il cavo della batteria/schermo.
Is it the end of the world if the bracket is not reinstalled, will the device function normally or will it eventually have issues with the connectors coming loose following shock?
-
-
-
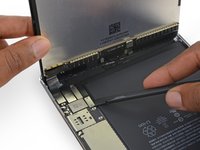
Usa la parte piatta dello spudger per scollegare il connettore della batteria dal suo socket sulla scheda logica.
When i was starting to disconnect the lcd to the board i hit the black film and it lit and now even the new display wont display anything how to fix it? The black film near the lcd connector.
-
-
-
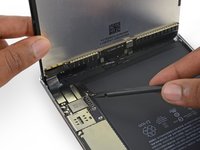
Usa l'estremità appuntita di uno spudger per scollegare il connettore dei dati dello schermo dal suo alloggiamento sulla scheda logica.
-
Usa l'estremità appuntita di uno spudger per scollegare il connettore del digitalizzatore dal suo alloggiamento sulla scheda logica.
-
-
-
Rimuovi il gruppo schermo.
Ich habe eine Bücherstütze benutzt um das Display in senkrechter Position zu halten, während ich die vier Schräubchen gelöst habe.. So zieht man nicht so an den Flexkabeln….!
Because the 3-piece adhesive strips shown in the Display Adhesive Application Guide link were different from iPad Mini 4 Adhesive Strips (item code IF316-013-1), it wasn't easy to figure out the exact location of the bottom adhesive. It would be helpful to include a separate application guide or an additional picture showing the exact location of each strip) on the guide.
-
-
-
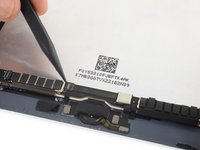
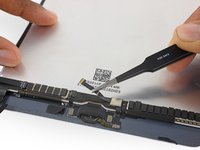
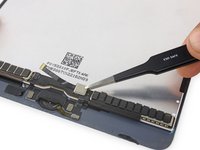
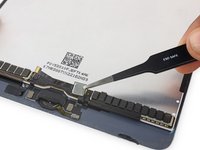
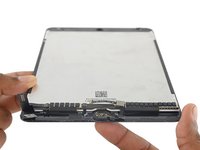
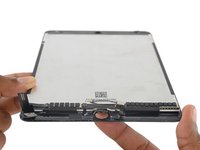
Usa la punta di uno spudger per ruotare verso l'alto l'aletta di bloccaggio sul connettore ZIF del tasto Home.
-
-
-
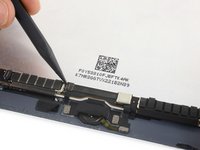
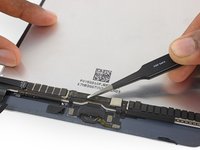
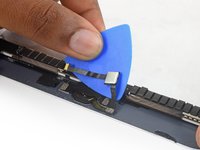
Usa uno strumento di apertura in plastica per fare leva sul supporto del tasto Home dal gruppo dello schermo.
The tip about the high-bond tape is great, but high-bond tape is something that should be mentioned at the beginning in the list of supplies we need. Because I have the whole thing taken apart, and now I’m told I need something that I don’t have on hand. So what am I supposed to do, just let everything sit around open, until I get to the store to see if they have some high-bond tape?
-
-
-
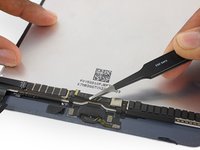
Rimuovi il gruppo del tasto Home.
-


Per rimontare il tuo dispositivo, segui le istruzioni in ordine inverso.
Per rimontare il tuo dispositivo, segui le istruzioni in ordine inverso.
Annulla: non ho completato questa guida.
Altre 15 persone hanno completato questa guida.
Un ringraziamento speciale a questi traduttori:
91%

Questi traduttori ci stanno aiutando ad aggiustare il mondo! Vuoi partecipare?
Inizia a tradurre ›

4 Commenti
Great tutorial but you should change the title to button removal. You never show how to replace it as suggested by the title.
I would have appreciated some points on installing the button. I clearly missed something and the button is not solid. When I push on it it sinks into the iPad. It works but it isn’t right and I’m not willing to risk breaking the glass to try something different, especially since I still am not sure what needs to be done differently.
I replaced the new screen of iPhone Mini 4 with same original home button. But Home button does not work. Does it requires any microsoldering to home button work?