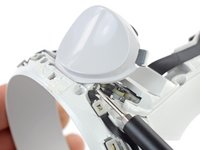
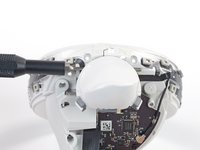
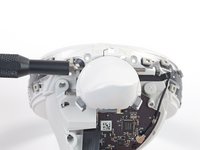
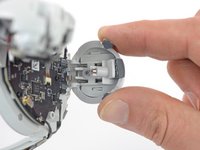
Salta al contenuto principale
Meta Quest 2 Controller Joystick Replacement

Meta Quest 2 Controller Joystick Replacement

Arthur Shi

Arthur Shi e 2 altri collaboratori

Ultimo aggiornamento il April 3, 2025

40 minuti - 1 ora
Moderato
Guida In Evidenza

Introduzione

Vai al passo 1

This guide shows how to remove and replace a drifting or broken joystick (aka thumbstick) for your Meta Quest 2 controller.

If you're experiencing controller drift, or your joystick isn't responsive, you'll likely need to replace the joystick.

The joystick is nested behind the controller board, requiring you to disassemble the entire controller to access it.

This guide is written with the right controller. If you're repairing the left controller, you can still use this guide, as the procedure is identical.

Cosa ti serve

Ricambi

Strumenti

Mostra di più…

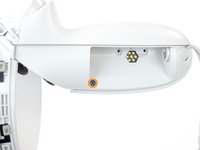
  1. Meta Quest 2 Controller Joystick Replacement, Remove the battery cover: passo 1, immagine 1 di 3 Meta Quest 2 Controller Joystick Replacement, Remove the battery cover: passo 1, immagine 2 di 3 Meta Quest 2 Controller Joystick Replacement, Remove the battery cover: passo 1, immagine 3 di 3
    • Use your fingers to slide the battery cover down towards the strap end of the controller.

    • Remove the battery cover.

    • If you're taking the controller apart for repairs, remove the batteries in the controller.

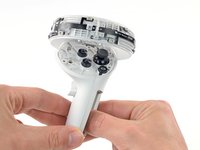
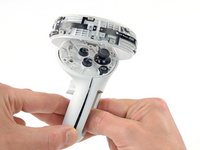
  2. Meta Quest 2 Controller Joystick Replacement, Remove the wrist strap: passo 2, immagine 1 di 2 Meta Quest 2 Controller Joystick Replacement, Remove the wrist strap: passo 2, immagine 2 di 2
    • Use your fingers to grasp the wrist strap near the anchor peg.

    • Lift the wrist strap anchor peg straight out of its recess.

    • Remove the wrist strap.

  3. Meta Quest 2 Controller Joystick Replacement, Loosen the faceplate adhesive: passo 3, immagine 1 di 1
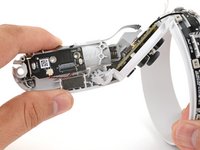
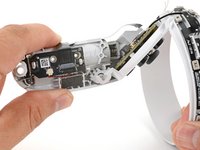
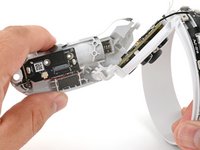
    • Heat an iOpener and apply it to the bottom edge of the controller faceplate for a minute.

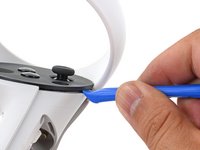
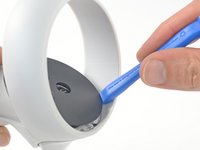
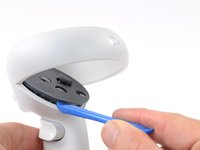
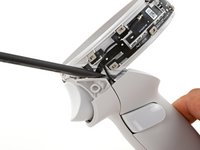
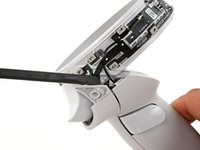
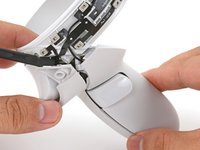
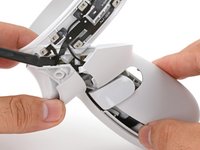
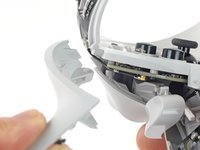
  4. Meta Quest 2 Controller Joystick Replacement, Loosen the controller faceplate: passo 4, immagine 1 di 3 Meta Quest 2 Controller Joystick Replacement, Loosen the controller faceplate: passo 4, immagine 2 di 3 Meta Quest 2 Controller Joystick Replacement, Loosen the controller faceplate: passo 4, immagine 3 di 3
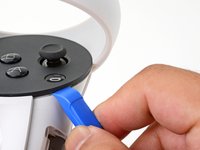
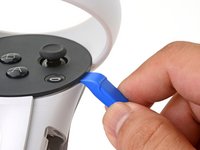
    • The controller faceplate is secured with adhesive and three friction pegs.

    • Press the edge of an opening tool into the seam between the controller faceplate and shell, near the Oculus button.

    • If you can’t get the opening tool into the seam, heat the area with an iOpener for a minute and try again.

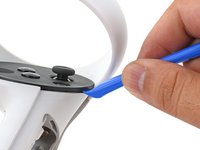
    • Slide the opening tool to the base of the ring shell to loosen the adhesive.

  5. Meta Quest 2 Controller Joystick Replacement: passo 5, immagine 1 di 2 Meta Quest 2 Controller Joystick Replacement: passo 5, immagine 2 di 2
    • Use an opening tool to pry up on the seam to loosen the first friction peg.

  6. Meta Quest 2 Controller Joystick Replacement: passo 6, immagine 1 di 2 Meta Quest 2 Controller Joystick Replacement: passo 6, immagine 2 di 2
    • Continue prying around the entire faceplate to separate the remaining friction pegs and adhesive.

    • If you're having trouble, apply a heated iOpener to the faceplate for a minute and try again.

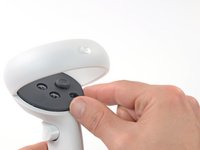
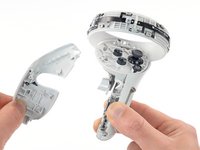
  7. Meta Quest 2 Controller Joystick Replacement, Remove the faceplate: passo 7, immagine 1 di 3 Meta Quest 2 Controller Joystick Replacement, Remove the faceplate: passo 7, immagine 2 di 3 Meta Quest 2 Controller Joystick Replacement, Remove the faceplate: passo 7, immagine 3 di 3
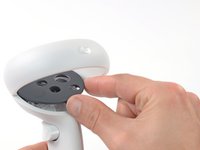
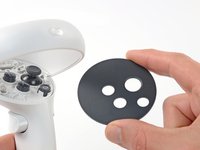
    • Remove the controller faceplate.

    • The three friction pegs should hold the faceplate securely, so you don’t need to replace the adhesive during reassembly. Be sure to firmly press the faceplate onto the controller so that all friction pegs fully engage.

  8. Meta Quest 2 Controller Joystick Replacement, Loosen the controller ring shell: passo 8, immagine 1 di 2 Meta Quest 2 Controller Joystick Replacement, Loosen the controller ring shell: passo 8, immagine 2 di 2
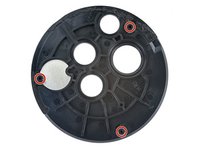
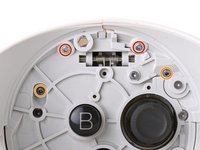
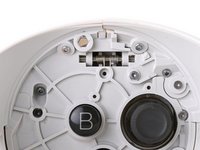
    • Use a Torx T5 driver to remove the four screws securing the controller ring shell to the controller:

    • Two 4.7 mm‑long screws

    • Two 5.9 mm‑long screws

  9. Meta Quest 2 Controller Joystick Replacement: passo 9, immagine 1 di 2 Meta Quest 2 Controller Joystick Replacement: passo 9, immagine 2 di 2
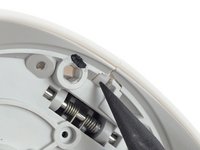
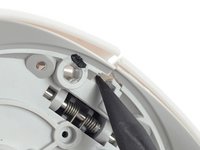
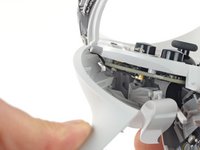
    • Press the point of a spudger firmly against the white alignment square to release the ring shell.

  10. Meta Quest 2 Controller Joystick Replacement, Remove the controller ring shell: passo 10, immagine 1 di 3 Meta Quest 2 Controller Joystick Replacement, Remove the controller ring shell: passo 10, immagine 2 di 3 Meta Quest 2 Controller Joystick Replacement, Remove the controller ring shell: passo 10, immagine 3 di 3
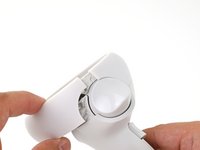
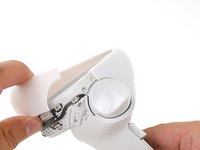
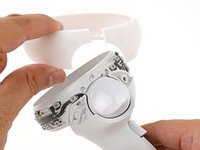
    • Use your fingers to grab the end of the ring shell that doesn’t have the white alignment square.

    • Gently lift the ring shell up and away from the controller to unclip it from the controller.

    • Remove the controller ring shell.

  11. Meta Quest 2 Controller Joystick Replacement, Loosen the side shell: passo 11, immagine 1 di 2 Meta Quest 2 Controller Joystick Replacement, Loosen the side shell: passo 11, immagine 2 di 2
    • Use a Torx T5 driver to remove the five screws:

    • One 11.5 mm‑long screw

    • Three 5.9 mm‑long screws

    • One 18.2 mm‑long screw

  12. Meta Quest 2 Controller Joystick Replacement, Remove the battery label: passo 12, immagine 1 di 1
    Attrezzo utilizzato in questo passaggio:
    Tweezers
    $4.99
    • Use tweezers and your fingers to peel the battery information label out from the battery compartment.

    • If you want to reuse this sticker, be careful not to tear it. If it’s difficult to peel, apply a heated iOpener to it for a minute to soften the label adhesive.

  13. Meta Quest 2 Controller Joystick Replacement, Loosen the side shell: passo 13, immagine 1 di 2 Meta Quest 2 Controller Joystick Replacement, Loosen the side shell: passo 13, immagine 2 di 2
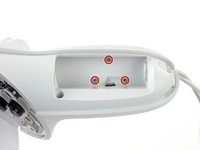
    • Use a Torx T5 driver to remove the four 5.9 mm‑long screws securing the side shell to the controller:

    • Three screws inside the battery compartment

    • One screw near the corner of the battery compartment

  14. Meta Quest 2 Controller Joystick Replacement: passo 14, immagine 1 di 2 Meta Quest 2 Controller Joystick Replacement: passo 14, immagine 2 di 2
    • Pull the bottom of the side shell slightly away from the controller to loosen the shell.

    • You may hear a few clicks as the clips release. This is normal.

  15. Meta Quest 2 Controller Joystick Replacement: passo 15, immagine 1 di 2 Meta Quest 2 Controller Joystick Replacement: passo 15, immagine 2 di 2
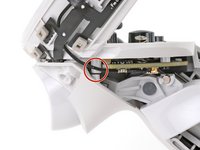
    • Part of the side shell is looped around a screw post. In this step, you’ll spread the screw post apart enough to slip the shell out.

    • Insert the flat end of a spudger into the gap between the controller ring and the front shell.

    • The front shell is the plastic frame part below the front trigger.

    • Twist the spudger to widen the gap between the front shell and the controller.

    • Position the spudger so that it can stay in place without you holding the tool.

  16. Meta Quest 2 Controller Joystick Replacement, Remove the side shell: passo 16, immagine 1 di 3 Meta Quest 2 Controller Joystick Replacement, Remove the side shell: passo 16, immagine 2 di 3 Meta Quest 2 Controller Joystick Replacement, Remove the side shell: passo 16, immagine 3 di 3
    • Guide the looped part of the side shell through the screw post gap.

    • Remove the side shell.

  17. Meta Quest 2 Controller Joystick Replacement, Reassembly note: passo 17, immagine 1 di 3 Meta Quest 2 Controller Joystick Replacement, Reassembly note: passo 17, immagine 2 di 3 Meta Quest 2 Controller Joystick Replacement, Reassembly note: passo 17, immagine 3 di 3
    • During reassembly:

    • Spread the screw post wide enough to loop the side shell back around it.

    • Be careful not to pinch the antenna cable or the tracking flex cable as you reposition the side shell.

  18. Meta Quest 2 Controller Joystick Replacement, Remove the Controller Front Shell: passo 18, immagine 1 di 1
    • Use a spudger or an opening pick to gently pry the shell from the battery compartment side first.

    • Once it pops open, turn the controller over to remove the front shell.

    • If you have trouble, move to the next step.

  19. Meta Quest 2 Controller Joystick Replacement: passo 19, immagine 1 di 3 Meta Quest 2 Controller Joystick Replacement: passo 19, immagine 2 di 3 Meta Quest 2 Controller Joystick Replacement: passo 19, immagine 3 di 3
    • If you successfully removed the front shell, skip this step.

    • Grasp the front shell near the bottom of the controller.

    • Lift and pull the bottom edge of the front shell outwards slightly to clear the plastic alignment peg.

    • The alignment peg breaks easily. Make sure you lift the shell enough to clear it.

  20. Meta Quest 2 Controller Joystick Replacement: passo 20, immagine 1 di 2 Meta Quest 2 Controller Joystick Replacement: passo 20, immagine 2 di 2
    • Pull the front shell away from the controller and remove it.

  21. Meta Quest 2 Controller Joystick Replacement, Remove the front trigger pin: passo 21, immagine 1 di 3 Meta Quest 2 Controller Joystick Replacement, Remove the front trigger pin: passo 21, immagine 2 di 3 Meta Quest 2 Controller Joystick Replacement, Remove the front trigger pin: passo 21, immagine 3 di 3
    • Use a driver bit (such as the Torx T5) or the point of a spudger to push the front trigger pin out from the side shown. Pushing from the opposite side can cause the pin to rip the sensor cable.

    • For better reach, you can also use a straightened paper clip or the point of your tweezers.

  22. Meta Quest 2 Controller Joystick Replacement: passo 22, immagine 1 di 1
    Attrezzo utilizzato in questo passaggio:
    Tweezers
    $4.99
    • Hold the front trigger with your finger to prevent the trigger from flying out.

    • Use tweezers or your fingers to pull the trigger pin out.

  23. Meta Quest 2 Controller Joystick Replacement, Remove the front trigger: passo 23, immagine 1 di 2 Meta Quest 2 Controller Joystick Replacement, Remove the front trigger: passo 23, immagine 2 di 2
  24. Meta Quest 2 Controller Joystick Replacement, Disconnect the controller board: passo 24, immagine 1 di 2 Meta Quest 2 Controller Joystick Replacement, Disconnect the controller board: passo 24, immagine 2 di 2
    Attrezzo utilizzato in questo passaggio:
    Tweezers
    $4.99
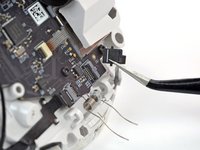
    • Use a clean fingernail or tweezers to flip up the ZIF socket's lock bar securing the outer tracking flex cable.

  25. Meta Quest 2 Controller Joystick Replacement: passo 25, immagine 1 di 2 Meta Quest 2 Controller Joystick Replacement: passo 25, immagine 2 di 2
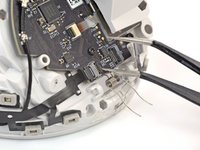
    • Use tweezers to grasp the outer tracking flex cable by its pull tab and pull it out of its ZIF socket.

  26. Meta Quest 2 Controller Joystick Replacement: passo 26, immagine 1 di 3 Meta Quest 2 Controller Joystick Replacement: passo 26, immagine 2 di 3 Meta Quest 2 Controller Joystick Replacement: passo 26, immagine 3 di 3
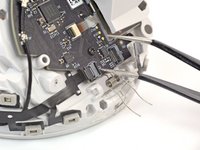
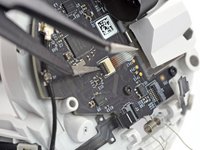
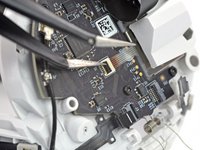
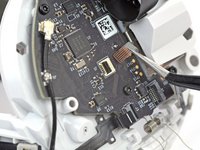
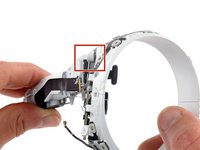
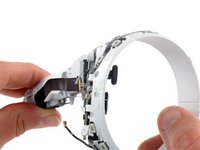
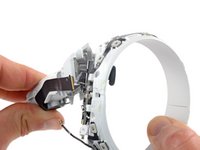
    • Use the same procedure to unlock and disconnect the inner tracking flex cable from its ZIF socket.

  27. Meta Quest 2 Controller Joystick Replacement: passo 27, immagine 1 di 3 Meta Quest 2 Controller Joystick Replacement: passo 27, immagine 2 di 3 Meta Quest 2 Controller Joystick Replacement: passo 27, immagine 3 di 3
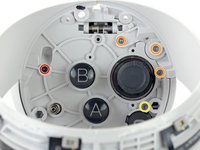
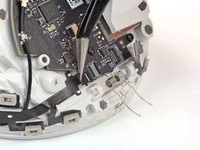
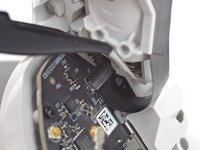
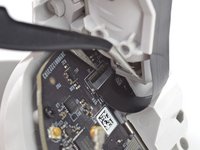
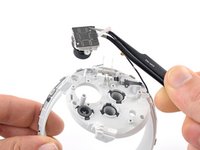
    • Use a clean fingernail or tweezers to unlock and disconnect the joystick flex cable from its ZIF socket.

  28. Meta Quest 2 Controller Joystick Replacement: passo 28, immagine 1 di 3 Meta Quest 2 Controller Joystick Replacement: passo 28, immagine 2 di 3 Meta Quest 2 Controller Joystick Replacement: passo 28, immagine 3 di 3
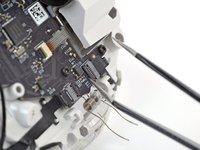
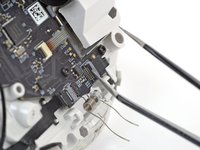
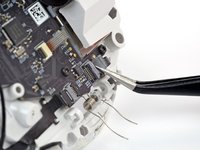
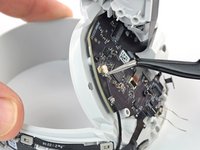
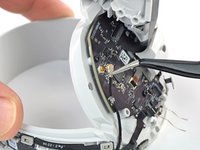
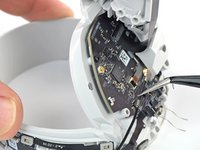
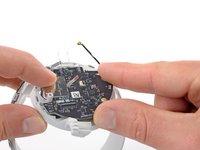
    • Insert one arm of a pair of tweezers under the metal neck of the antenna cable.

    • Pry straight up to disconnect the antenna from the controller board.

    • Gently pull the antenna to unclip it from its grounding clip.

  29. Meta Quest 2 Controller Joystick Replacement: passo 29, immagine 1 di 3 Meta Quest 2 Controller Joystick Replacement: passo 29, immagine 2 di 3 Meta Quest 2 Controller Joystick Replacement: passo 29, immagine 3 di 3
    • Use a clean fingernail or tweezers to unlock and disconnect the interconnect flex cable from its ZIF socket.

  30. Meta Quest 2 Controller Joystick Replacement, Loosen the battery shell: passo 30, immagine 1 di 3 Meta Quest 2 Controller Joystick Replacement, Loosen the battery shell: passo 30, immagine 2 di 3 Meta Quest 2 Controller Joystick Replacement, Loosen the battery shell: passo 30, immagine 3 di 3
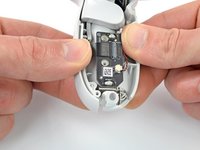
    • The battery shell is the plastic frame part that holds the batteries.

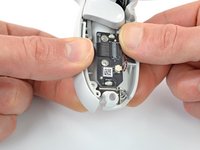
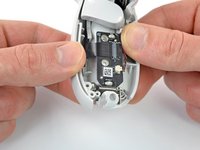
    • Use your fingers to twist the battery shell slightly so that its edge near the thumbstick clicks out of place.

  31. Meta Quest 2 Controller Joystick Replacement: passo 31, immagine 1 di 3 Meta Quest 2 Controller Joystick Replacement: passo 31, immagine 2 di 3 Meta Quest 2 Controller Joystick Replacement: passo 31, immagine 3 di 3
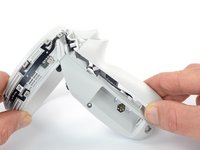
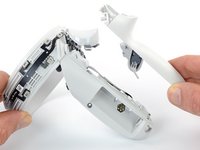
    • There’s a friction assembly near the vibration motor that needs to separate in order to remove the battery shell.

    • Gently wiggle the battery shell as you pull it away from the controller.

    • Remove the battery shell.

  32. Meta Quest 2 Controller Joystick Replacement, Unfasten the controller board: passo 32, immagine 1 di 1
    • Use a Torx T5 driver to remove the four 7.5 mm‑long screws securing the controller board.

    • During reassembly, be careful not to overtighten these screws, or you may break them.

  33. Meta Quest 2 Controller Joystick Replacement, Remove the controller board: passo 33, immagine 1 di 3 Meta Quest 2 Controller Joystick Replacement, Remove the controller board: passo 33, immagine 2 di 3 Meta Quest 2 Controller Joystick Replacement, Remove the controller board: passo 33, immagine 3 di 3
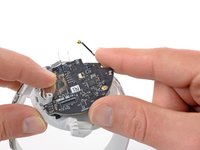
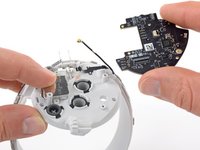
    • Use your fingers to lift the controller board out of the shell and remove it.

  34. Meta Quest 2 Controller Joystick Replacement, Remove the joystick: passo 34, immagine 1 di 2 Meta Quest 2 Controller Joystick Replacement, Remove the joystick: passo 34, immagine 2 di 2
    Attrezzo utilizzato in questo passaggio:
    Tweezers
    $4.99
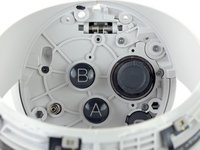
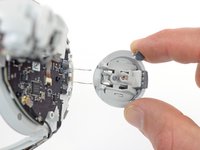
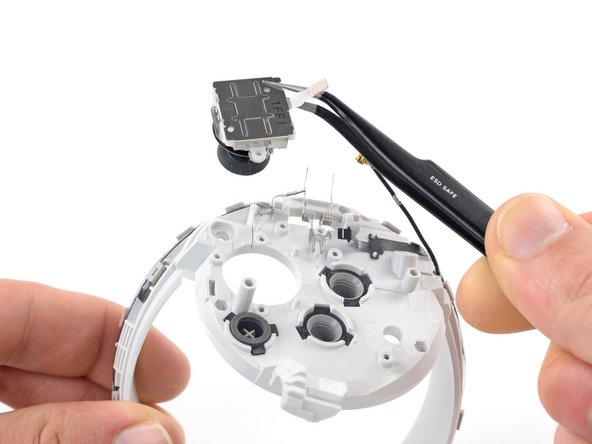
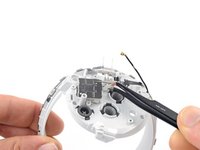
    • Use your fingers or tweezers to remove the joystick.

Conclusione

To reassemble your device, follow these instructions in reverse order.

Take your e-waste to an R2 or e-Stewards certified recycler.

Repair didn’t go as planned? Try some basic troubleshooting, or ask our Answers community for help.

Altre 23 persone hanno completato questa guida.

Arthur Shi

Membro da: 01/03/18

283.416 Reputazione

587 Guide realizzate

Team

iFixit Membro di iFixit

Staff

118 Membri

19.652 Guide realizzate

6Commenti sulla guida

When replacing the joystick, make sure you place the metal cover on the right side, the joystick goes under the circuit board, and make sure the little metal flap is bent enough, also make sure the screws are tight.
id recommend this video so you get more what i mean, although it doesn't show exactly that i mean.
https://youtu.be/kQ2-XYEbOKY?t=98

otherwise you wont have the touch pad on the joystick, it'll still work good, just no sensing if you have your finger on it

Matthew Blakeney - Replica

You dont need to remove the pin/take of the tigger, if youre carful and paitent
id say its safer to leave it in

Matthew Blakeney - Replica

Can confirm. I looked at this guide before looking at any videos (all of which do not take the trigger out) and I must have bent the pin/spring when putting it back in because my trigger won't go back up now. I also broke the front shell alignment peg when going back to try to try again. Please update this guide so this doesn't happen to anyone else.

MikeyLORR -

thank you for the guide, i am yet to do it, why is the anolog the first last thing to come out when they are notorious to breaking

Harry Chamberlain - Replica

Nooooo! I did everything perfectly but once I reached step 11 going backward for re-assembly I read the first two bullet points and for some stupid reason assumed it was going in Longest --> shortest screw length, Ughhh was rushing through it thinking this was the easy part!

I stupidly tried the 18mm in the 11mm and it broke off, no chance of ever removing that...


Put everything back together anyway and it works quite well even with those both missing, only issue is the buttons sit a little lower then normal and the touch sensitivity is not perfect for light touching. This is not used in any games I play so I'll likely leave it as is for now. Still infinitely better than with drift but that is annoying.

Anyway, the guide is extremely good, just don't be like me and read the instructions carefully and you will be fine. I Actually started off with a video teardown and then switched to this as this was more clear.

Roshank231 - Replica

Aggiungi Commento

Visualizza Statistiche:

Ultime 24 Ore: 48

Ultimi 7 Giorni: 420

Ultimi 30 Giorni: 2,060

Tutti i Tempi: 24,110