Salta al contenuto principale
How to Open Your Google Pixel Tablet

How to Open Your Google Pixel Tablet

Clay Eickemeyer

Clay Eickemeyer e un altro collaboratore

Ultimo aggiornamento il July 1, 2024

15 - 30 minuti
Moderato
Solo Prerequisita
Questa guida è destinata a essere usata solo come prerequisito per altre guide. Da sola è incompleta.

Introduzione

Vai al passo 1

This guide demonstrates how to open your Google Pixel Tablet for repair.

Cosa ti serve

Strumenti

Mostra di più…

iFixit guadagna commissioni quando acquisti tramite questi link.
  1. How to Open Your Google Pixel Tablet, Prepare your tablet for disassembly: passo 1, immagine 1 di 2 How to Open Your Google Pixel Tablet, Prepare your tablet for disassembly: passo 1, immagine 2 di 2
    • Allow your battery to fully drain before starting this repair. A charged battery may catch fire if damaged.

    • Unplug any cables from your tablet and fully power it down.

    • Hold the power and volume up buttons at the same time to bring up the power off menu.

  2. How to Open Your Google Pixel Tablet: passo 2, immagine 1 di 1
    • If your screen is badly cracked, lay overlapping strips of packing tape over the glass to protect yourself and make disassembly easier.

  3. How to Open Your Google Pixel Tablet, Secure the Anti-Clamp: passo 3, immagine 1 di 3 How to Open Your Google Pixel Tablet, Secure the Anti-Clamp: passo 3, immagine 2 di 3 How to Open Your Google Pixel Tablet, Secure the Anti-Clamp: passo 3, immagine 3 di 3
    Attrezzo utilizzato in questo passaggio:
    Clampy - Anti-Clamp
    $24.95
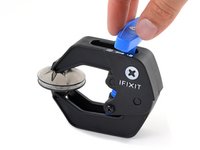
    • The next three steps demonstrate the Anti-Clamp, a tool we designed to make the opening procedure easier. If you aren't using the Anti-Clamp, skip down three steps for an alternate method.

    • For complete instructions on how to use the Anti-Clamp, check out this guide.

    • Pull the blue handle backward to unlock the Anti-Clamp's arms.

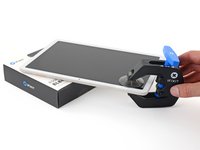
    • Slide the arms over the top left corner, with one suction cup on the back cover and one on the screen.

    • Place an object under your tablet so it rests level between the Anti-Clamp's arms.

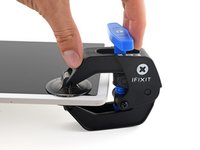
    • Squeeze the cups together to create suction.

  4. How to Open Your Google Pixel Tablet, Use the Anti-Clamp to create a gap: passo 4, immagine 1 di 3 How to Open Your Google Pixel Tablet, Use the Anti-Clamp to create a gap: passo 4, immagine 2 di 3 How to Open Your Google Pixel Tablet, Use the Anti-Clamp to create a gap: passo 4, immagine 3 di 3
    • Pull the blue handle forward to lock the arms.

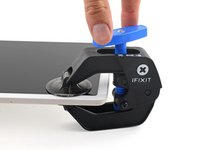
    • Turn the handle clockwise two full turns, or until the suction cups begin to stretch.

    • As the cups stretch, make sure they stay vertically aligned with each other. If they keep slipping, remove the Anti-Clamp and apply tape for the cups to stick to.

  5. How to Open Your Google Pixel Tablet, Insert an opening pick: passo 5, immagine 1 di 3 How to Open Your Google Pixel Tablet, Insert an opening pick: passo 5, immagine 2 di 3 How to Open Your Google Pixel Tablet, Insert an opening pick: passo 5, immagine 3 di 3
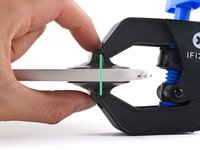
    • Use a hair dryer or heat gun to heat the top left corner of the screen until a gap forms between the glass and the frame.

    • Be careful not to overheat the tablet—the screen and battery are susceptible to heat damage.

    • Insert an opening pick into the gap.

    • Remove the Anti-Clamp using the pull tabs on the suction cups.

  6. How to Open Your Google Pixel Tablet, Heat the top left corner: passo 6, immagine 1 di 1
    • If you've already inserted an opening pick using the Anti-Clamp, skip down two steps.

    • Rotate your tablet so the front camera is closest to you.

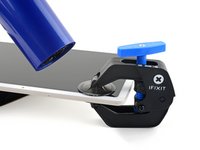
    • Apply a heated iOpener to the top left corner of the screen (now your bottom right, since the tablet is flipped around) for three minutes.

    • You can also use a hair dryer, heat gun, or hot plate, but be careful not to overheat the screen or battery—only heat the tablet so it's warm to the touch.

  7. How to Open Your Google Pixel Tablet, Insert an opening pick: passo 7, immagine 1 di 3 How to Open Your Google Pixel Tablet, Insert an opening pick: passo 7, immagine 2 di 3 How to Open Your Google Pixel Tablet, Insert an opening pick: passo 7, immagine 3 di 3
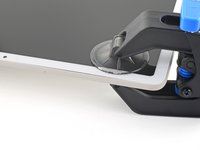
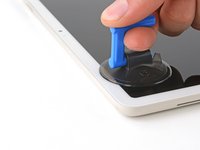
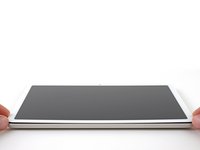
    • Apply a suction handle to the top left corner of the screen, as close to the top edge as possible.

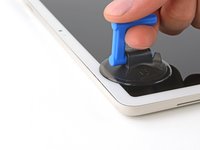
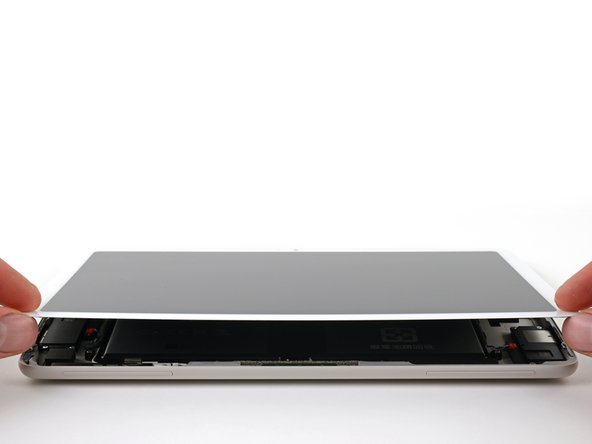
    • Pull up on the suction handle with a strong, steady force until a gap forms between the glass and the frame.

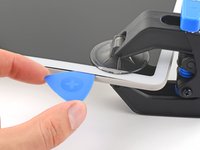
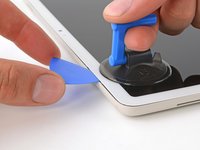
    • Insert the tip of an opening pick into the gap.

    • Remove the suction handle.

  8. How to Open Your Google Pixel Tablet, Adhesive information: passo 8, immagine 1 di 3 How to Open Your Google Pixel Tablet, Adhesive information: passo 8, immagine 2 di 3 How to Open Your Google Pixel Tablet, Adhesive information: passo 8, immagine 3 di 3
    • The screen is secured with adhesive all around the perimeter. Note the following areas as you separate the adhesive:

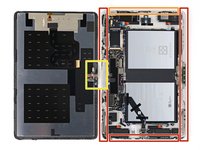
    • The top, bottom, and left edges have the thickest adhesive.

    • The right edge has slightly thinner adhesive.

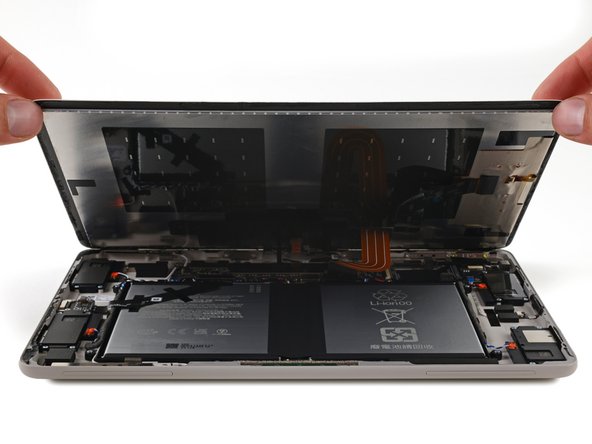
    • At the top, near the front camera, the adhesive is very thin and delicate cables connect the screen to the frame.

  9. How to Open Your Google Pixel Tablet, Reposition your opening pick: passo 9, immagine 1 di 2 How to Open Your Google Pixel Tablet, Reposition your opening pick: passo 9, immagine 2 di 2
    • Don't insert your pick deeper than 7 mm, or about halfway between the tip of the pick and the iFixit logo.

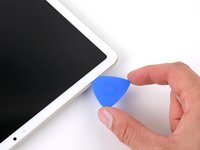
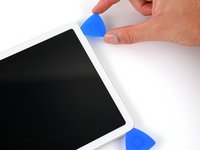
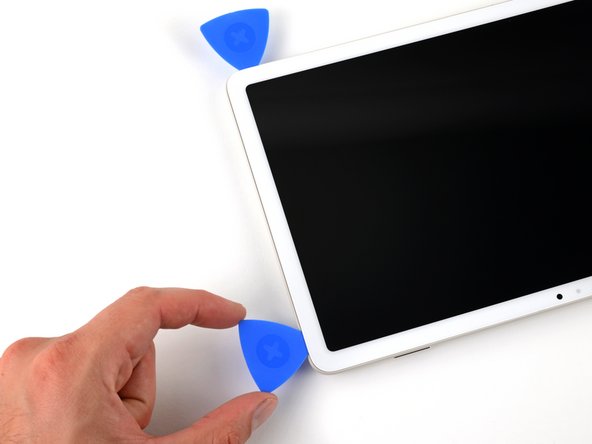
    • Slide your opening pick to the top left corner of the tablet.

    • Leave this pick inserted to prevent the adhesive from resealing.

  10. How to Open Your Google Pixel Tablet, Heat the left edge: passo 10, immagine 1 di 1
    • Apply a heated iOpener to the left edge of the screen for two minutes.

    • You can also use a hair dryer, heat gun, or hot plate, but be careful not to overheat the screen or battery.

  11. How to Open Your Google Pixel Tablet, Separate the left edge adhesive: passo 11, immagine 1 di 2 How to Open Your Google Pixel Tablet, Separate the left edge adhesive: passo 11, immagine 2 di 2
    • Don't insert your pick deeper than 7 mm, or about halfway between the tip of the pick and the iFixit logo.

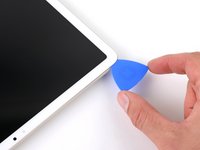
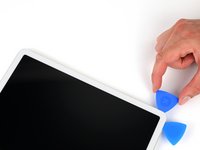
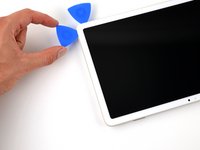
    • Insert a second opening pick in the top left corner of the screen.

    • Slide your pick to the bottom left corner of the screen to separate the left edge adhesive.

    • Leave this pick inserted to prevent the adhesive from resealing.

  12. How to Open Your Google Pixel Tablet, Heat the bottom edge: passo 12, immagine 1 di 1
    • Apply a heated iOpener to the bottom edge of the screen for two minutes.

    • You can also use a hair dryer, heat gun, or hot plate, but be careful not to overheat the screen or battery.

  13. How to Open Your Google Pixel Tablet, Separate the bottom edge adhesive: passo 13, immagine 1 di 3 How to Open Your Google Pixel Tablet, Separate the bottom edge adhesive: passo 13, immagine 2 di 3 How to Open Your Google Pixel Tablet, Separate the bottom edge adhesive: passo 13, immagine 3 di 3
    • Don't insert your pick deeper than 7 mm, or about halfway between the tip of the pick and the iFixit logo.

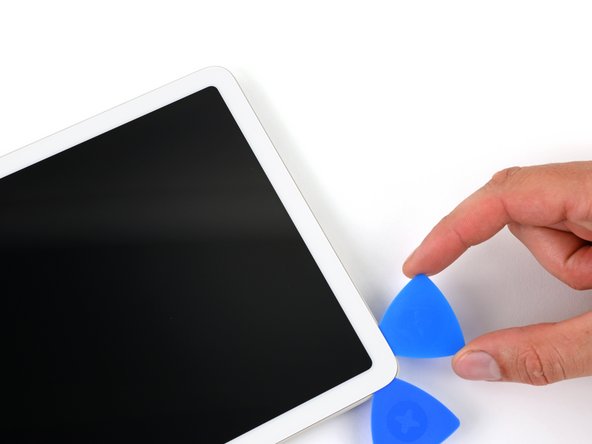
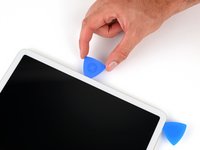
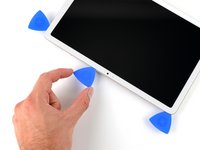
    • Insert a third opening pick in the bottom left corner.

    • Slide your pick to the bottom right corner of the screen to separate the bottom edge adhesive.

    • If your pick becomes stuck, repeatedly twist it as you slide to help separate the adhesive.

    • Leave this pick inserted to prevent the adhesive from resealing.

  14. How to Open Your Google Pixel Tablet, Heat the right edge: passo 14, immagine 1 di 1
    • Apply a heated iOpener to the right edge of the screen for two minutes.

    • You can also use a hair dryer, heat gun, or hot plate, but be careful not to overheat the screen or battery.

  15. How to Open Your Google Pixel Tablet, Separate the right edge adhesive: passo 15, immagine 1 di 2 How to Open Your Google Pixel Tablet, Separate the right edge adhesive: passo 15, immagine 2 di 2
    • Don't insert your pick deeper than 5 mm along the right edge.

    • For a visual reference, you can measure 5 mm from the tip and mark your pick with a permanent marker.

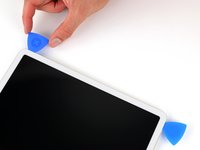
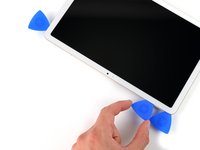
    • Insert a fourth opening pick in the bottom right corner.

    • Slide your pick to the top right corner to separate the right edge adhesive.

    • Leave this pick inserted to prevent the adhesive from resealing.

  16. How to Open Your Google Pixel Tablet, Heat the top edge: passo 16, immagine 1 di 1
    • Apply a heated iOpener to the top edge of the screen for two minutes.

    • You can also use a hair dryer, heat gun, or hot plate, but be careful not to overheat the screen or battery.

  17. How to Open Your Google Pixel Tablet, Top edge information: passo 17, immagine 1 di 1
    • The front camera and sensor are along the middle of the top edge. Be very careful not to insert your opening pick deeper than 3 mm (1/8 in) here.

    • For a visual reference, you can measure 3 mm from the tip and mark your pick with a permanent marker.

    • To mark where to avoid slicing too deep, it can be helpful to put a 6.3 cm (2.5 in) long strip of masking tape on the top edge, centered over the front camera.

  18. How to Open Your Google Pixel Tablet, Separate the top edge adhesive: passo 18, immagine 1 di 3 How to Open Your Google Pixel Tablet, Separate the top edge adhesive: passo 18, immagine 2 di 3 How to Open Your Google Pixel Tablet, Separate the top edge adhesive: passo 18, immagine 3 di 3
    • Insert a fifth opening pick in the top right corner of the screen.

    • Slide your pick toward the front camera. Stop when your pick is 3 cm (1.25 in) from the front camera.

    • Pull your pick out to a depth of 3 mm (1/8 inch) and slide it past the front camera.

    • When your pick is 3 cm past the front camera, insert it up to 6 mm deep, or about halfway between the tip and the iFixit logo, and slide it to the first pick you left in the top left corner.

  19. How to Open Your Google Pixel Tablet, Tilt the screen open: passo 19, immagine 1 di 3 How to Open Your Google Pixel Tablet, Tilt the screen open: passo 19, immagine 2 di 3 How to Open Your Google Pixel Tablet, Tilt the screen open: passo 19, immagine 3 di 3
    • Don't tilt the screen open beyond 90 degrees. The front camera and sensor cables are very short and may tear.

    • Grab and lift the bottom corners of the screen.

    • If the screen feels stuck, check around the perimeter for any missed sections of adhesive and slice them with an opening pick.

    • Tilt the screen open just enough to access the cables connecting the screen to the frame.

    • During reassembly, remove the adhesive liners from the perimeter of the screen before firmly pressing it into place in the frame.

  20. How to Open Your Google Pixel Tablet, Remove the screen cable tape: passo 20, immagine 1 di 3 How to Open Your Google Pixel Tablet, Remove the screen cable tape: passo 20, immagine 2 di 3 How to Open Your Google Pixel Tablet, Remove the screen cable tape: passo 20, immagine 3 di 3
    Attrezzo utilizzato in questo passaggio:
    Tweezers
    $4.99
    • For the next three steps, hold the screen tilted open with one hand while you work with your other hand.

    • If you have difficulty holding up the screen, place the tablet's dock on the frame to prop up the screen or ask someone to hold it up while you work.

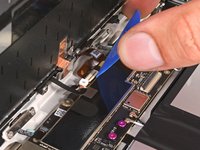
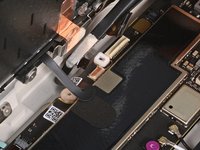
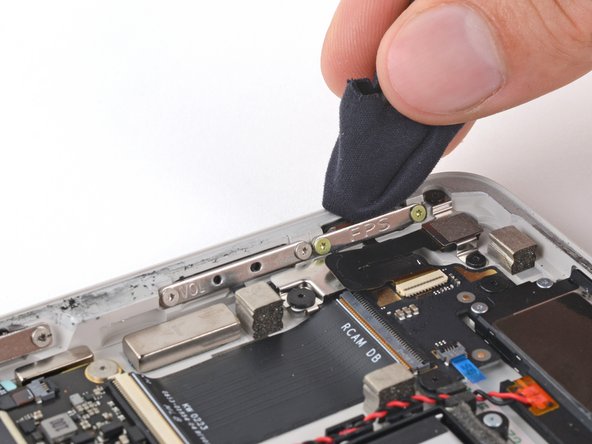
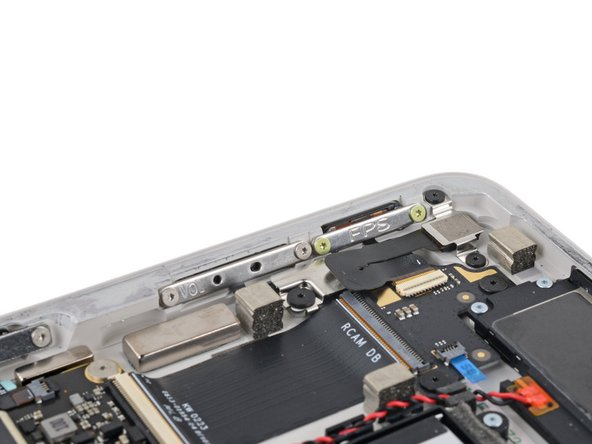
    • Use tweezers to peel and remove the black tape off of the screen cable connector.

    • During reassembly:

    • Install new tape if the old piece is damaged and you have a replacement from your repair kit.

    • Now is a good time to test your tablet before sealing it up. Power it on and check that it works. Power it back down before you continue reassembly.

  21. How to Open Your Google Pixel Tablet, Disconnect the screen: passo 21, immagine 1 di 3 How to Open Your Google Pixel Tablet, Disconnect the screen: passo 21, immagine 2 di 3 How to Open Your Google Pixel Tablet, Disconnect the screen: passo 21, immagine 3 di 3
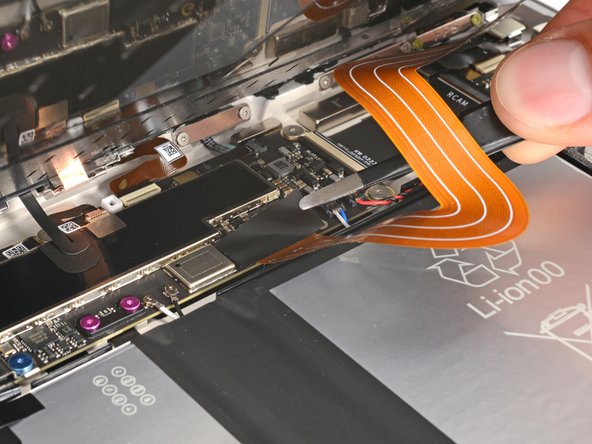
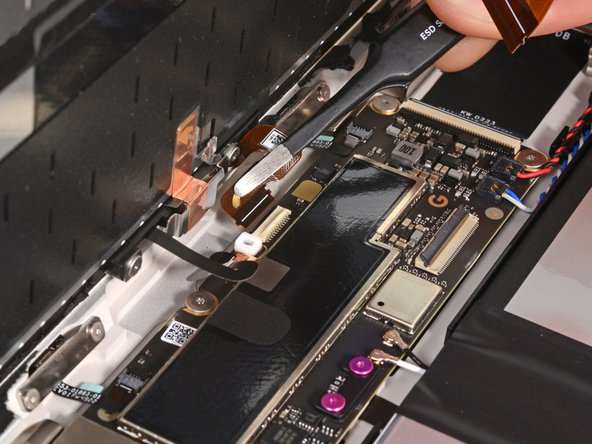
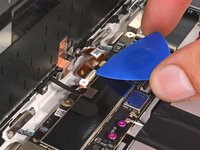
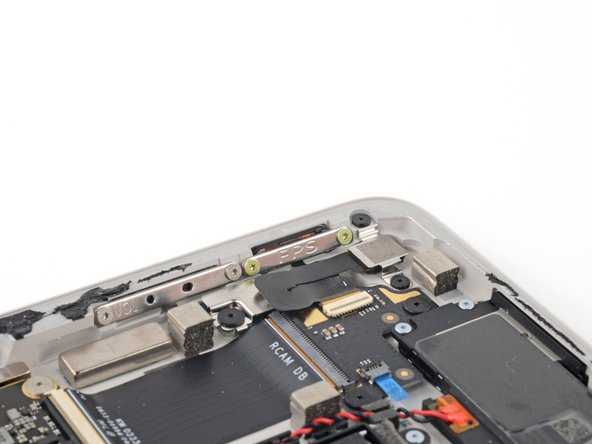
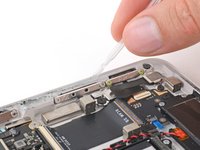
    • Use the point of a spudger or a clean fingernail to flip up the small locking flap on the inside edge (same side as the cable) of the screen cable ZIF connector.

    • Use tweezers or your fingers to pull the screen cable straight out of its socket.

  22. How to Open Your Google Pixel Tablet, Disconnect the front camera: passo 22, immagine 1 di 3 How to Open Your Google Pixel Tablet, Disconnect the front camera: passo 22, immagine 2 di 3 How to Open Your Google Pixel Tablet, Disconnect the front camera: passo 22, immagine 3 di 3
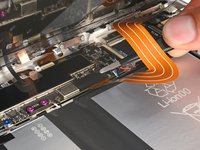
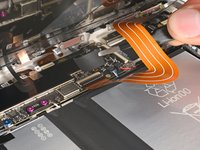
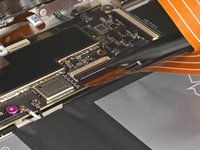
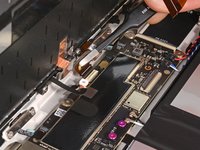
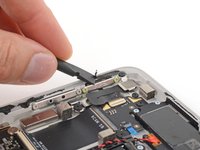
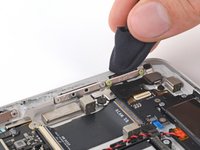
    • Use an opening pick to flip up the small locking flap on the outside edge (opposite the cable) of the front camera ZIF connector.

    • Use tweezers to pull the cable straight out of its socket.

    • During reassembly, be careful not to tear this cable, since it doesn't have much room to bend. Guide the connector into its socket with tweezers and lock the ZIF connector flap at the same time.

  23. How to Open Your Google Pixel Tablet, Disconnect the front sensor: passo 23, immagine 1 di 3 How to Open Your Google Pixel Tablet, Disconnect the front sensor: passo 23, immagine 2 di 3 How to Open Your Google Pixel Tablet, Disconnect the front sensor: passo 23, immagine 3 di 3
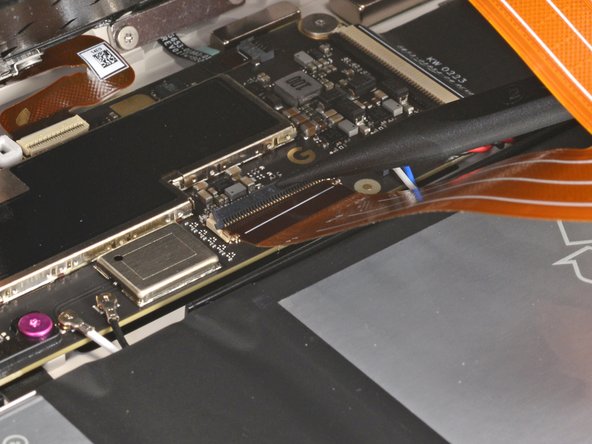
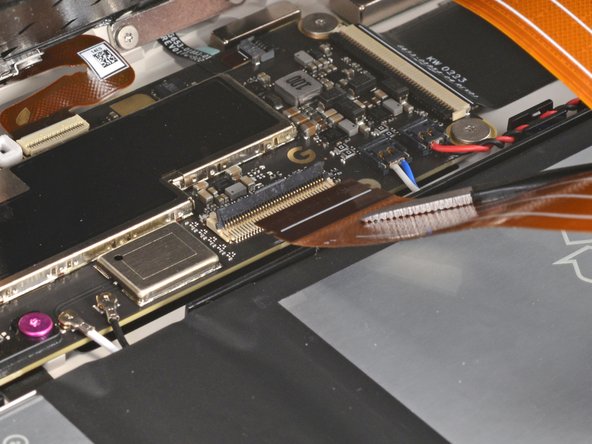
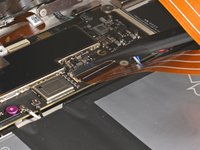
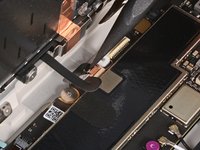
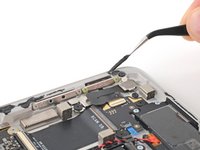
    • Use the point of your spudger or a clean fingernail to flip up the small locking flap on the inside edge of the front sensor connector.

    • Use tweezers to pull the cable straight out of its socket.

  24. How to Open Your Google Pixel Tablet, Remove the screen: passo 24, immagine 1 di 1
    • Remove the screen.

  25. How to Open Your Google Pixel Tablet, Prepare your frame for reassembly: passo 25, immagine 1 di 3 How to Open Your Google Pixel Tablet, Prepare your frame for reassembly: passo 25, immagine 2 di 3 How to Open Your Google Pixel Tablet, Prepare your frame for reassembly: passo 25, immagine 3 di 3
    • Follow the next two steps to clean your frame and prepare it for reassembly.

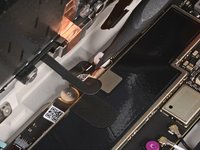
    • Use the flat end of your spudger or a clean fingernail to scrape up an edge of the leftover frame adhesive until you can grip it.

    • Use tweezers or your fingers to peel off large pieces of adhesive from the frame.

    • Repeat this process around the entire perimeter of the frame until there are no large pieces are left.

    • If you're reusing your screen, remove the old adhesive from it as well as the frame.

  26. How to Open Your Google Pixel Tablet: passo 26, immagine 1 di 3 How to Open Your Google Pixel Tablet: passo 26, immagine 2 di 3 How to Open Your Google Pixel Tablet: passo 26, immagine 3 di 3
    Attrezzo utilizzato in questo passaggio:
    Microfiber Cleaning Cloths
    $3.99
    • Fill a pipette or syringe with highly-concentrated isopropyl alcohol (over 90%) and apply a few drops to the edge of the frame.

    • Wrap a microfiber or lint free cloth around the flat end of your spudger and scrub the frame until it's clean. Use more isopropyl alcohol as you go.

    • If you're reusing your screen, clean its perimeter as well as the frame.

Conclusione

To reassemble your device, follow these instructions in reverse order.

Clay Eickemeyer

Membro da: 09/19/22

82.983 Reputazione

455 Guide realizzate

Team

Guide Team Membro di Guide Team

Staff

9 Membri

11.691 Guide realizzate

0Commenti sulla guida

Aggiungi Commento

Visualizza Statistiche:

Ultime 24 Ore: 0

Ultimi 7 Giorni: 0

Ultimi 30 Giorni: 5

Tutti i Tempi: 85