
How to Fix Logitech G403 Double Click Issue
Introduzione
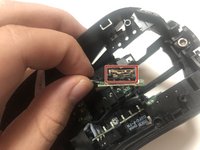
Vai al passo 1Use this guide to fix the mouse if there is a double click problem on your Logitech G403.
Double clicking is a very common problem for G403. If your warranty is finished, you can fix the mouse by yourself, rather than buy a new one.
You will need a precision screwdriver set to fix the mouse. However, in case your screwdriver doesn’t work, you can look at these pages for help:
Don’t forget to unplug your mouse before you start.
Cosa ti serve

-
-
Use a prying tool or your hand to take out both sides of the mouse feet.
-
-
-
Remove seven screws from the upper cover.
The center-left screw is not circled, you have circled the cabling pathway between the tiers. The screw to the right (2:30 from the center circle) was also missed when labeling. I am not sure if this was a mistake or not as I could not continue after removing the seven screws that I could actually see.
The circles are all correct including what you described as "cabling pathway", there's a screw there! You are also right about the 2 screws you mentioned. So there are a total of 9 screws!
-
-
-
Remove four screws from the mouse.
-
Remove the mouse click cover.
Could not find a decent way to remove these and bevel pops couldn’t save me from damaging the connection to the tier beneath this one. Decent tutorial, but perhaps I’m a little too much of an amateur because I could not remove this cover without damage.
-
-
-
Open the mouse switch using a prying tool or your hands.
how do you open these?
If the switch is oriented like in the picture, orient the flat portion of precision flathead screwdriver (or knife) horizontally. Go at the switch from the side. Wedge between the base and the "tab" part of the housing that has the gap as seen in the picture. Pry open. That should lift some of the housing off the base, then you can pry open the rest.
-
-
-
Find the place where more tension is needed.
-
Use a prying tool or your hand to give more tension to the copper piece, making sure the copper is curved.
This article helped to see what was going on. Need to gently pull up on the middle of the brass piece to curve it up a little bit, adding some tension to the "up" position. I accidentally pulled a bit too much and yanked the brass piece off, but thankfully it can just be mounted back on, nothing broken.
Well I just realized that I used a different approach then described in this fix -.- I removed the brass spring completly from the switch and then tried bending it back into the correct shape. I think thats a mistake since it gives you more room to fck up that sheet metal since its really thin and delecate. I think its better as it is describe here under step 8 to keep it in place and just bend it right there as needed
-


To reassemble your device, follow these instructions in reverse order.
To reassemble your device, follow these instructions in reverse order.
Annulla: non ho completato questa guida.
Altre 10 persone hanno completato questa guida.
Preparati per le riparazioni future
Acquista tutti


Team

York University, Team S1-G25, Allen Summer 2020 Membro di York University, Team S1-G25, Allen Summer 2020
YORK-ALLEN-SU20S1G25
1 Membro
2 Guide realizzate
10Commenti sulla guida
Worked, thanks
did you find a video about that? if you could send it pls or if it was some place where talk more about it
Worked!!! I had this problem for years, even stoped playing valorant bacause of that. Thanks
CR-V (+) 1.5mm
The PH00 size screwdriver fit perfectly. Tried these two sizes PH00 and PH0 also fit.
Rufus -
I dont know the mouse botton feels terrible now I even tried switching the springs from the lower left side button to the left mouse button, but now both of them feel muchy and do not have a sharp clicking point anymore. I think the double clicking of the left mouse botton is better, but the feel to it is terrible. I think if I would try to do this again, I would buy new switches so the D2FC-F-7N(G) for the left mousee button and then try to solder them. But this is tricky as well since you need to heat up all three legs of the button at the same time to remove it from the little pcb, but you dont need to be super careful with it, since the old switch is going to the trash anyway. But for me bending and fixing these little springs inside the mouse button felt really tidious and in the end pointless, because the mouse is not really repaired or like before after the fix.
Well I just realized that I used a different approach then described in this fix -.- I removed the brass spring completly from the switch and then tried bending it back into the correct shape. I think thats a mistake since it gives you more room to fck up that sheet metal since its really thin and delecate. I think its better as it is describe here under step 8 to keep it in place and just bend it right there as needed
Seems to have worked, thanks for giving my mouse some extra life.
There was actually only 5 screws for the back plate, you indicated 7, someone else said 9, but it is hard to tell which ones are which. 2 are down holes, the remaining 3 are the ones you'd expect.
The spring bending part I'd love to see a before and after close up, but seems like just guesstimateing works well enough.
Good guide.