Introduzione
Utilizza questa guida per sostituire lo schermo (o "display") del tuo Steam Deck OLED.
Ricorda di seguire le procedure generali di sicurezza contro le scariche elettrostatiche (ESD) durante la riparazione del tuo dispositivo.
Per completare la riparazione avrai bisogno dell'adesivo dello schermo sostitutivo.
Cosa ti serve
-
-
Spegni il tuo Steam Deck e scollega tutti i cavi.
 Chiedi a FixBot
-
-
-
Misura 3 mm dalla punta del plettro e segna questa distanza con un pennarello indelebile.
-
-
-
Prepara un iOpener e applicalo sul bordo superiore dello schermo per un minuto.
-
-
-
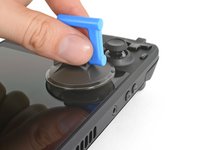
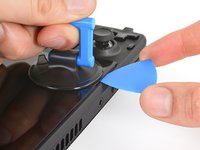
Applica una ventosa con manico all'angolo superiore sinistro dello schermo, il più vicino possibile al bordo superiore.
-
-
-
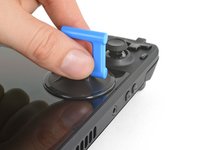
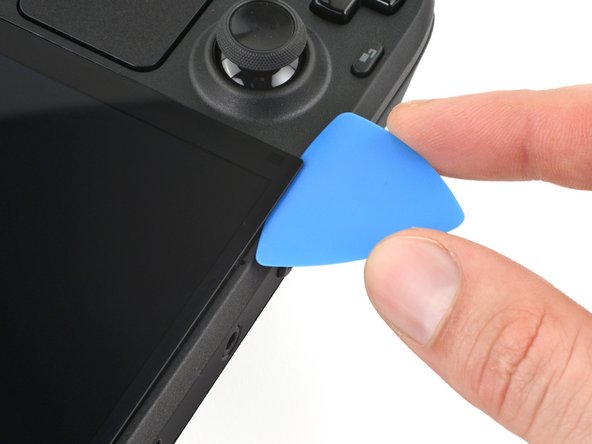
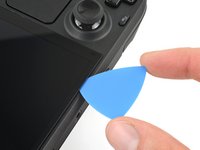
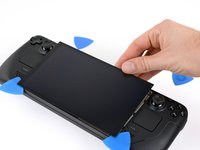
Tira la ventosa con manico con una forza decisa e costante per creare uno spazio tra lo schermo e il telaio.
-
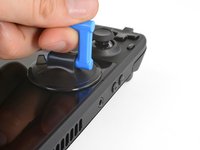
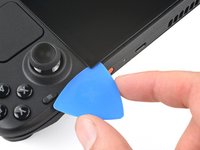
Inserisci la punta di un plettro di apertura nello spazio creato.
-
-
-
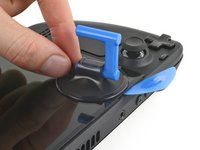
Tira la linguetta sul retro della ventosa con manico per rimuoverla dallo schermo.
-
-
-
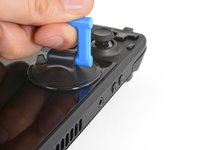
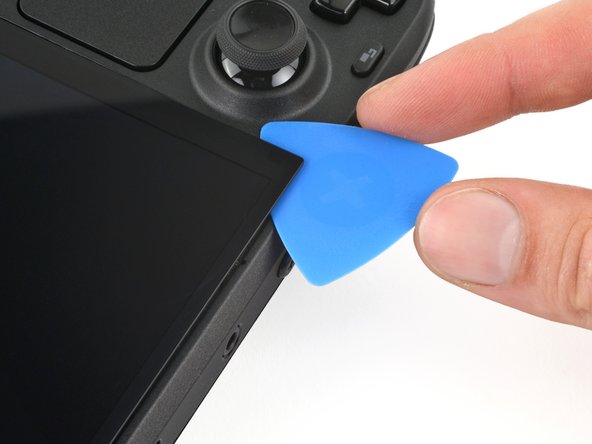
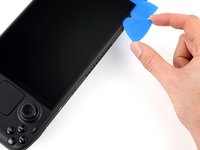
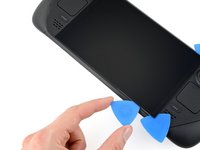
Lungo i bordi superiore e inferiore, non inserire il plettro per più di 3 mm (circa 1/8 di pollice) per evitare di danneggiare i sensori, il cavo dei sensori o il cavo dello schermo.
-
Lungo i bordi sinistro e destro, non inserire il plettro per più di 5 mm (circa 1/5 di pollice) per evitare di danneggiare il pannello dello schermo.
-
-
-
-
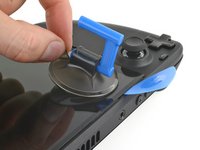
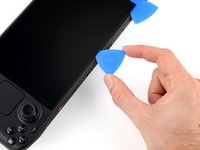
Ruota il plettro in modo che il suo bordo piatto si trovi tra lo schermo e il telaio.
-
Lascia questo plettro inserito per evitare che l'adesivo si risigilli.
-
-
-
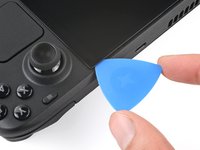
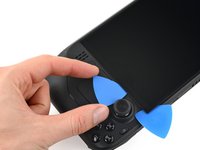
Inserisci un altro plettro nell'angolo in alto a sinistra.
-
Fai scorrere il plettro verso il pulsante di accensione per separare l'adesivo che fissa il bordo superiore dello schermo.
-
-
-
Ruota il plettro in modo che il bordo piatto si trovi tra lo schermo e il telaio.
-
Lascia inserito questo plettro per evitare che l'adesivo si richiuda.
-
-
-
Riscalda il bordo destro dello schermo per un minuto.
-
-
-
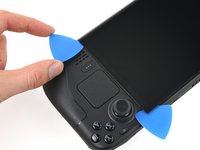
Inserisci un altro plettro appena sotto il joystick destro.
-
Fai scorrere il plettro verso l'angolo inferiore destro per separare l'adesivo del bordo destro.
-
Lascia il plettro inserito per evitare che l'adesivo si riattacchi.
-
-
-
Riscalda il bordo inferiore dello schermo per un minuto.
-
-
-
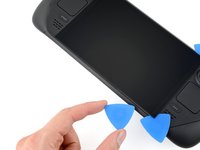
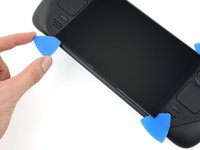
Inserisci un altro plettro nell'angolo inferiore destro lungo il bordo inferiore.
-
Fai scorrere il plettro fino all'angolo inferiore sinistro per separare l'adesivo del bordo inferiore.
-
Lascia il plettro inserito per evitare che l'adesivo si richiuda.
-
-
-
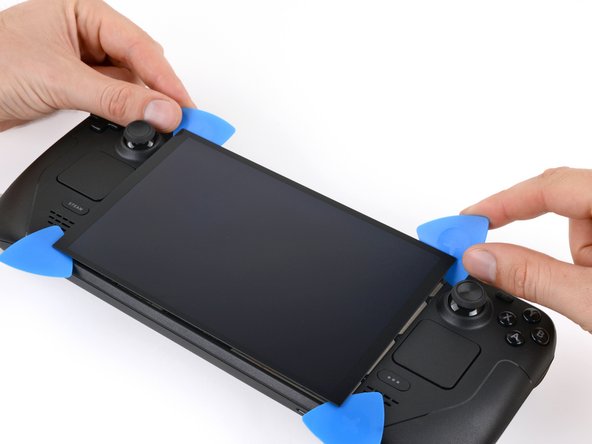
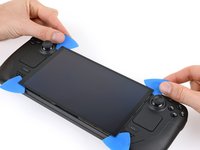
Afferra i due plettri lungo il bordo superiore.
-
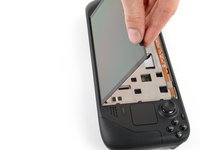
Fai leva per sollevare il bordo superiore dello schermo dal telaio finché non riesci ad afferrarlo.
-
-
-
Ribalta lo schermo oltre il bordo inferiore del telaio.
-
Sostieni lo schermo con una piccola scatola o un libro di circa 2,5 cm di spessore.
-
-
-
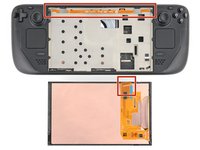
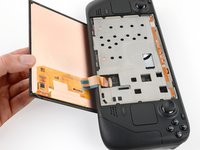
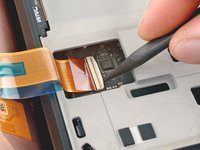
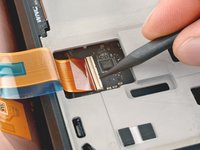
Usa la punta di uno spudger o un'unghia pulita per sollevare la linguetta di bloccaggio sul bordo esterno del connettore ZIF connettore ZIF.
-
-
Strumento utilizzato in questo passaggio:Tweezers$4.99
-
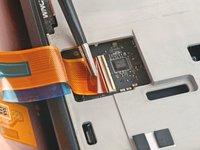
Usa le pinzette o le dita per afferrare la linguetta del cavo dello schermo e fai scorrere il cavo dritto fuori dalla sua presa per scollegarlo.
-


Per riapplicare l'adesivo e installare lo schermo, segui questa guida.
Porta i tuoi rifiuti elettronici presso un centro di riciclaggio certificato R2 o e-Stewards.
La riparazione non è andata come previsto? Prova delle soluzioni di base ai problemi, oppure rivolgiti alla nostra comunità Risposte per trovare aiuto.
Annulla: non ho completato questa guida.
Altre 11 persone hanno completato questa guida.
Un ringraziamento speciale a questi traduttori:
100%

Translation Bot ci sta aiutando ad aggiustare il mondo! Vuoi partecipare?
Inizia a tradurre ›

Team

11Commenti sulla guida
I successfully swapped matte/glossy OLED model screens this way. First boot after swap had a frazzled screen. Hard reset fixed the problem instantly.
Do I need to disconnect the battery cable from the motherboard when replacing the screen?
Is this compatible with limited edition?
the steps are the same for both OLED models. However the LE comes stock with a matte screen, standard model with glossy screen