
Sostituzione ventola Xbox 360 S

Introduzione
Vai al passo 1Sostituisci una ventola ammaccata, sporca e rumorosa per far funzionare l'Xbox 360 S come nuova.
Cosa ti serve
Ricambi

Strumenti


Mostra di più…
-
-
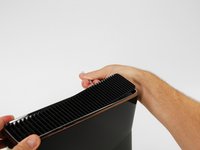
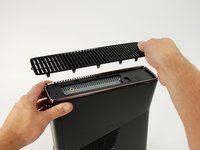
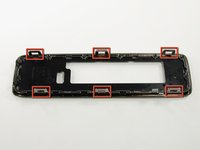
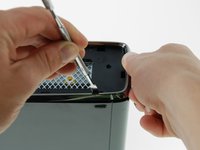
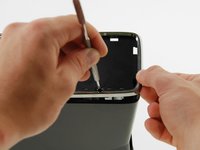
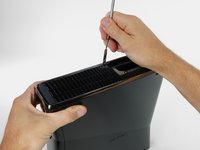
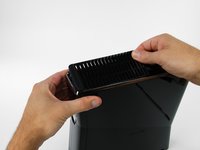
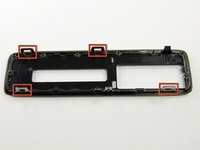
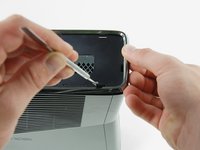
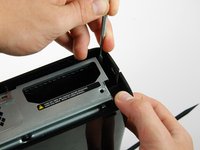
Nei seguenti passaggi, rimuoverai la grata superiore, assicurata al pannello dai tredici fermi di plastica mostrati nella foto.
-
-
-
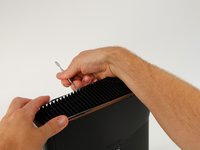
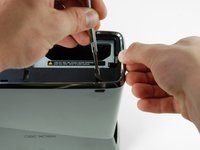
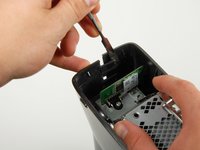
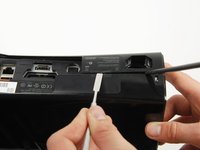
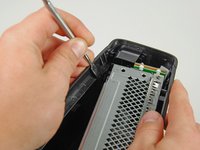
Orienta la console in modo che le parole "XBOX 360" sui lati siano rivolte verso l'alto e il frontalino sia rivolto verso sinistra.
-
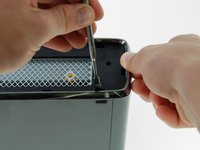
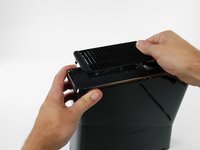
Inserire lo spudger di metallo tra lo sfiato superiore e la mascherina superiore vicino al retro della Xbox.
-
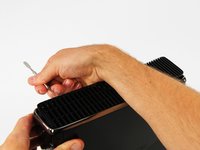
Ruota lo spudger verso l´esterno dalla console, facendo leva sul bordo dello sfiato della ventola fino a liberare i due fermagli di plastica.
This step is and the others following are to rough and not needed, simply put smth in between the lamellar and push it up with littlebit pressure thats better for the plastic parts.
-
-
-
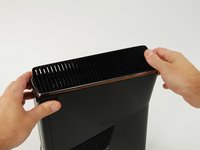
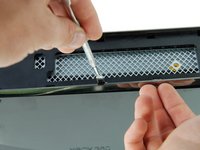
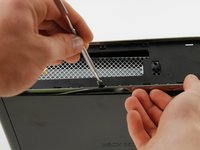
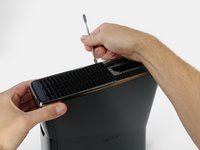
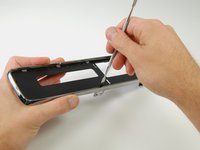
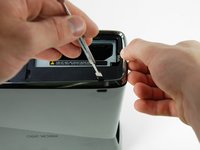
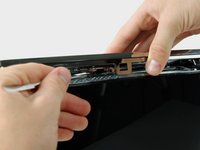
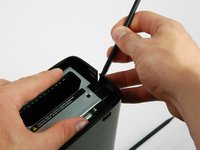
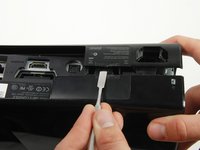
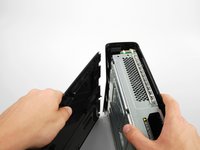
Inserisci lo spudger tra la grata di sfogo e la cornice superiore, lungo il lato sinistro della console.
-
Nello stesso modo descritto sopra, inizia a far leva sul lato sinistro dello sfiato superiore per staccarlo dalla cornice.
-
Continua a fare leva lungo tutto il lato sinistro per sganciare tutte le clip su questo lato.
-
-
-
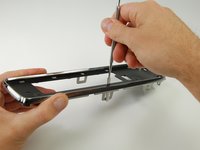
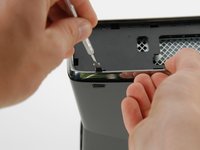
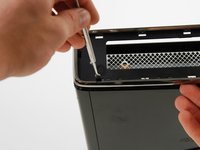
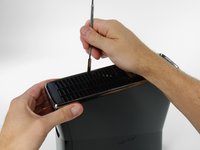
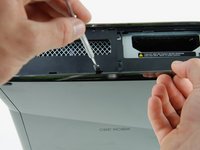
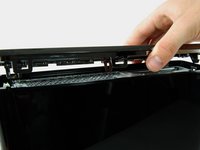
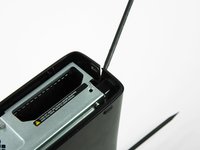
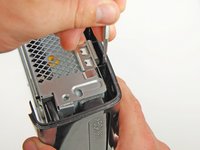
Inserisci uno spudger metallico attraverso la fessura più anteriore sul bordo sinistro del telaio superiore e tra il bordo inferiore del fermo e il case sinistro, come descritto sopra.
-
Ruota contemporaneamente lo spudger lontano dalla console e tira verso l'alto il telaio superiore per liberare il fermo.
So I got the fan filter thing off, but the black edge plate thing isn't coming off. All I did was warp my flathead screwdriver and scratch the console.
-
-
-
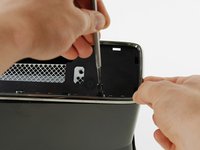
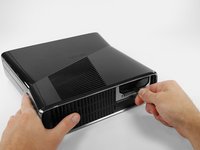
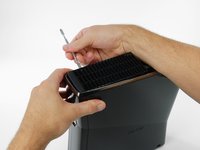
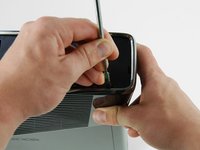
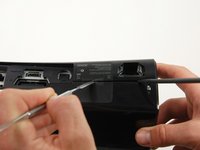
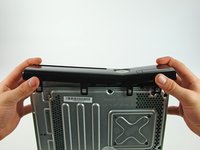
Ruota la console in modo che la parte posteriore dell'Xbox 360 S sia rivolta verso destra e il case destro sia rivolto verso di te.
-
Inserisci uno spudger metallico attraverso la fessura più posteriore sul bordo destro del telaio superiore e tra il bordo inferiore del fermo e il case destro.
-
Mentre sollevi il telaio superiore con le dita, ruota lo spudger lontano dalla console per liberare il fermo.
-
-
-
Spingi il blocco che tiene in posizione la copertura dell'hard drive verso sinistra.
-
Tira la copertura dell'hard drive lontano dalla console.
-
-
-
Afferra saldamente il tassello in tessuto etichettato con la dimensione dell'hard drive (ad es. "250 GB") attaccato all'hard drive.
-
Tira l'hard drive dritto fuori dalla console.
If i buy a new xbox 360 and replace the hardrive inside with my own, will i have my account and saves? or will i have to recover my account and start over?
You will still have your saves and account if you replace your hard drive in the new xbox
hola tengo un disco de laptop y quiero ponerle 100 juegos como puedo hacer la xbox me reconose el disco y todo lo configuro pero cuando conecto a mi pc para pasar los juejosel emulador no me deja
-
-
-
-
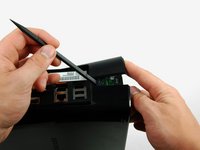
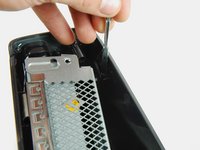
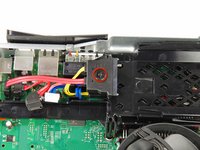
Inserisci uno spudger metallico attraverso la fessura vicino all'angolo posteriore sinistro del telaio inferiore.
-
Ruota lo spudger allontanandolo dal dispositivo mentre sollevi il telaio inferiore con l'altra mano.
These are pretty awkward to remove, but once you understand how they work its easy enough. The goal here is to slot the spudger THROUGH the gap of the silver tabs (visible in previous steps image, circled) and then pry. Put pressure against the wall of the Xbox case and push downwards, once you feel the spudger slot in, then apply force away from the Xbox and pull up a little with your free hand.
-
-
-
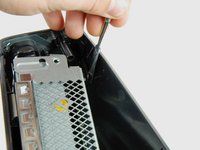
Inserisci uno spudger metallico attraverso la fessura centrale sinistra del telaio inferiore e tra il bordo inferiore del fermo e il case sinistro.
-
Solleva contemporaneamente il telaio inferiore e ruota lo spudger lontano dalla console per liberare il fermo.
-
In modo simile, libera il fermo della parte anteriore del bordo sinistro del telaio inferiore.
-
-
-
-
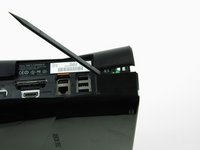
Individua i due fermi che collegano il case destro e sinistro lungo il bordo superiore della console, dietro la scheda Wi-Fi.
-
Mentre con una mano spingi i case sinistro e destro l'uno lontano dall'altro, fai leva sui fermi con uno spudger metallico per staccarli dal case.
-
-
-
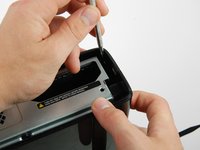
Inserisci il bordo piatto di uno spudger metallico tra i case sinistro e destro nel punto dove era l'adesivo di garanzia.
-
Fai leva sul case sinistro verso l'alto per formare uno spazio tra i due case e inserisci lo spudger verso il case sinistro.
-
Ruota lo spudger verso l'alto per liberare l'ultimo fermo.
if you make a hole right here like the link`s picture you can boot the lock
As the user above me said, please avoid doing it like shown in the guide. It just didn’t work on my Xbox (unless your goal is to destroy the plastic case). Instead, pick some small needle like object (the spudger was too short for this, I used the SIM bit of my iFixit driver kit) and find the right spot on the big sticker which is on the left in the pictures shown in the guide. That spot is just between the text and the column of logos (Dolby Digital, etc.) (https://team-xecuter.com/slim/slim_secre..., picture not mine). Poke it (don’t be too gentle, you have to apply some force) and you will hear the clip release.
Both the above links are dead, i used this YouTube video which shows you the process of getting the hidden clip
I was able to open it by pushing on the sticker to unclamp the clip while another person helped me pull open the case.
Here is a Video that shows the small hole behind the sticker, ist in german but ist good to see how to open that hidden clip easiely.
None of the above options by the other commenters worked for me, but I found a video that points out there's a little hole right in the middle of the "SEE PRINTED MANUAL" and "UL" on the sticker under the Xbox 360 warranty sticker that I stuck a sewing needle into and it unlatches the latch: https://youtu.be/7mC8ckDvKqc?si=CVyCszpF...
-
-
-
Gira la console in modo che la parte inferiore sia rivolta verso l'alto.
-
Sgancia un fermo nell'angolo anteriore sinistro del bordo inferiore che fissa il case sinistro al pannello frontale.
-
Ruota il case sinistro lontano dal dispositivo per liberare gli ultimi due fermi interni.
-
Rimuovi il case sinistro.
-
-
-
Sgancia il fermo vicino all'angolo anteriore destro del bordo superiore che fissa il case destro al pannello frontale.
There are 4 black screw that has to be removed before you can detach the other cover. Please note
Sorry, there 5screws, one in the middle and 4 at the edges
-
-
-
Solleva il bordo sinistro del pannello frontale verso l'alto per sganciare gli ultimi due fermi che fissano il pannello frontale al case destro.
-
Stacca il pannello frontale dal resto del dispositivo.
There isn’t 2 clips there is 4 clips
I tore this on reassembly and it was barely held together. Be careful!
-
-
-
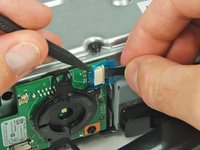
Usando uno spudger o un'unghia, solleva la linguetta trasparente blu dal connettore.
-
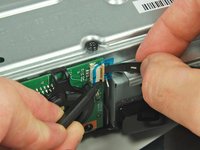
Fai scorrere la linguetta di blocco sul connettore del cavo della scheda dell'interruttore di accensione verso la parte superiore della console.
-
Tira il cavo dell'interruttore di accensione dritto fuori dal connettore.
-
Il pannello frontale è ora staccato dal resto della console.
-
-
-
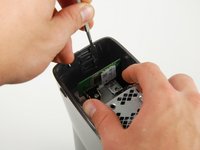
Rimuovi le due viti Torx T8 da 5,6 mm che fissano il modulo RF al case metallico.
On my disassembly during this part, I found the T9 Torx to be too big and had to use the T8 Torx instead.
The correct size is T8!
-
-
-
Tira la scheda direttamente lontano dall'Xbox per rimuoverla.
It may not be required but recommended. As you move the xbox around you could break this part. Removing it and placing it in a safe place keeps that from happening.
-
-
-
Rimuovi l'unica vite Torx T10 che fissa la scheda wireless.
-
Estrai la scheda Wi-Fi dalla console.
-
-
-
Rimuovi l'ampio adesivo di garanzia bianco dal telaio metallico per esporre una vite.
-
-
-
Rimuovi le cinque viti Torx T10 da 55,5 mm che fissano il case destro al telaio metallico.
I opened an Xbox 360 S manufactured in 2010. These 5 screws are needed to be undone in order to complete step 30. I didn't know about the one under the sticker so I ended up breaking the housing as a result. I'd appreciate it if you could make a note to step 30 pointing you to this step if you are having trouble taking the side off, as it is highly likely that these screws are the reason.
-
-
-
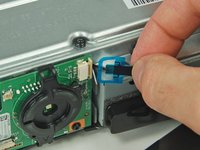
Scollega il cavo dati dell'unità ottica dalla parte posteriore dell'unità ottica.
-
Scollega il cavo di alimentazione dalla parte posteriore dell'unità ottica.
-
-
-
Solleva l'unità ottica fuori dall'Xbox.
Is there a specific Optical Drive that Microsoft uses in these or can I upgrade my drive?
i took my drive out but when installed my replacement it would not work
WAS thinking of possibly trying to repair my son's Xbox 360S, by replacing the optical drive, but after looking at all the spudger steps to get to the drive and then your comment that the replacement might not actually work... forget about it! I ain't going to all that work for possibly nothing... t'ain't worth it!
Anyone want a perfectly working Xbox 360S with a drive the spins game discs upon ejection? We've already bought a replacement, so this unit is for sale... name your price.
Luposian -
In regards to davidgardner301 comment there is a extra step they. Didn't show on this replacement guide in order for your new disk drive to work you will need to remove the origional board connected to thje origional drive that came with the system and soler that onto the new one its a tricky process however its a step most people over look
Without the origional board the xbox will not accept the replacement drive only because each disk drive is coded to work with tat soecific xbox only so your out of luck if you already. Tossed out your old disk drive
The DVD drives are coded to the Motherboard. If you buy the same exact drive to replace the broken one. You will still need to either 1) transfer the DVD circuit board OR 2) get the Firmware from the old DVD drive using a PC and then transfer it to the New DVD. There are website regarding this procedure if you want to look it up.
-
-
-
Rimuovi l'unica vite Torx T10 da 11,3 mm di colore oro dal foro contrassegnato con "G."
-
-
-
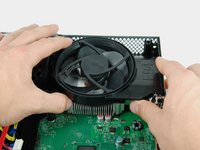
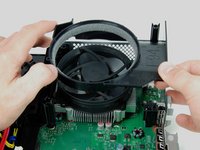
Solleva il supporto del disco rigido fuori dal telaio metallico.
I have a 4GB Xbox 360 slim and I bought a 500GB hard drive for it. I pushed the hard drive in its place and after I heard that click, I pushed it a little bit more to be shure that it's in place. I noticed that the hard drive bracket (the slide that holds the hard drive) it's elastic: after the hard drive is inserted, it wobbles (maybe to prevent hdd damage when the xbox is moved).
My question is: how does the hard drive bracket work? is there a metal spring in its mechanism that allows it to wobble? Did I make any damage to it because I pushed the hard drive to be sure that it is in place? I don't want to teardwon my console to find that out.
Thank you!
-
-
-
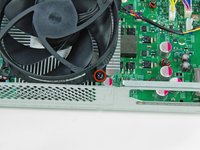
Scollega il cavo della ventola staccando il suo connettore dalla scheda logica.
-


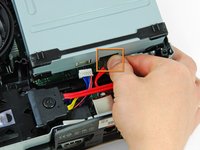
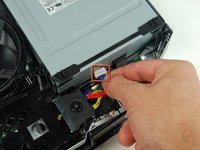


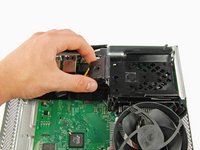


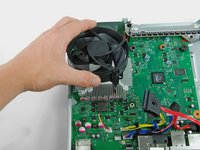
Per rimontare il tuo dispositivo, segui queste istruzioni in ordine inverso.
Per rimontare il tuo dispositivo, segui queste istruzioni in ordine inverso.
Annulla: non ho completato questa guida.
Altre 107 persone hanno completato questa guida.
Un ringraziamento speciale a questi traduttori:
100%


Questi traduttori ci stanno aiutando ad aggiustare il mondo! Vuoi partecipare?
Inizia a tradurre ›

8Commenti sulla guida
Do I need to buy a new fan, or does this tutorial basically use a method of cleaning things out to fix the fan?
A bit late I know, but if you’re getting this deep into the system, put in a new fan.
This tutorial was perfect.
Thank you Mr. Newsom!
what wrong with x360 s
So could I water cool this thing?
You probably could if you can get the waterblock to fit into the xbox. but the radiator and fans might be tricky unless you just have those outside the case.
i just used this guide to clean out my 2010 360s, RIP 360 marketplace
Great run through . My fan was so noisy. Sorted and now quiet as a mouse .
Many thanks
RIP 360 marketplace . Will be sadly missed from 24th july 2024
The motherboard and the disc drive's PCB (circuit board) are paired. If the drive's PCB is fine, which it most likely is, then all you need to do is swap out the PCB on the new drive with your old one before installing it. No motherboard replacement required.
Only in the unlikely case that the drive's PCB is fried will you require a full drive and motherboard replacement.
SirStephenH - Replica