
Nintendo 3DS 2015 D Pad Replacement
Introduzione
Vai al passo 1If you aren't getting full range of motion on the D pad replacing may fix it. Go slow. There are several delicate ribbons cables. Make sure that components are completely disconnected before you pull them apart.
Cosa ti serve


-
-
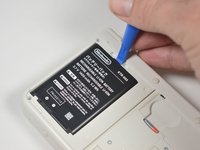
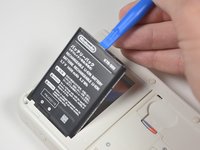
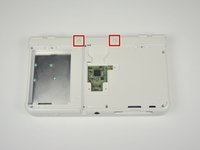
Unscrew the two 3mm Phillips #1 head screws along the top edge of the device.
-
-
-
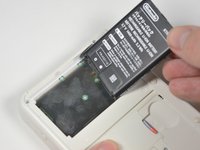
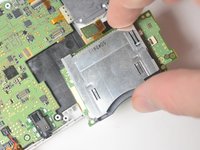
Unscrew the three 3mm Y0 screws along the right and bottom of the SD card reader.
-
-
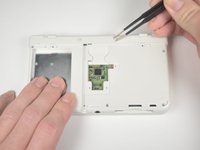
Attrezzo utilizzato in questo passaggio:Tweezers$4.99
-
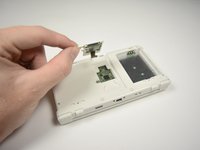
Reorient the device so that the game slot now faces you.
-
Remove the two rubber bumpers along the top of the device using tweezers.
-
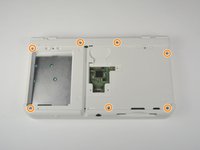
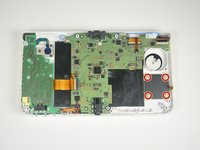
Unscrew the seven 6mm Phillips #00 screws along the top and bottom of the 3DS.
-
-
-
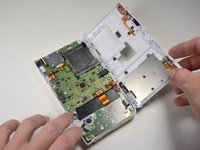
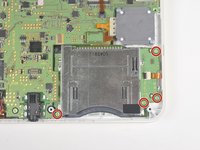
Locate the gamecard reader near the bottom right corner of the motherboard.
-
Unscrew the four 3mm Phillips #00 screws along the edge of the gamecard reader.
-
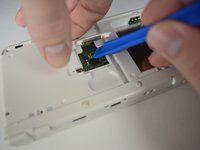
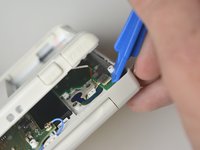
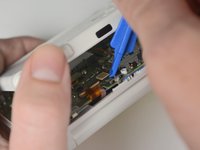
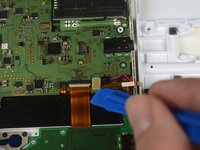
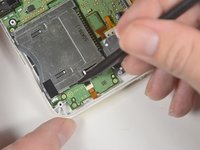
Lift the black latch on the ZIF connector along the right side of the reader using a plastic opening tool.
-
-
-
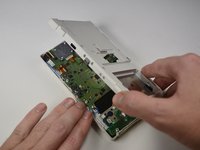
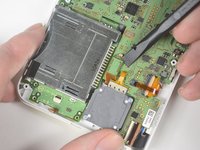
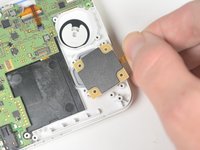
Remove the four 3mm Phillips #00 screws from the four corners of the D pad board.
-
Lift the D pad board out of the device.
-


To reassemble your device, follow these instructions in reverse order.
To reassemble your device, follow these instructions in reverse order.
Preparati per le riparazioni future
Acquista tutti


Team

Cal Poly, Team 4-6, Livingston Fall 2016 Membro di Cal Poly, Team 4-6, Livingston Fall 2016
CPSU-LIVINGSTON-F16S4G6
4 Membri
40 Guide realizzate
4Commenti sulla guida
Thanks for pointing that out! I think it is fixed now.
-Tyler