Salta al contenuto principale
Unisciti alla Community delle riparazioni - Crea un account
How to Open the Logitech G903

How to Open the Logitech G903

Dominik Schnabelrauch

Dominik Schnabelrauch e 6 altri collaboratori

Ultimo aggiornamento il 17 lug 2025

15 - 30 minuti
Moderato

Introduzione

Vai al passo 1

Use this guide to open a Logitech G903 for cleaning or repair.

Cosa ti serve

Strumenti

Mostra di più…

  1. How to Open the Logitech G903, Turn off the mouse: passo 1, immagine 1 di 2 How to Open the Logitech G903, Turn off the mouse: passo 1, immagine 2 di 2
    • Before you begin, flip the mouse's power switch into the red OFF position.

    • A red indicator should be visible beneath the switch.

    • Unplug all cables from your mouse.

    • Throughout your repair, it may be helpful to lay your mouse on a soft cloth to stabilize it and prevent damage while you work.
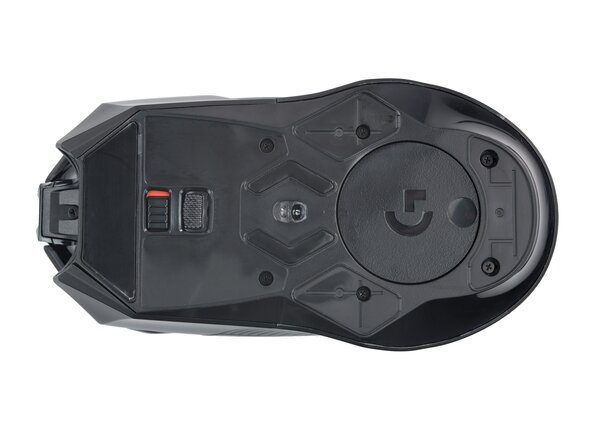
  2. How to Open the Logitech G903, Heat the mouse foot: passo 2, immagine 1 di 1
    • The feet are secured to the bottom of the mouse with strong adhesive. In order to cleanly remove them, the adhesive needs to be thoroughly heated.

    • Heat an iOpener and lay it on the mouse feet for one minute to heat the adhesive.

    • Alternatively, you can use a hair dryer on the Low heat setting to soften the adhesive.

    • If you're using a hair dryer, only heat the feet a few seconds at a time or you may warp the plastic shell.

  3. How to Open the Logitech G903, Separate the mouse foot adhesive: passo 3, immagine 1 di 3 How to Open the Logitech G903, Separate the mouse foot adhesive: passo 3, immagine 2 di 3 How to Open the Logitech G903, Separate the mouse foot adhesive: passo 3, immagine 3 di 3
    • The feet have two layers—a rubberized one and an adhesive pad underneath.

    • If you're reusing the feet, be very careful not to separate the two layers or damage the feet.

    • Slide the tip of an opening pick under an edge of the bottom mouse foot, making sure it goes under both the foot and its adhesive pad.

    • If the foot feels stuck, apply more heat and try again.

    • Gently slide your pick farther under the foot and lift until you can grip it with your fingers.

    • Use your fingers to peel up and remove the foot.

  4. How to Open the Logitech G903, Clean off the old adhesive: passo 4, immagine 1 di 3 How to Open the Logitech G903, Clean off the old adhesive: passo 4, immagine 2 di 3 How to Open the Logitech G903, Clean off the old adhesive: passo 4, immagine 3 di 3
    • If the rubber layer separated from its adhesive pad:

    • Slide the flat end of a spudger under an edge of the adhesive. If the adhesive seems stuck, you may need to heat it further.

    • Peel the adhesive off.

    • To install a new foot:

    • If any of the feet got damaged during removal or separated from their adhesive pads, replace them.

    • Use a spudger to carefully scrape up and remove any remaining adhesive bits.

    • Use isopropyl alcohol and a microfiber cloth to thoroughly clean all adhesive residue from the foot recesses. Allow the surface to completely dry.

    • Remove the feet from their backing and firmly press them into place.

  5. How to Open the Logitech G903, Remove the pentagonal mouse feet: passo 5, immagine 1 di 2 How to Open the Logitech G903, Remove the pentagonal mouse feet: passo 5, immagine 2 di 2
    • Repeat the process to remove the two pentagonal mouse feet on the left and right sides.

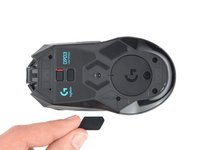
  6. How to Open the Logitech G903, Heat the Logitech sticker: passo 6, immagine 1 di 1
    • The Logitech sticker on the bottom of the mouse is sensitive to heat and crumbles easily. If you want to keep that sticker intact, apply as little heat as possible and remove the sticker carefully.

    • If you don't want to remove the sticker all the way, you can puncture it with a screwdriver where the two screws are located beneath it.

    • Heat an iOpener and apply it to the Logitech sticker for one minute to soften its adhesive.

    • Alternatively, you can use a hair dryer on the Low heat setting to soften the adhesive.

    • If you're using a hair dryer, only heat the sticker a few seconds at a time or you may warp the plastic shell.

  7. How to Open the Logitech G903, Remove the Logitech sticker: passo 7, immagine 1 di 3 How to Open the Logitech G903, Remove the Logitech sticker: passo 7, immagine 2 di 3 How to Open the Logitech G903, Remove the Logitech sticker: passo 7, immagine 3 di 3
    • If you want to reuse the sticker, be delicate and work slowly.

    • Slide the tip of an opening pick under an edge of the Logitech sticker.

    • Gently slide your pick farther under the sticker and lift until you can grip it with your fingers.

    • If the sticker feels stuck, apply more heat and try again.

    • Use your fingers to peel up and remove the sticker.

    You don't need to fully remove this sticker, all you need to do is flip the thinnest part (like till you reach the part like in the photo above), put the screwdriver in, unscrew the screw, take the screw out and stick the sticker back on. Do the same with the other screw and during the assembly.

    Adam “Mavi” Kroupa - Replica

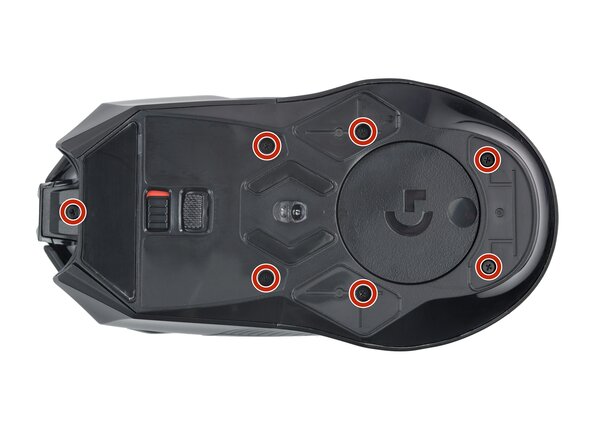
  8. How to Open the Logitech G903, Remove the case screws: passo 8, immagine 1 di 2 How to Open the Logitech G903, Remove the case screws: passo 8, immagine 2 di 2
    • Use a Phillips screwdriver to remove the seven 4.5 mm screws securing the two halves of the mouse together.

    • On older models, the top middle screw may be a Torx T5.

    You'll need a T5 bit to remove the seventh top screw.

    Olivier Charbonneau - Replica

    It used to be that on the older models, but on the newer one I just opened it had a Philips for that last one too, just like the guide shows.

    Remy Monsen -

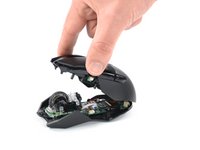
  9. How to Open the Logitech G903, Open the mouse: passo 9, immagine 1 di 3 How to Open the Logitech G903, Open the mouse: passo 9, immagine 2 di 3 How to Open the Logitech G903, Open the mouse: passo 9, immagine 3 di 3
    • Don't completely separate the two halves yet—they're still connected together by a delicate cable.

    • Swing the top case towards the rear of your mouse to access the internals.

    • Keep the top case lifted with one hand, or use something heavy to support it while you work.

    • Be careful not to strain the cable connecting the two halves.

  10. How to Open the Logitech G903, Disconnect the interconnect cable: passo 10, immagine 1 di 2 How to Open the Logitech G903, Disconnect the interconnect cable: passo 10, immagine 2 di 2
    • Use a spudger or clean fingernail to flip up the hinged locking flap on the interconnect cable ZIF connector.

  11. How to Open the Logitech G903: passo 11, immagine 1 di 2 How to Open the Logitech G903: passo 11, immagine 2 di 2
    • Use tweezers or your fingers to grip the interconnect cable by its pull tab and slide it out of the socket.

  12. How to Open the Logitech G903, Disconnect the battery: passo 12, immagine 1 di 3 How to Open the Logitech G903, Disconnect the battery: passo 12, immagine 2 di 3 How to Open the Logitech G903, Disconnect the battery: passo 12, immagine 3 di 3
    • Use a pair of tweezers to firmly grasp the sides of the battery connector.

    • Hold the tweezers with your fingers as close to the connector as possible to get a firm hold.

    • Pull the connector up and out of its socket, gently rocking it back and forth to loosen it.

  13. How to Open the Logitech G903, Remove the top half of the mouse: passo 13, immagine 1 di 1
    • Remove the top half of the mouse.

Conclusione

Compare your new replacement part to the original part—you may need to transfer remaining components or remove adhesive backings from the new part before installing.

To reassemble your device, follow the above steps in reverse order.

Take your e-waste to an R2 or e-Stewards certified recycler.

Repair didn’t go as planned? Check out our Answers community for troubleshooting help.

Altre 20 persone hanno completato questa guida.

Preparati per le riparazioni future

Acquista tutti

Team

iFixit Membro di iFixit

Staff

119 Membri

22.101 Guide realizzate

1Commento della guida

Would this let me remove the left and right buttons to clean under? Because if there's an easier way to clean this godforsaken design I'd rather start there ;P

CrazineX UnbounD - Replica

Aggiungi Commento

Visualizza Statistiche:

Ultime 24 Ore: 17

Ultimi 7 Giorni: 113

Ultimi 30 Giorni: 436

Tutti i Tempi: 30,181