Introduzione
Segui questa guida per sostituire le cover degli stick analogici consumate o rotte nel tuo controller DualShock 4 modello CUH-ZCT1U.
Nota che le cover degli stick analogici non sono responsabili della deriva degli stick. Se gli stick analogici non funzionano come previsto, potresti dover pulire o sostituire il modulo degli stick analogici.
Cosa ti serve
-
-
Controlla il numero di modello sul retro del controller. La guida è stata scritta usando il modello CUH-ZCT1U. Se hai un altro modello, la procedura presente in questa guida e le parti sostitutive potrebbero essere leggermente diverse.
-
-
Attrezzo utilizzato in questo passaggio:Microfiber Cleaning Cloths$3.99
-
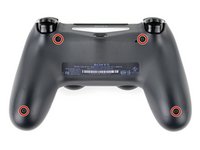
Usa un cacciavite a croce Phillips per rimuovere le quattro viti da 6,4 mm che tengono chiusa la scocca posteriore.
to re-torque these PH00 screw... i found 19Ncm to be about the max. (since 27Ncm was too much)
-
-
-
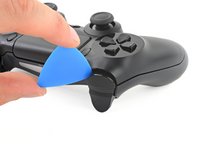
Usa un plettro in plastica per fare leva su ogni angolo del tasto L1 dalla parte della scocca anteriore.
-
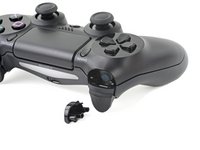
Rimuovi il pulsante.
-
-
-
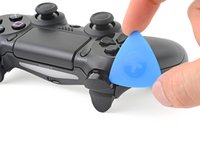
Usa il tuo plettro in plastica per fare leva e rimuovere il tasto R1, esattamente come hai fatto per il tasto L1.
-
-
-
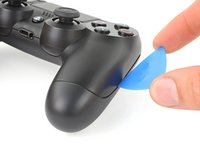
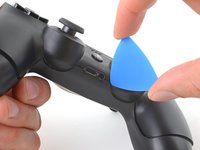
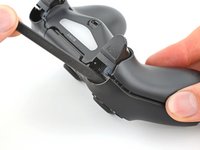
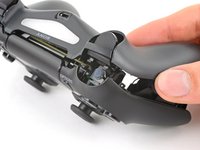
Inserisci il plettro tenendolo verso il basso tra la scocca anteriore e la scocca posteriore, a metà tra il manico e i pulsanti azione.
-
Fai scorrere il plettro verso il manico fino a sganciare la prima clip.
-
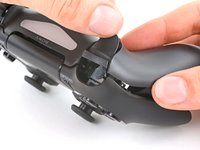
Ripeti questa procedura dall'altro lato del controller per sganciare la seconda clip.
-
-
-
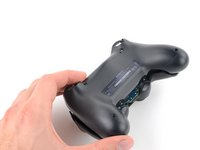
Altre due clip agganciano la scocca posteriore; queste si trovano vicino alla porta di estensione e al jack cuffie.
-
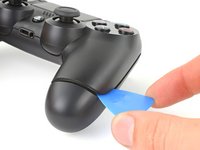
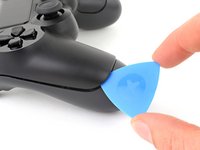
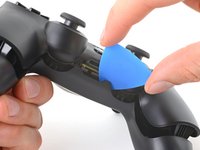
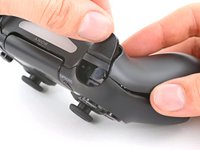
Inserisci il plettro fra la scocca anteriore e quella posteriore in uno dei due lati delle porte.
-
Ruota il plettro così da sganciare la sezione della scocca posteriore da quella anteriore.
-
-
-
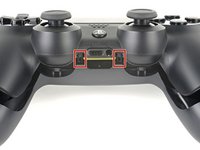
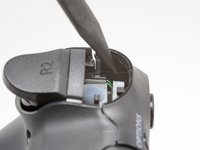
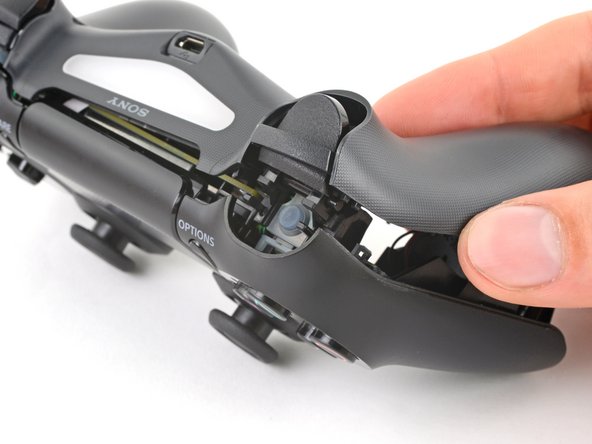
Identifica le clip guardando attraverso lo spazio al di sopra dei grilletti L2 o R2.
Ah, well perhaps I may have broken a tab by not removing the buttons but if be more worried about breaking the buttons
-
-
-
-
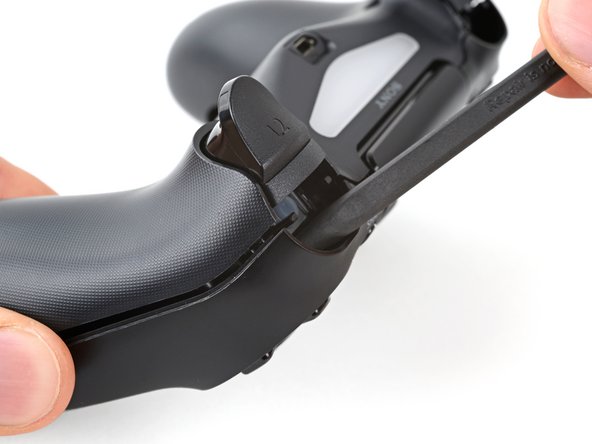
Inserisci la punta di uno spudger attraverso lo spazio al di sopra del grilletto R2 e spingi la clip verso l'esterno.
-
Mentre spingi la clip verso l'esterno, allontana lentamente la scocca posteriore da quella anteriore finché non senti che sono prossime a separarsi.
-
Ripeti la procedura per la clip vicina al grilletto L2.
-
-
-
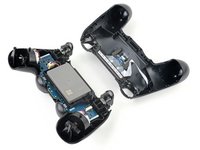
Premi il grilletto R2 e fai scorrere oltre questo la scocca posteriore.
-
-
Attrezzo utilizzato in questo passaggio:Tweezers$4.99
-
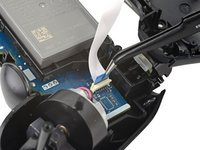
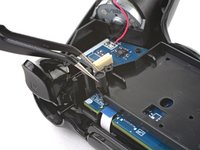
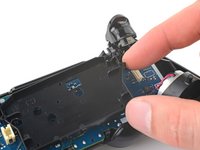
Usa delle pinzette o le dita per rimuovere il cavo di interconnessione tirando verso l'alto la linguetta di plastica blu.
On the model CUH-ZCT2E the circuit board is mirrored so that the connection is on the left side. When reassembling the blue tab should be facing inwards.
I just left the interconnect cable attached and held things out of the way when I put in the new battery
I melted the connector with my soldering iron while removing the analog, is there a way to replace it? I don't know how many pins it has or the model to buy.
-
-
-
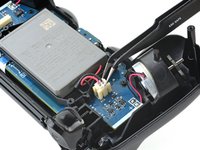
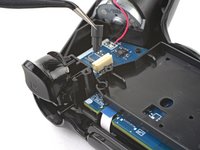
Usa una pinzetta o le dita per prendere e disconnettere il jack del cavo batteria dalla scheda madre.
-
-
-
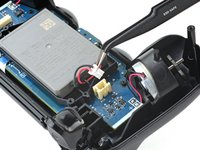
Prendi e rimuovi l'estensione del tasto reset dal suo alloggio nella staffa della batteria.
On the model CUH-ZCT2E this is part of the battery bracket and not removable. Just skip this step.
-
-
-
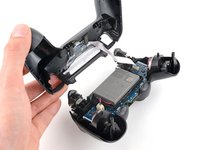
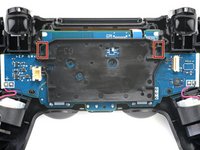
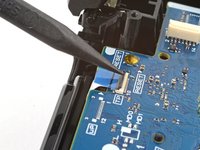
Individua le due clip che fissano la staffa della batteria alla scheda madre.
-
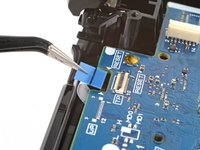
Inserisci la punta del tuo spudger nell'apertura dietro la clip della staffa destra.
-
Premi la clip per disinserirla dalla scheda madre.
-
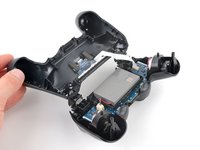
Solleva il bordo destro della staffa della batteria.
On the model CUH-ZCT2E the battery bracket is not secured by clips but by a PH #00 screw mid height on the right half of the battery bracket. Just remove the screw and for the next step lift the battery bracket straight up.
-
-
Attrezzo utilizzato in questo passaggio:Tweezers$4.99
-
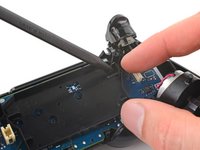
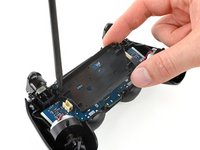
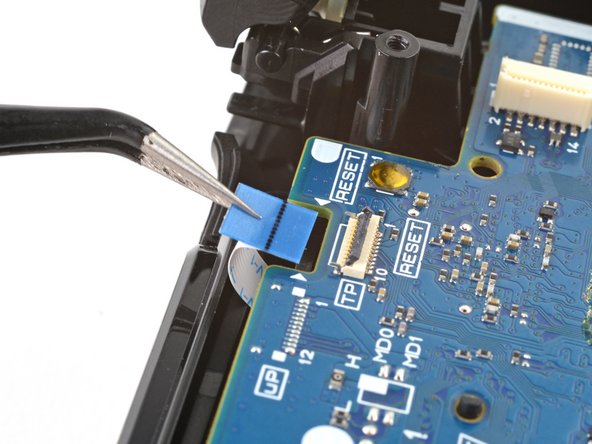
Usa la punta del tuo spudger per sollevare l'aletta di bloccaggio che fissa il connettore ZIF del cavo del touch pad.
-
Usa delle pinzette o le dita per scollegare il cavo utilizzando la sua linguetta blu.
-
-
-
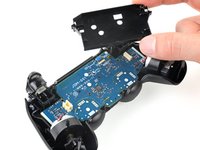
Utilizza il cacciavite a croce Phillips per rimuovere la vite da 6,4 mm che fissa la scheda madre.
-
-
-
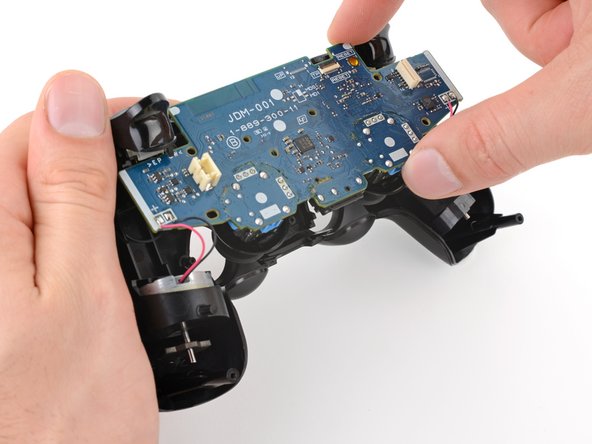
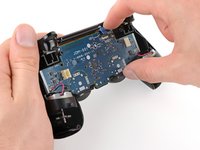
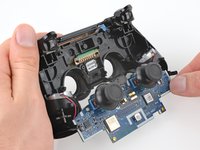
Solleva la scheda madre dal telaio centrale.
-
Fai passare le coperture degli stick analogici attraverso i loro tagli nella parte anteriore del case.
-
Capovolgi la scheda madre sulla parte inferiore del controller, lasciando attaccati i cavi del motore di vibrazione.
-
-
-
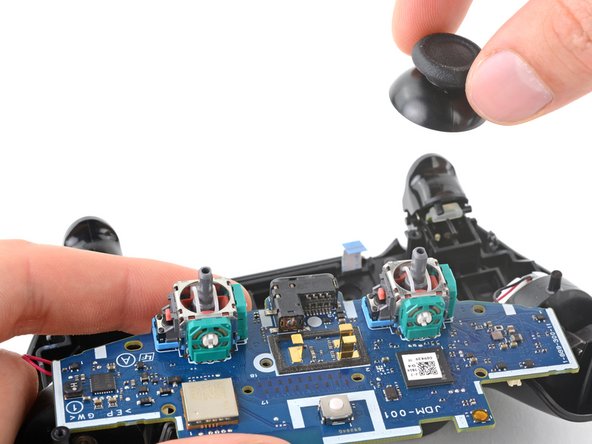
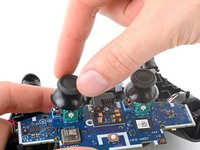
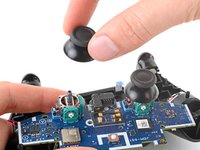
Afferra e tira le cover degli stick analogici direttamente via dai loro moduli.
-


Per rimontare il tuo dispositivo, segui le istruzioni nell'ordine inverso.
Porta i tuoi rifiuti elettronici presso un riciclatore certificato R2 o e-Stewards.
La riparazione non è andata come previsto? Prova qualche risoluzione dei problemi di base o chiedi aiuto alla nostra comunità Risposte.
Per rimontare il tuo dispositivo, segui le istruzioni nell'ordine inverso.
Porta i tuoi rifiuti elettronici presso un riciclatore certificato R2 o e-Stewards.
La riparazione non è andata come previsto? Prova qualche risoluzione dei problemi di base o chiedi aiuto alla nostra comunità Risposte.
Annulla: non ho completato questa guida.
Altre 137 persone hanno completato questa guida.
Un ringraziamento speciale a questi traduttori:
100%


Questi traduttori ci stanno aiutando ad aggiustare il mondo! Vuoi partecipare?
Inizia a tradurre ›

Team

14Commenti sulla guida
So I followed all the steps, got the sticks in. But when I put the controller back together it Wouldent turn on. Do you guys have any clue as to what it could be?
Same exact thing happened to me, just wouldn't turn back on
Me too and all the reconnected cables are connected correctly, but it just won’t work.
Andy Hui -
Hope you guys still keep the parts, since the problem can be resolved by following the post below successfully. :)
Andy Hui -
i think you didn't put a wire in
Does this fix the issue with worn out sticks? Mine currently at idle will get stuck slightly pressing to the left, (in game, I'll be cruising left at a snail's pace) and pressing up/forward or sometimes pressing to the right doesn't fully work (in game this causes me to either not move at all, or move at about 2/3rds speed).
I've had them for about two years now, and they have seen some rigorous use, I tell you what. It is beginning to affect gameplay pretty badly, though.
Thank you for the guide - it helped me fix a beaten up DS4 controller I found on the flea market. However, it would be nice to explain a bit more in detail how to crack the case pieces open. Some detailed pictures with the different inside clips and hinges would be nice. Also, there is no explanation as to how to assemble the L2/R2 triggers back together. Last, but not least, there is no explanation as to how to remove the battery tray, in order to connect the touchpad to the motherboard.
It actually opens quite easily. I'm female with shaky fingers and didn't have a plastic pry tool. Broke the last one opening iPhones. I took a very small flat too screw driver from my electronic tool set, stuck it in at the same spot he showed and just gently pried all around. It opened fairly easily with nothing breaking. When it was almost all the way open I did go to the opposite side and gently loosened up thevither end, just so it would open straight. It's easy as long as you are gentle with it
If parts to the controller should be replaced how would you know? Is there a circuit test proceedure for the mother board? How would you know to replace other items when you are disassembling the controller? Thank you for the assistance with my controller and your time you have taken to help. Have a great one!
Thank you for the guide !
This doesn't look easy and there are opportunities to mess things up. Also, it might be hard to find an unused analog stick cover. I would try silicone joystick caps from eBay before attempting this guide.
Sometimes plastic or rubber items I handle become extremely sticky and can't be cleaned. This is a very annoying problem for me. I remember my stepdad yelling at me because I'd made swimming goggles sticky, and he also thought I'd covered bicycle handlebars with glue to make my hands stick better. Really I think it's just resins and plasticizers leeching out because of my sweat. I had the same problem with my PS4 controller's joysticks. No matter how carefully I wash my hands or clean the controller they're sticky. If I were to sell it for parts I wouldn't want someone to buy my sticky joystick covers.
I bought some silicone joystick caps from eBay and they were easy to install, I just stretched them over my existing joysticks. They've even got some little bumps that help with grip.
As of March 14, 2023, this guide has been updated! Comments regarding step procedures may no longer be relevant.
model:cuh-zct2e
كيف يمكن ان افكها
Mhmod - Replica