
Nikon Coolpix AW130 LCD Screen Replacement
Introduzione
Vai al passo 1Without the LCD screen, you cannot preview your nifty vacation photos. If this screen is cracked, the waterproof qualities of the Nikon may be sacrificed. Allowing water to infiltrate into the body can cause for additional problems.
Cosa ti serve


-
-
Using your thumb and pointer finger, open the card/battery hatch by pressing the center button of the wheel and turning the entire wheel to the left.
-
-
-
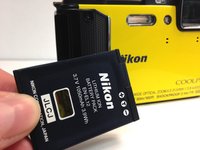
Push the yellow battery/charger compartment tab up using your thumb nail.
This yellow tab spring broken, how I can repair
From where I can get this yellow tab, and how I can replace
-
-
-
-
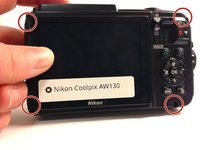
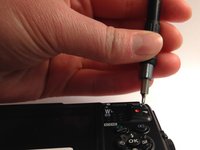
Using the T5 Torx screwdriver, remove all four 4mm screws.
-
-
-
Remove the upper cover (connected by glue) and unscrew the single Philips screw.
Start with a metal spuge from the buckle on the lens-side and work your way from there.
Its not necessary to remove the whole thing - cause the side on the other buckle tends to break.
-
-
-
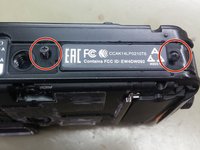
Remove two Philips screws from the bottom cover, lift gently the cover and remove the single Philips screw under it.
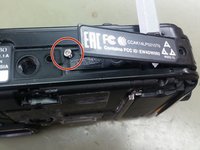
In the case of my camera, I had to move the plat that says “EAC…” to the side. Underneath was another small Philips screw that I had to remove before I could take off the back panel
-
-
-
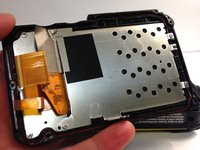
Carefully remove the back cover from the camera body.
Merci Tutoriel parfait
Patrick M
The back cover is connected to the main board with two flexible flat cables (FFC). The connectors on the board have lids that lock the cables, so first lift the lids with a plastic tip, then tear the cable with no force aut of the connector.
bonjour , pour ma part le capot ne se retire pas , il semble encore retenu au niveau de la vis centrale du capot inferieur alors que j'ai retiré toute les vis !!! merci de m'eclairer
-
-
-
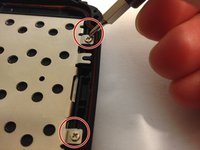
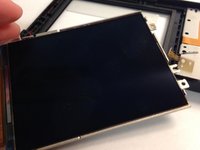
Using a Phillips #000 screwdriver, remove all 11, 4mm screws on the LCD screen cover.
-
Two screws are located on the right.
-
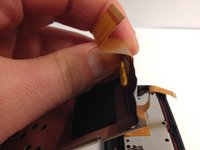
The remaining screws are hidden behind a connector ribbon on the left.
-


To reassemble your device, follow these instructions in reverse order.
To reassemble your device, follow these instructions in reverse order.
Team

Western Carolina University, Team 1-4, Virtue Spring 2016 Membro di Western Carolina University, Team 1-4, Virtue Spring 2016
WCU-VIRTUE-S16S1G4
5 Membri
16 Guide realizzate
8Commenti sulla guida
Hi.
Where can you buy a replacement screen?
my contact is josem6073@gmail.com
Thank you .
Please add Torx T5 screwdriver at the tool needed, required at step 5
Hi.
Where can you buy a replacement screen?
my contact is cpapacon@gmail.com
Thank you .
Hi.
Where can you buy a replacement screen?
my contact is Keithdurkan@gmail.com
Thank you .
What appears to be the most difficult step —Step 7 —has its critical parts skipped over: how to carefully remove the top cover from its glued surfaces without breaking it. What tool is used? Where does one start the process? Are there particularly vulnerable sections where caution should be used to avoid breaking the cover?
Also not included are the instructions for replacing the top cover and making sure it stays in place. If it is re-glued, what type of glue is used?
Other than that, the instructions are clear and beautifully illustrated.