
Lenovo ThinkPad T15 Gen 2 SSD Replacement

Introduzione
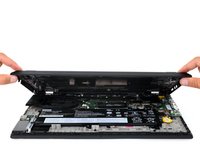
Vai al passo 1Use this guide to replace the SSD on your Lenovo ThinkPad T15 Gen 2.
Before you perform this repair, if at all possible, back up your existing SSD. If you are replacing the SSD where your operating system is installed, familiarize yourself with a disk cloning utility so you’ll be ready to migrate your data to the new SSD.
Be sure to completely power off and unplug your laptop. Make sure the laptop is not in standby, sleep, or hibernation mode.
Cosa ti serve
Kit di riparazione
Questi kit contengono tutti i ricambi e gli strumenti necessari per completare questa guida.


Ricambi


Strumenti


Mostra di più…
-
-
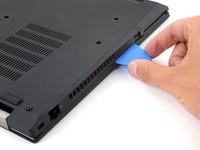
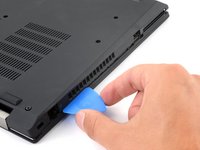
Use a Phillips #1 screwdriver to loosen the eight captive screws securing the lower case.
-
-
-
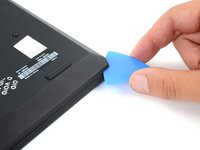
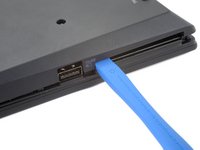
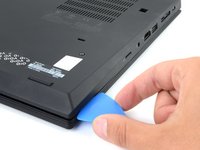
Insert an opening pick between the lower case and the chassis on the front right edge.
-
-
-
Angle the pick down at about 30˚.
-
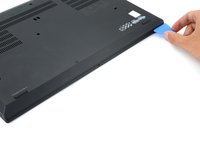
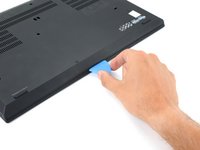
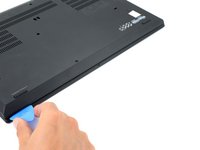
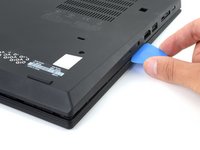
Slide the pick along the front edge to release the clips securing the lower case.
-
-
-
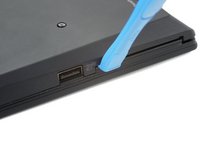
Insert an opening tool between the lower case and the chassis, just to the right of the USB port on the left edge.
-
Pry the opening case up to release the clip next to the USB port.
-
-
-
-
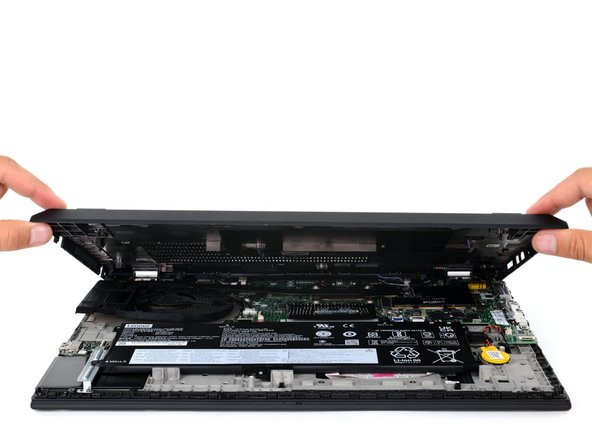
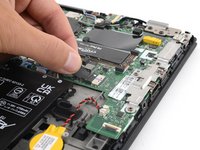
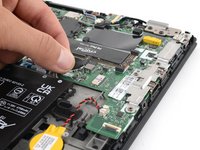
Grip the pull tab on the battery connector with your fingers and gently pull away from the socket to disconnect it.
-
-
-
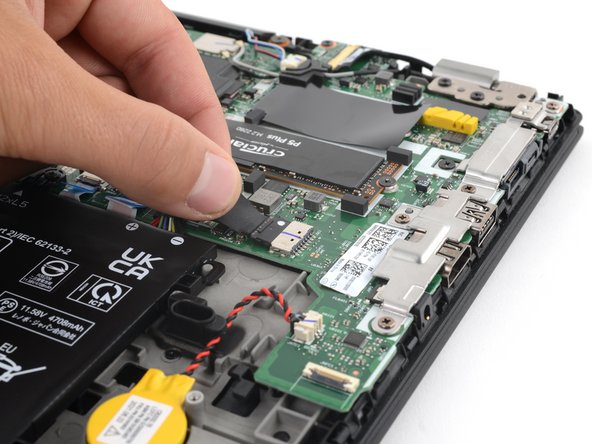
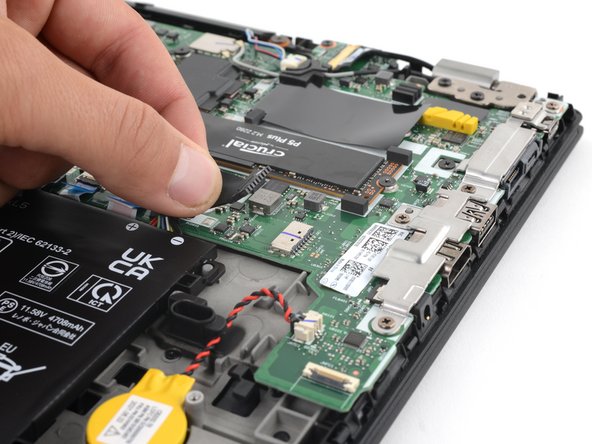
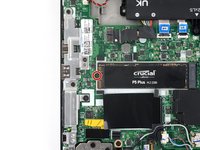
Use a Phillips screwdriver to remove the 3.5 mm screw securing the SSD.
-
-
-
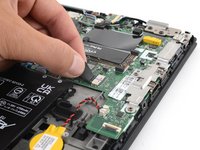
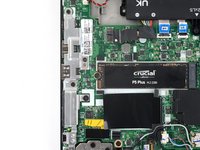
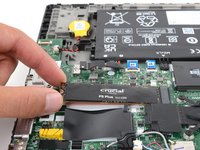
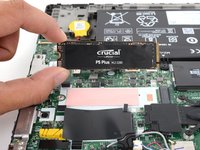
Pull the SSD out of its socket and remove it. Keep the SSD as parallel to the motherboard as possible when pulling on it.
-


To reassemble your device, follow these instructions in reverse order.
Take your e-waste to an R2 or e-stewards certified recycler.
Repair didn't go as planned? Try some basic troubleshooting, or ask our Lenovo ThinkPad T Series answers community for help.
To reassemble your device, follow these instructions in reverse order.
Take your e-waste to an R2 or e-stewards certified recycler.
Repair didn't go as planned? Try some basic troubleshooting, or ask our Lenovo ThinkPad T Series answers community for help.

