Salta al contenuto principale
Google Pixel Slate Motherboard Replacement

Google Pixel Slate Motherboard Replacement

Spencer Alonge

Spencer Alonge e 9 altri collaboratori

Ultimo aggiornamento il May 7, 2024

25 - 30 minuti
Difficile

Introduzione

Vai al passo 1

This guide will show how to replace the motherboard of a Google Pixel Slate (Model #GA00347-US).

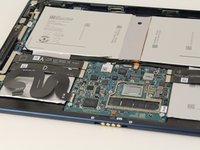
For the Google Pixel Slate, the motherboard is responsible for connecting all hardware within the device to the processor. Additionally, it distributes electricity to the power supply and defines other components of the inner system, such as the memory modules, storage devices, and graphics card.

Indicators for a faulty motherboard may include a failed boot-up sequence, slowed performance/glitches, or overheating. If you encounter one of these errors, or any of the errors listed here, you may want to inspect your device's motherboard.

Prior to beginning this repair, make sure the device is turned off completely and disconnected from power.

Cosa ti serve

Strumenti

Mostra di più…

  1. Google Pixel Slate Motherboard Replacement, Screen: passo 1, immagine 1 di 3 Google Pixel Slate Motherboard Replacement, Screen: passo 1, immagine 2 di 3 Google Pixel Slate Motherboard Replacement, Screen: passo 1, immagine 3 di 3
    • Orient the Google Pixel Slate so that the screen is facing upwards.

    • Use the iFixit opening tool to separate screen from main body.

    • Use the suction cup to remove the screen from the body of the device.

    The tool and suction does not work for me. The adhesive is too strong.

    beep - Replica

    It’s so easy to crack the screen here. I recommend using heat to soften the bond and avoid cracking the screen. Ideally a heating pad ($$$), but a heat gun or hair dryer also does the trick. I’ve seen a temperature range of 80-90 C (matching specs from a heating pad). I heated a pizza stone to temperature to make a homemade heating pad. That worked to soften the adhesive here.

    beep - Replica

    The adhesive is very strong, and they are not just at the edge. Some of them a little further inside, and be careful not to cut the speak grill.

    Kings Lee - Replica

  2. Google Pixel Slate Motherboard Replacement: passo 2, immagine 1 di 3 Google Pixel Slate Motherboard Replacement: passo 2, immagine 2 di 3 Google Pixel Slate Motherboard Replacement: passo 2, immagine 3 di 3
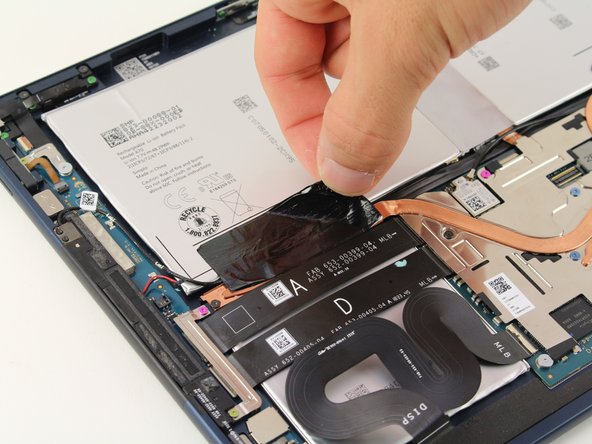
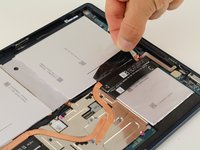
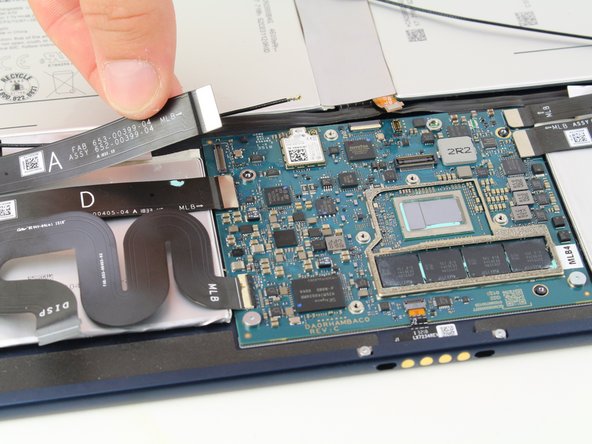
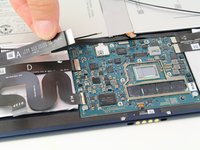
    • Gently disconnect the three flat-wires from the screen.

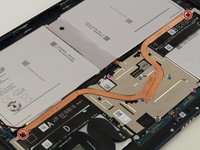
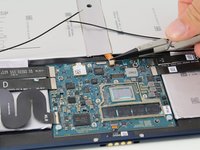
    • Carefully separate and remove the screen from the body of the device.

    Where can I source the screen?

    Brandon Price - Replica

  3. Google Pixel Slate Motherboard Replacement, Motherboard: passo 3, immagine 1 di 3 Google Pixel Slate Motherboard Replacement, Motherboard: passo 3, immagine 2 di 3 Google Pixel Slate Motherboard Replacement, Motherboard: passo 3, immagine 3 di 3
    • Once the screen is removed, remove the two black, adhesive strips.

  4. Google Pixel Slate Motherboard Replacement: passo 4, immagine 1 di 3 Google Pixel Slate Motherboard Replacement: passo 4, immagine 2 di 3 Google Pixel Slate Motherboard Replacement: passo 4, immagine 3 di 3
    • Use a T3 Torx screwdriver to remove the two black screws that are holding down the copper strip.

  5. Google Pixel Slate Motherboard Replacement: passo 5, immagine 1 di 3 Google Pixel Slate Motherboard Replacement: passo 5, immagine 2 di 3 Google Pixel Slate Motherboard Replacement: passo 5, immagine 3 di 3
    • Use the T3 Torx screwdriver to remove the seven 3mm screws.

    • Use a T2 Torx screwdriver to remove the pink 2mm screw closest to the edge.

    • There is a total of four blue 3mm screws, two black 3mm screws, one pink 3mm screw, and one pink 2mm screw holding down the plate.

  6. Google Pixel Slate Motherboard Replacement: passo 6, immagine 1 di 2 Google Pixel Slate Motherboard Replacement: passo 6, immagine 2 di 2
    • Lift and remove the metal plate.

  7. Google Pixel Slate Motherboard Replacement: passo 7, immagine 1 di 3 Google Pixel Slate Motherboard Replacement: passo 7, immagine 2 di 3 Google Pixel Slate Motherboard Replacement: passo 7, immagine 3 di 3
    Attrezzo utilizzato in questo passaggio:
    Tweezers
    $4.99
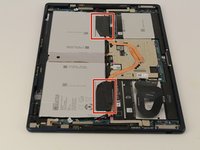
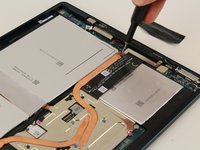
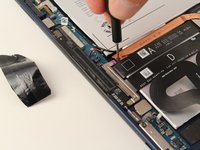
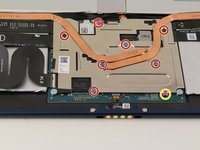
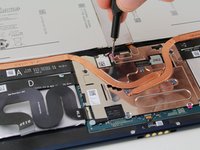
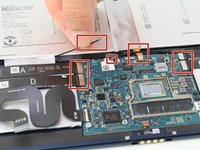
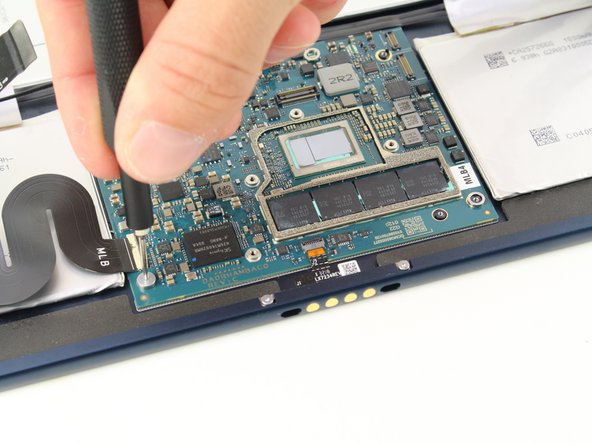
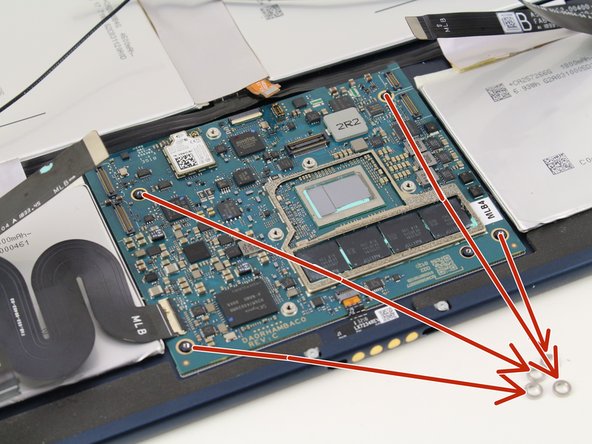
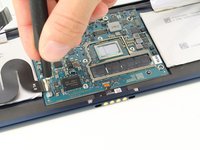
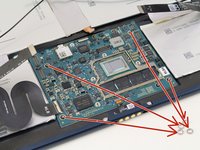
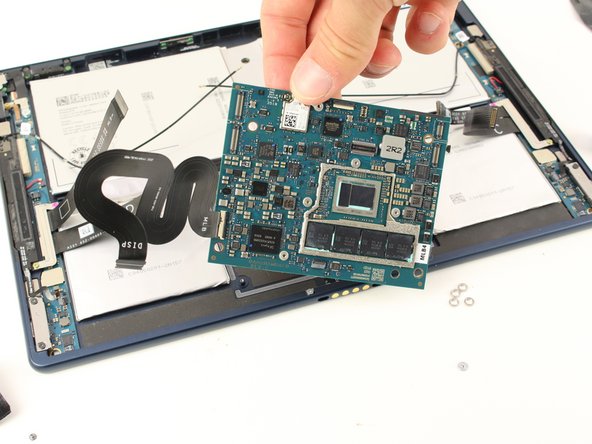
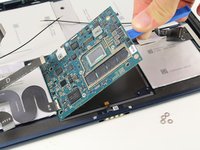
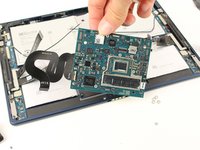
    • Remove the two speaker plugs, one battery plug, and disconnect the four flat wires from the motherboard.

    • Nylon Tipped Tweezers may be necessary to remove the wires effectively.

    I then start removing the battery from this step. The battery adhesive is very strong. I think I have punctured the battery during removal.

    Kings Lee - Replica

  8. Google Pixel Slate Motherboard Replacement: passo 8, immagine 1 di 3 Google Pixel Slate Motherboard Replacement: passo 8, immagine 2 di 3 Google Pixel Slate Motherboard Replacement: passo 8, immagine 3 di 3
    • Use a T3 Torx screwdriver to remove the two silver screws.

    • Remove the 4 exposed washers from the motherboard and put aside.

  9. Google Pixel Slate Motherboard Replacement: passo 9, immagine 1 di 3 Google Pixel Slate Motherboard Replacement: passo 9, immagine 2 di 3 Google Pixel Slate Motherboard Replacement: passo 9, immagine 3 di 3
    • Use the iFixit opening tool to remove the motherboard from the device.

Conclusione

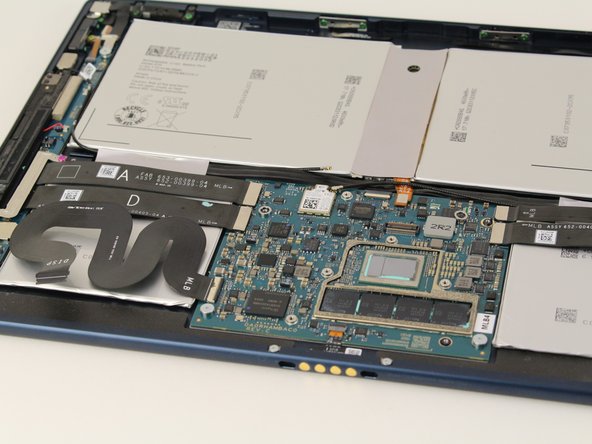
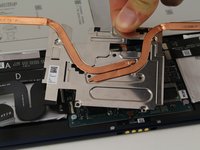
To reassemble your device, follow these instructions in reverse order.

Altre 4 persone hanno completato questa guida.

Team

Cal Poly, Team S2-G5, Maness Spring 2019 Membro di Cal Poly, Team S2-G5, Maness Spring 2019

CPSU-MANESS-S19S2G5

4 Membri

5 Guide realizzate

1Commento della guida

Very helpful, nice and clear steps.

Eddie Lundberg - Replica

Aggiungi Commento

Visualizza Statistiche:

Ultime 24 Ore: 0

Ultimi 7 Giorni: 3

Ultimi 30 Giorni: 35

Tutti i Tempi: 3,778