Salta al contenuto principale
Unisciti alla Community delle riparazioni - Crea un account

DualSense Edge Battery Replacement

Cosa ti serve

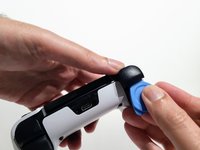
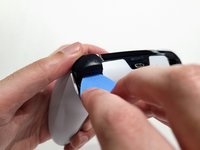
  1. DualSense Edge Battery Replacement, Battery: passo 1, immagine 1 di 2 DualSense Edge Battery Replacement, Battery: passo 1, immagine 2 di 2
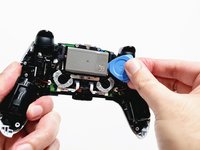
    • Disconnect and power down your controller before you begin.

    • Use the opening pick to push the release latch on the back of the controller.

    Chiedi a FixBot

    Aggiungi Commento

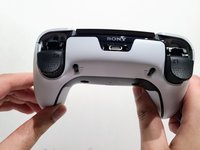
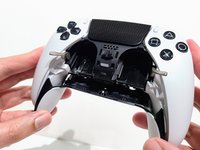
  2. DualSense Edge Battery Replacement: passo 2, immagine 1 di 3 DualSense Edge Battery Replacement: passo 2, immagine 2 di 3 DualSense Edge Battery Replacement: passo 2, immagine 3 di 3
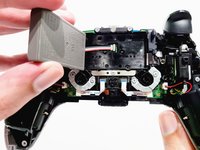
    • Remove the front plate.

    Chiedi a FixBot

    Aggiungi Commento

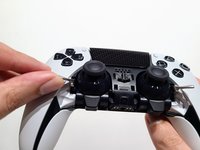
  3. DualSense Edge Battery Replacement: passo 3, immagine 1 di 2 DualSense Edge Battery Replacement: passo 3, immagine 2 di 2
    • Raise both left and right levers next to each stick module.

    Chiedi a FixBot

    Aggiungi Commento

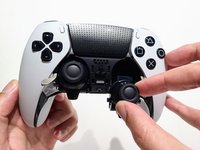
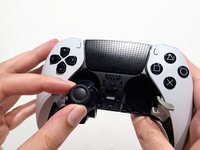
  4. DualSense Edge Battery Replacement: passo 4, immagine 1 di 3 DualSense Edge Battery Replacement: passo 4, immagine 2 di 3 DualSense Edge Battery Replacement: passo 4, immagine 3 di 3
    • Slide both stick modules out of their slots.

    Chiedi a FixBot

    Aggiungi Commento

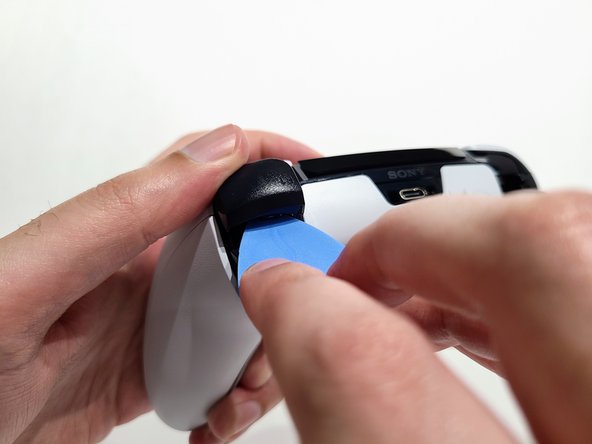
  5. DualSense Edge Battery Replacement: passo 5, immagine 1 di 3 DualSense Edge Battery Replacement: passo 5, immagine 2 di 3 DualSense Edge Battery Replacement: passo 5, immagine 3 di 3
    • The L1 and R1 buttons are held in by two clips. If only one clip releases, move your pick to the other side of the button to release the remaining clip. Don't continue prying on one side after a clip is released, or you risk breaking the other clip.

    • Use the pick to pop both the R1 and L1 shoulder buttons out.

    • Use your thumb to prevent the button from flying across the room.

    Chiedi a FixBot

    Aggiungi Commento

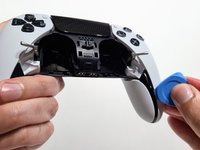
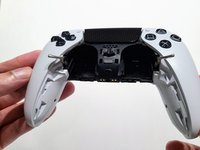
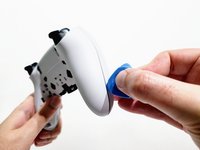
  6. DualSense Edge Battery Replacement: passo 6, immagine 1 di 2 DualSense Edge Battery Replacement: passo 6, immagine 2 di 2
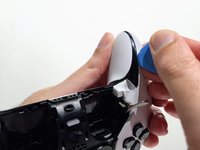
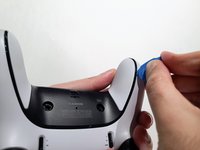
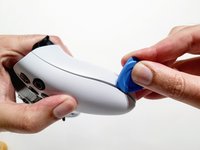
    • The rear trim is held in place by fragile plastic clips. Work slowly and gently to avoid breaking the clips.

    • Slide the opening pick along the left and right sides of the rear trim to release the clips that secure the trim.

    Chiedi a FixBot

    Aggiungi Commento

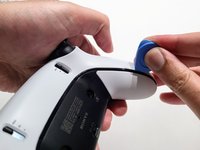
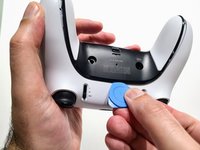
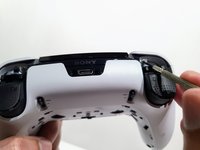
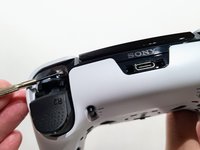
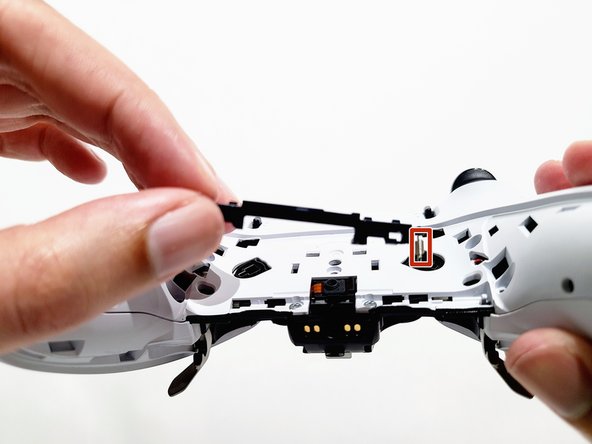
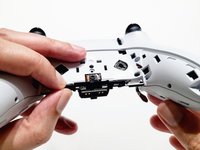
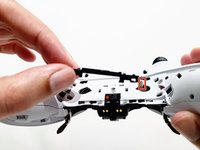
  7. DualSense Edge Battery Replacement: passo 7, immagine 1 di 3 DualSense Edge Battery Replacement: passo 7, immagine 2 di 3 DualSense Edge Battery Replacement: passo 7, immagine 3 di 3
    • Turn the controller around and continue sliding the opening pick along the trim to release the remaining clips.

    Chiedi a FixBot

    Aggiungi Commento

  8. DualSense Edge Battery Replacement: passo 8, immagine 1 di 2 DualSense Edge Battery Replacement: passo 8, immagine 2 di 2
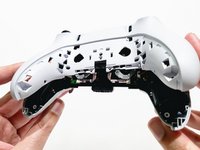
    • Remove the rear trim now that all clips are released.

    • If at any point the trim feels stuck, stop and look for any clips that may have re-engaged and release them with the opening pick to avoid damaging them.

    Chiedi a FixBot

    Aggiungi Commento

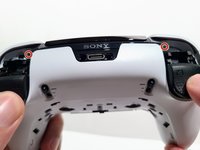
  9. DualSense Edge Battery Replacement: passo 9, immagine 1 di 3 DualSense Edge Battery Replacement: passo 9, immagine 2 di 3 DualSense Edge Battery Replacement: passo 9, immagine 3 di 3
    • Remove the two 6.4 mm‑long screws from the L1 and R1 button enclosures (one screw on each side).

    • Use a JIS J0 driver or an official iFixit Phillips PH0 driver, which is designed to be cross-compatible with JIS screws. Using a screwdriver other than an official iFixit screwdriver or a JIS screwdriver may result in stripped screws.

    Chiedi a FixBot

    Aggiungi Commento

  10. DualSense Edge Battery Replacement: passo 10, immagine 1 di 2 DualSense Edge Battery Replacement: passo 10, immagine 2 di 2
    • Pull the lever to the left and lift up to detach it from the controller.

    • Be careful with the tiny spring attached to the lever, as it is easy to lose once detached.

    Chiedi a FixBot

    Aggiungi Commento

  11. DualSense Edge Battery Replacement: passo 11, immagine 1 di 1
    • Remove the nine screws securing the rear case:

    • Seven 6.4 mm‑long screws

    • Two 10.5 mm‑long screws

    Chiedi a FixBot

    Aggiungi Commento

  12. DualSense Edge Battery Replacement: passo 12, immagine 1 di 2 DualSense Edge Battery Replacement: passo 12, immagine 2 di 2
    • Insert an opening pick between the front and rear casing and gently pry them apart.

    Chiedi a FixBot

    Aggiungi Commento

  13. DualSense Edge Battery Replacement: passo 13, immagine 1 di 3 DualSense Edge Battery Replacement: passo 13, immagine 2 di 3 DualSense Edge Battery Replacement: passo 13, immagine 3 di 3
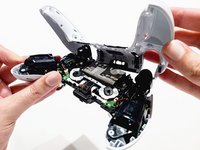
    • If at any point the case feels stuck, stop and look for any clips that may have re-engaged and release them with the opening pick to avoid damaging them.

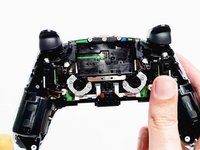
    • Use your hands to pull the rear case off of the controller carefully.

    Chiedi a FixBot

    Aggiungi Commento

  14. DualSense Edge Battery Replacement, Replace the slider covers: passo 14, immagine 1 di 3 DualSense Edge Battery Replacement, Replace the slider covers: passo 14, immagine 2 di 3 DualSense Edge Battery Replacement, Replace the slider covers: passo 14, immagine 3 di 3
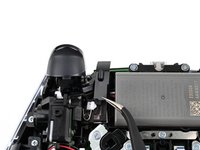
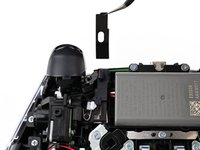
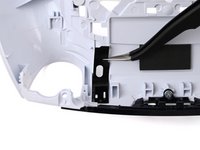
    • The rear case holds two small plastic covers for the adaptive trigger assembly adjustment sliders. These may have come off during removal. Place them back in the rear cover now to avoid losing them.

    • Use a pair of tweezers or your fingers to lift the cover from the controller.

    • Slide the flat end of the cover under the plastic tab in the rear case.

    • Make sure it is placed so it can move freely in its groove. The edge with the notch should be towards the middle of the controller.

    • If a cover got bent during the rear case removal or reassembly process, apply a small amount of heat with a hair dryer to restore it to its original shape.

    • During reassembly, you can use a small piece of painter's tape on the outside of the rear case to hold the covers in place.

    Chiedi a FixBot

    Aggiungi Commento

  15. DualSense Edge Battery Replacement: passo 15, immagine 1 di 2 DualSense Edge Battery Replacement: passo 15, immagine 2 di 2
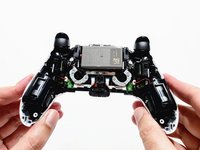
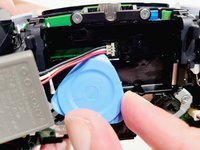
    • Use your opening pick to lift the battery from its enclosure and expose the wire connection.

    • The battery is loose in the enclosure; hold the controller with the battery facing upward so it does not fall out.

    Chiedi a FixBot

    Aggiungi Commento

  16. DualSense Edge Battery Replacement: passo 16, immagine 1 di 3 DualSense Edge Battery Replacement: passo 16, immagine 2 di 3 DualSense Edge Battery Replacement: passo 16, immagine 3 di 3
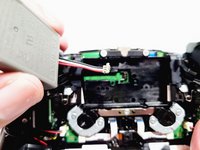
    • Place your opening pick under the low profile connector and pull it upward toward you to disconnect the battery.

    • Only pry on the connector. Do not pry on the wires, as that may damage the wires.

    Chiedi a FixBot

    Aggiungi Commento

Conclusione

To reassemble your device, follow these instructions in reverse order.

Annulla: non ho completato questa guida.

Altre 11 persone hanno completato questa guida.

Roberto Loya

Membro da: 04/01/23

484 Reputazione

Una guida realizzata

Team

4Commenti sulla guida

where can i buy battery replacement

Rave Paz - Rispondi Condividi

取替の説明が有っても、バッテリー自体が手に入らないから日本では上げても余り意味が無い。

ちょいオヤジ - Rispondi Condividi
Yeah that’s great and all but without a battery all I can really do is kick rocks so what’s a guy gotta do to get a new one of those? Preferably with increased capacity but I’ll take an original new one too.

Albert Einstein - Rispondi Condividi

インナートリムの再組立の際の注意点

インナートリム上側の爪は押さえながらスライドさせる様にはめないと潰れて入らなくなってしまう可能性がある

「逆手順で」の説明だけでは破損させてしまうことがあるので注意喚起してほしい

(私は爪を潰してしまって入らなくなり戻すのに苦労した)

シバやん - Rispondi Condividi

Aggiungi Commento

Visualizza statistiche:

Ultime 24 ore: 43

Ultimi 7 giorni: 255

Ultimi 30 giorni: 1,399

Tutti i Tempi: 35,679