Salta al contenuto principale
Dell G15-5510 Gaming SSD Replacement

Dell G15-5510 Gaming SSD Replacement

Clay Eickemeyer

Clay Eickemeyer e 2 altri collaboratori

Ultimo aggiornamento il June 16, 2023

15 - 30 minuti
Moderato

Introduzione

Vai al passo 1

This guide will walk you through the process of replacing the SSD in your Dell G15-5510 Gaming laptop.

Your laptop might not come with a standoff bracket to install an additional SSD. In this case, you'll need to purchase one.

Before you perform this repair, back up your existing SSD if possible. If you’re replacing the SSD where your operating system is installed, familiarize yourself with a disk cloning utility so you’ll be ready to migrate your data to the new SSD.

Cosa ti serve

Kit di riparazione

Questi kit contengono tutti i ricambi e gli strumenti necessari per completare questa guida.

Ricambi

Strumenti

Mostra di più…

  1. Dell G15-5510 Gaming SSD Replacement, Unfasten the back cover: passo 1, immagine 1 di 2 Dell G15-5510 Gaming SSD Replacement, Unfasten the back cover: passo 1, immagine 2 di 2
    • For your safety, discharge the battery below 25% and power down your device before disassembly.

    • Use a Phillips #1 screwdriver to remove the four screws securing the back cover.

    • Two 8 mm screws

    • Two 5.8 mm screws

    • Loosen the four captive screws.

  2. Dell G15-5510 Gaming SSD Replacement, Unclip the front corners: passo 2, immagine 1 di 2 Dell G15-5510 Gaming SSD Replacement, Unclip the front corners: passo 2, immagine 2 di 2
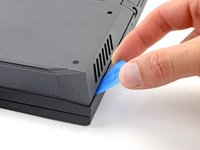
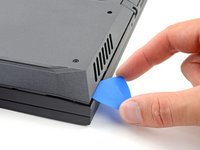
    • Insert an opening pick between the bottom-left corner of the back cover and the chassis.

    • Pry upward to release clips holding the cover in place.

    • Listen for a loud click to indicate a clip being released.

  3. Dell G15-5510 Gaming SSD Replacement: passo 3, immagine 1 di 2 Dell G15-5510 Gaming SSD Replacement: passo 3, immagine 2 di 2
    • Insert your opening pick again between the bottom-right corner of the back cover and the chassis.

    • Pry up to release the remaining clips securing the back cover.

  4. Dell G15-5510 Gaming SSD Replacement, Remove the back cover: passo 4, immagine 1 di 3 Dell G15-5510 Gaming SSD Replacement, Remove the back cover: passo 4, immagine 2 di 3 Dell G15-5510 Gaming SSD Replacement, Remove the back cover: passo 4, immagine 3 di 3
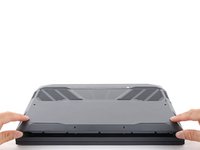
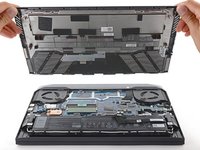
    • Grip the front of the back cover and lift it away from the laptop.

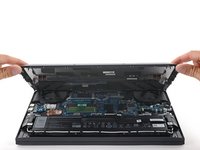
    • Pull the back cover towards you to disconnect the clips along the top of the back cover.

    • Remove the back cover.

  5. Dell G15-5510 Gaming SSD Replacement, Disconnect the battery: passo 5, immagine 1 di 3 Dell G15-5510 Gaming SSD Replacement, Disconnect the battery: passo 5, immagine 2 di 3 Dell G15-5510 Gaming SSD Replacement, Disconnect the battery: passo 5, immagine 3 di 3
    • Use the flat end of a spudger to push the battery connector's square tab away from the socket and disconnect it.

  6. Dell G15-5510 Gaming SSD Replacement, Unfasten the SSD Cover: passo 6, immagine 1 di 2 Dell G15-5510 Gaming SSD Replacement, Unfasten the SSD Cover: passo 6, immagine 2 di 2
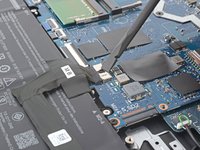
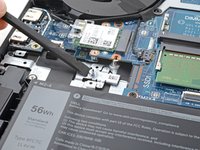
    • Use a Phillips #0 screwdriver to remove the two 4.2 mm-long screws securing the copper SSD cover.

  7. Dell G15-5510 Gaming SSD Replacement, Remove the SSD cover: passo 7, immagine 1 di 1
    Attrezzo utilizzato in questo passaggio:
    Tweezers
    $4.99
    • Pull the SSD cover off by hand or with a pair of blunt nose tweezers.

    • When reassembling with an 80 mm-long full size SSD, do not install this cover.

  8. Dell G15-5510 Gaming SSD Replacement, Remove the SSD: passo 8, immagine 1 di 3 Dell G15-5510 Gaming SSD Replacement, Remove the SSD: passo 8, immagine 2 di 3 Dell G15-5510 Gaming SSD Replacement, Remove the SSD: passo 8, immagine 3 di 3
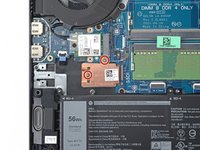
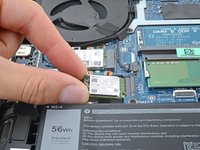
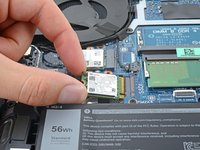
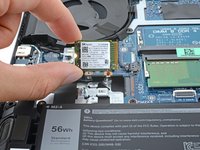
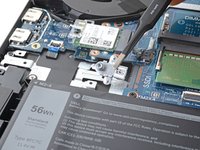
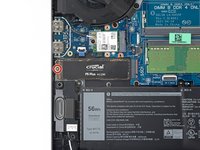
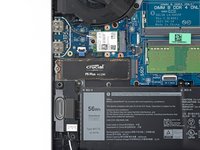
    • Grip the original SSD by the corners near the screw indent.

    • Pull it straight out of its socket and remove it.

    • Gently wiggle the SSD side to side if it feels stuck.

  9. Dell G15-5510 Gaming SSD Replacement, Remove the SSD standoff: passo 9, immagine 1 di 3 Dell G15-5510 Gaming SSD Replacement, Remove the SSD standoff: passo 9, immagine 2 di 3 Dell G15-5510 Gaming SSD Replacement, Remove the SSD standoff: passo 9, immagine 3 di 3
    • Follow the next four steps to reposition the standoff bracket.

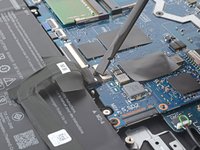
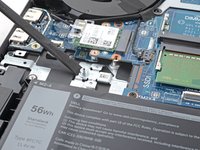
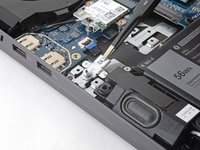
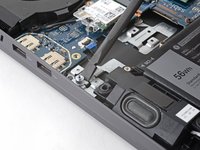
    • Use the flat end of a spudger to push the metal standoff bracket towards the center of the laptop and out of its slot.

    • Use a pair of blunt nose tweezers or your fingers to remove the bracket.

  10. Dell G15-5510 Gaming SSD Replacement, Reinstall the SSD standoff: passo 10, immagine 1 di 3 Dell G15-5510 Gaming SSD Replacement, Reinstall the SSD standoff: passo 10, immagine 2 di 3 Dell G15-5510 Gaming SSD Replacement, Reinstall the SSD standoff: passo 10, immagine 3 di 3
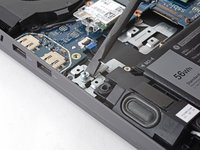
    • Slide the bracket's standoff edge into the adjacent slot.

    • Use the flat end of a spudger to press the the bracket into the slot. The wings of the standoff will clip underneath the tabs of the slot.

  11. Dell G15-5510 Gaming SSD Replacement, SSD installation: passo 11, immagine 1 di 3 Dell G15-5510 Gaming SSD Replacement, SSD installation: passo 11, immagine 2 di 3 Dell G15-5510 Gaming SSD Replacement, SSD installation: passo 11, immagine 3 di 3
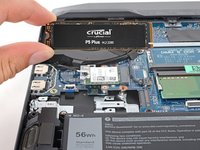
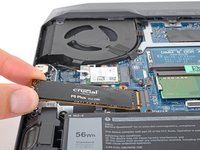
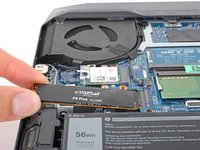
    • Grip your 80 mm-long (M.2 2280) SSD by the corners near the screw indent.

    • Slide the SSD into the socket.

  12. Dell G15-5510 Gaming SSD Replacement, Fasten the SSD: passo 12, immagine 1 di 2 Dell G15-5510 Gaming SSD Replacement, Fasten the SSD: passo 12, immagine 2 di 2
    • Use your Phillips #0 screwdriver to fasten the 4.2 mm-long screw to the SSD standoff.

Conclusione

To reassemble your Dell G15, follow these instructions in reverse order.

Take your e-waste to an R2 or e-Stewards certified recycler.

Repair didn’t go as planned? Try some basic troubleshooting, or ask our Dell laptop answers community for help.

Un'altra persona ha completato questa guida.

Clay Eickemeyer

Membro da: 09/19/22

81.284 Reputazione

455 Guide realizzate

Team

Guide Team Membro di Guide Team

Staff

9 Membri

11.365 Guide realizzate

Un commento

Thanks for the guide. I have the same laptop. I bought this laptop for work. I'm a game designer and create 3d character models for video games. There is a shortage of specialists in this field right now. It's good that there are services like DevotedCG, this platform unites top art professionals and a team of ADs and Producers who curate their work.

Thomas Dunk - Replica

Aggiungi Commento

Visualizza Statistiche:

Ultime 24 Ore: 11

Ultimi 7 Giorni: 124

Ultimi 30 Giorni: 183

Tutti i Tempi: 4,179