
AuKing M8-F Lens Replacement

Introduzione
Vai al passo 1Use this guide to replace your damaged or old lens for your Auking M8-F projector.
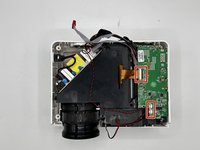
The lens is a component of the projector that is in control of how the images appear once the projector is on. A faulty lens can cause images to be blurry or affect its overall performance of the projector. In some instances, having a damaged lens can cause the image to not appear properly.
Before following this guide, please be sure to take a look at the troubleshooting page to see if the problem for the images is because of the lens. Some cases, the problem could be the keystone correction or the focus wheel.
Before continuing this guide, be sure to turn off your projector completely.
Cosa ti serve


-
-
Flip the projector on its opposite side.
-
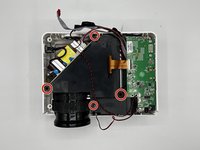
Remove all six of the 11 mm screws using a Phillips #1 screwdriver.
-
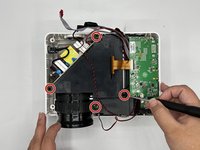
Remove the two 14 mm screws using a Phillips #1 screwdriver on the base of the projector
-
-


To reassemble your device, follow these instructions in reverse order.
To reassemble your device, follow these instructions in reverse order.

Team

University of North Texas, Team 1-4, Kilpatrick Fall 2023 Membro di University of North Texas, Team 1-4, Kilpatrick Fall 2023
UNT-KILPATRICK-F23S1G4
3 Membri
2 Guide realizzate