Introduzione
Use this guide to replace the battery on your Xiaomi Mi 10 Lite.
If your battery is swollen, take appropriate precautions.
For your safety, discharge your battery below 25% before disassembling your phone. This reduces the risk of a dangerous thermal event if the battery is accidentally damaged during the repair.
You’ll need replacement adhesive to reattach components when reassembling the device.
Cosa ti serve
-
-
Prepare an iOpener and apply it to the rear glass for at least two minutes to loosen the adhesive underneath.
-
-
-
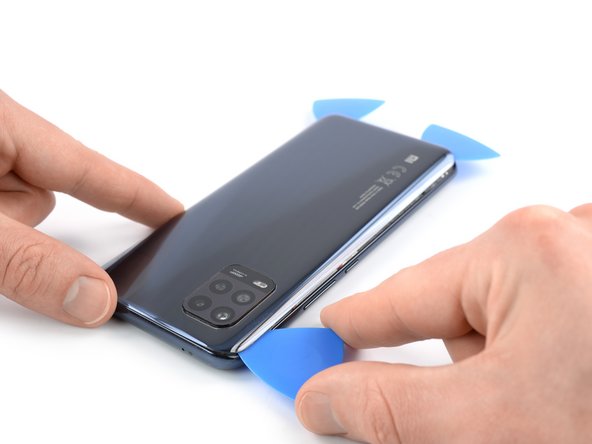
Secure a suction handle to the bottom edge of the rear glass, as close to the edge as possible.
-
Lift the rear glass with the suction handle to create a small gap between the rear glass and the frame.
-
Insert an opening pick into the gap you created.
-
Slide the opening pick to the bottom right corner to slice the adhesive.
-
Leave the opening pick in place to prevent the adhesive from resealing.
-
-
-
Insert a second opening pick at the bottom edge of your phone.
-
Slide the opening pick to the bottom left corner to slice the adhesive.
-
Leave the opening picks in place to prevent the adhesive from resealing.
-
-
-
Insert a third opening pick at the bottom left corner of your phone.
-
Slide the opening pick along the left edge of your phone to slice the adhesive.
-
Leave the opening pick in the top left corner to prevent the adhesive from resealing.
-
-
-
-
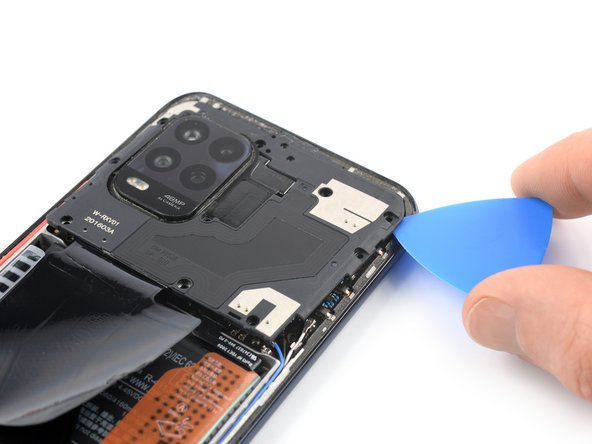
Use a Phillips screwdriver to remove the ten 3.9 mm-long screws securing the motherboard cover.
-
-
-
Insert the tip of an opening pick underneath the right edge of the motherboard cover.
-
Slide the opening pick to the top right corner of the motherboard cover to unhinge the plastic clips and pry it up.
-
-
-
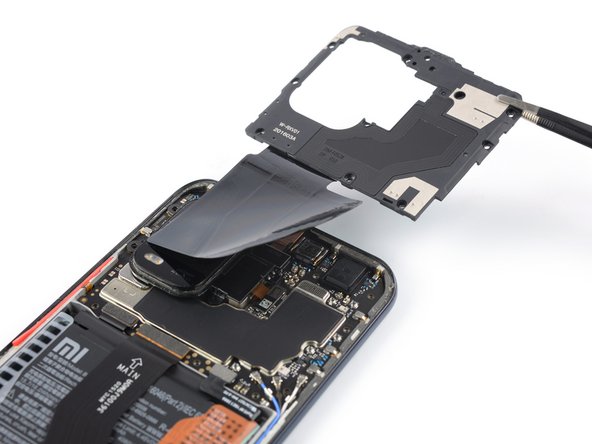
Use a pair of tweezers or your fingers to remove the motherboard cover.
-
-
-
Use a spudger to disconnect the battery cable by prying the connector straight up from its socket.
-
-
-
Use a spudger to disconnect the interconnect cable by prying the connector straight up from its socket.
-
-
-
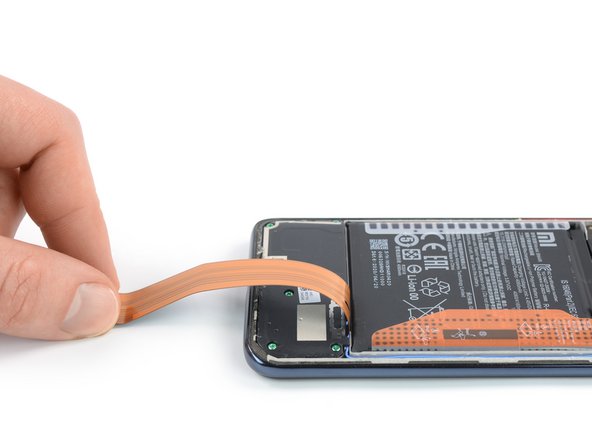
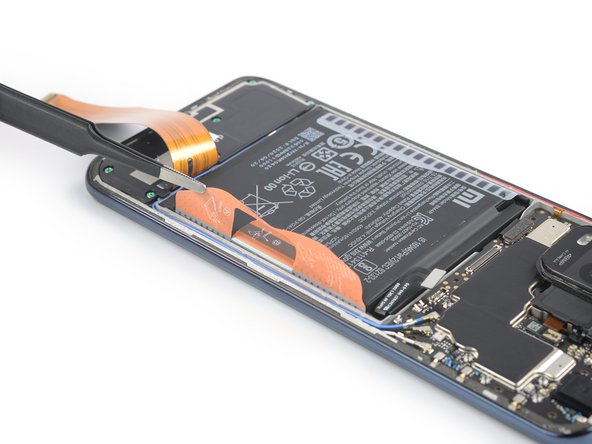
Fold the interconnect flex cable towards the charging port in order to get free access to both battery pull tabs.
-
You might want to use a small piece of tape to temporarily stick the cable onto your working surface to avoid accidentally damaging it during the battery removal.
-
-
-
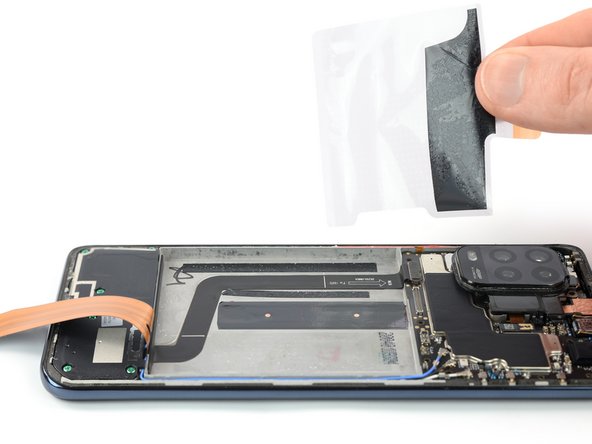
Use a pair of blunt nose tweezers or a clean fingernail to peel the orange adhesive strip labeled with an A off the battery.
-
Use a pair of blunt nose tweezers or a clean fingernail to peel the orange adhesive strip labeled with a B off the battery.
-
-
-
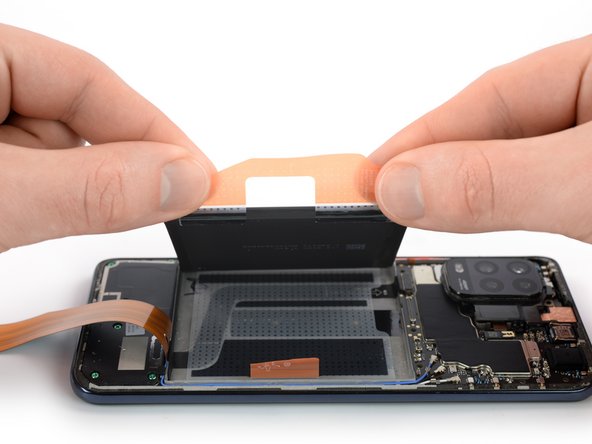
Grab both pull–tab ends labeled with an A and pull up on the orange adhesive strip to lift the battery out of its recess and swing it up to an upright position.
-
Peel the battery off the remaining adhesive.
-
Remove the battery.
-


If possible, turn on your device and test your repair before installing new adhesive and resealing.
For optimal performance, calibrate your newly installed battery after completing this guide.
Secure the new battery with pre-cut adhesive or double-sided adhesive tape. In order to position it correctly, apply the new adhesive into the device at the places where the old adhesive was located, not directly onto the battery. Press the new battery firmly into place.
Compare your new replacement part to the original part—you may need to transfer remaining components or remove adhesive backings from the new part before installing.
To reassemble your device, follow these instructions in reverse order. During reassembly apply new adhesive where necessary after cleaning the relevant areas with isopropyl alcohol (>90%).
Take your e-waste to an R2 or e-Stewards certified recycler.
Repair didn’t go as planned? Try some basic troubleshooting, or ask our Answers community for help.
Annulla: non ho completato questa guida.
Altre 6 persone hanno completato questa guida.


Un commento
Seguí los pasos de esta guía pero creo que aunque este punto es válido:
ten cuidado de no sobrecalentar el teléfono--el display y la batería ambas son susceptibles al daño por calor
(Y de hecho el procesador también puede ser dañado si se superan los 100-105º en T-Junction)
Es mucho más probable que ocurra lo contrario: que rompas el cristal templado trasero intentando despegarlo sino has aplicado suficiente calor. Mi recomendación es que tiren muy muy suavemente y sigan calentando hasta que se despegue sin esfuerzo. También que compren una tapa trasera de repuesto por si acaso ya que reinstalar una tapa resquebrajada no es en absoluto recomendable y dejarlo sin tapa, aún menos.
También mencionar que hay que tener especial cuidado con el cable azul que va de arriba a abajo ya que es susceptible de estirarse/romperse al tirar si se queda pegado al adhesivo o que lo rompas involuntariamente al pasar la pua.