
Xbox 360 Wireless Speed Wheel Left and Right Triggers Replacement
Introduzione
Vai al passo 1Similar to the buttons, triggers can break during hardcore gaming or could lose functionality due to sticky and gooey substances (eg. food). In this guide, you will learn how to replace the left and right triggers of the controller. This guide involves opening the controller.


-
-
Turn the controller on its backside and push the "eject" button to discharge the battery compartment door on the bottom of the controller.
-
Pull the two AA batteries out.
-
-
Attrezzo utilizzato in questo passaggio:Tweezers$4.99
-
Lift the battery compartment out of the controller and set it outside of the controller.
-
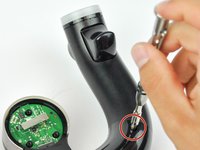
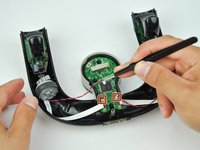
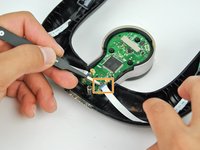
Use the precision tweezers to pull out the red and black wire attached to the white plug at the bottom side of the circuit board.
-
-
Attrezzo utilizzato in questo passaggio:Tweezers$4.99
-
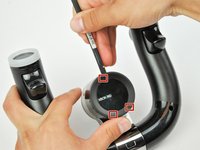
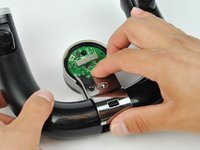
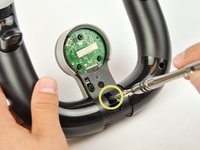
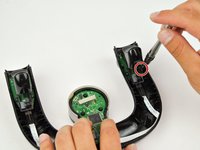
Remove the holographic Microsoft sticker with the percision tweezers to reveal a small screw.
-
Use a T6 Torx screwdriver to remove the 1.5mm screw.
-
-
-
-
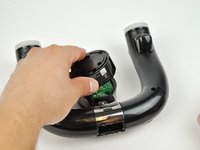
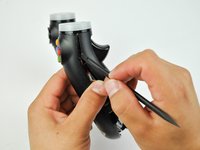
Pull the two halves apart at the bottom to detach the two latches that are holding the front and back panels together.
-
Start with one side of the controller (left or right).
-
Slide the spudger towards the end of the handles and pry the two halves apart. Do the same for the opposite side.
-
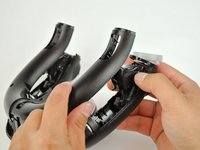
Pull the front and back panels apart to separate them and expose the inside of the controller.
-
-
Attrezzo utilizzato in questo passaggio:Tweezers$4.99
-
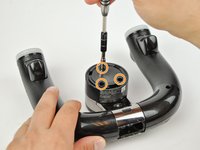
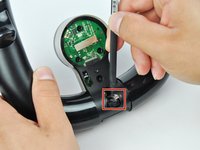
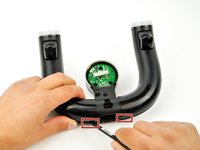
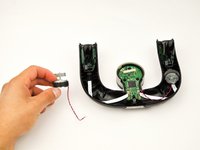
Use precision tweezers to remove the red and black wires that are attached to the circuit board.
-
-
-
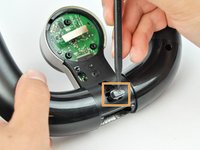
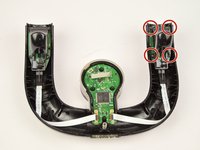
Use a T6 Torx screwdriver to remove the four 2.3mm screws.
-
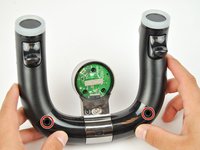
Lift up the black locking tab on the ZIF connector to release the ribbon cable.
-


To reassemble your device, follow these instructions in reverse order.
To reassemble your device, follow these instructions in reverse order.
Team

USF Tampa, Team S16-G5, Boczar Spring 2018 Membro di USF Tampa, Team S16-G5, Boczar Spring 2018
USFT-BOCZAR-S18S16G5
5 Membri
8 Guide realizzate
Un commento
Where can I buy the Where can I buy the spare or replacement trigger?