Salta al contenuto principale
Trek 4300 Bicycle Kickstand Replacement

Trek 4300 Bicycle Kickstand Replacement

Emily OConnor

Emily OConnor e 3 altri collaboratori

Ultimo aggiornamento il January 11, 2015

5 minuti
Moderato

Introduzione

Vai al passo 1

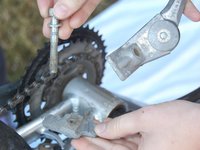
The kickstand has three parts: a bracket, a bolt, and the stand. To replace the kickstand the bracket and bolt will need to be removed to allow for the removal of the stand.

  1. Trek 4300 Bicycle Kickstand Replacement, Loosen Bracket: passo 1, immagine 1 di 2 Trek 4300 Bicycle Kickstand Replacement, Loosen Bracket: passo 1, immagine 2 di 2
    • Flip the bike over so it is balanced and resting on the handlebar and the bike seat.

    • Using a socket screwdriver with a hex adapter, loosen the bolt that is holding the kickstand and bracket in place.

    • This may require a moderate amount of strength. Make sure you have the proper hex adapter as to not strip the bolt.

  2. Trek 4300 Bicycle Kickstand Replacement, Remove the kickstand: passo 2, immagine 1 di 2 Trek 4300 Bicycle Kickstand Replacement, Remove the kickstand: passo 2, immagine 2 di 2
    • Once the bolt is loose, unscrew it the rest of the way by hand.

    • Remove the bolt. There should now be three separate pieces: the bolt, the bracket, and the kickstand.

    • Make sure to note the position of the bracket before you remove the bolt completely

Conclusione

To replace the new kickstand, follow these instructions in reverse order.

Emily OConnor

Membro da: 10/13/14

500 Reputazione

4 Guide realizzate

Team

Clemson, Team 3-2, Benson Fall 2014 Membro di Clemson, Team 3-2, Benson Fall 2014

CLEM-BENSON-F14S3G2

4 Membri

8 Guide realizzate

0Commenti sulla guida

Aggiungi Commento

Visualizza Statistiche:

Ultime 24 Ore: 0

Ultimi 7 Giorni: 12

Ultimi 30 Giorni: 22

Tutti i Tempi: 2,993