Introduzione
Usa questa guida per applicare correttamente le strisce adesive di ricambio della batteria in molti iPhone recenti. Ogni volta che rimuovi la batteria, queste strisce devono essere sostituite. Le strisce possono essere facilmente danneggiate se non applicate correttamente, quindi è consigliabile disporre di un set di strisce di ricambio a portata di mano se si segue questa guida per la prima volta.
I modelli di iPhone versione "Plus" usano tre strisce invece di due, ma la procedura è la stessa.
Prima di iniziare, dovresti aver rimosso la batteria seguendo una guida simile a quella riportata di seguito. Nota: i modelli iPhone 5 e precedenti non usano strisce adesive.
- sostituzione batteria iPhone 6
- sostituzione batteria iPhone 6 Plus
- sostituzione batteria iPhone 6s
- sostituzione batteria iPhone 6s Plus
- sostituzione batteria iPhone 7
- sostituzione batteria iPhone 7 Plus
Per sostituire le strisce adesive della batteria in un modello diverso di iPhone, utilizza una delle seguenti guide:
Cosa ti serve
Panoramica Video
-
-
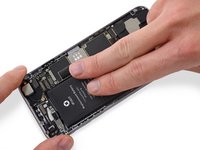
Se la nuova batteria ha già le strisce adesive attaccate, salta al Passo 7.
-
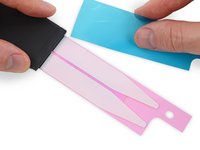
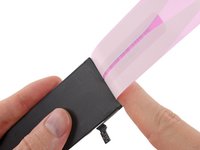
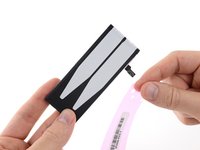
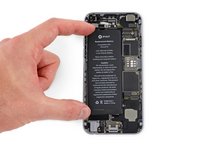
Altrimenti: se presente, rimuovere la pellicola o le pellicole di piccole dimensioni in plastica che coprono le estremità piatte delle strisce adesive.
-
-
-
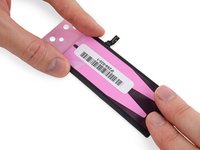
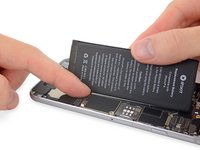
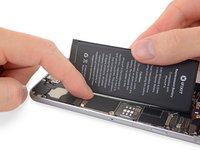
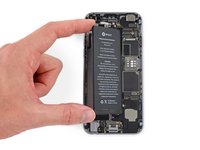
Colloca la batteria rivolta verso il basso su una superficie piana.
-
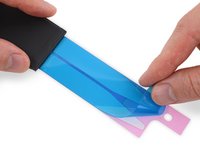
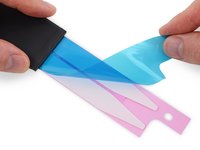
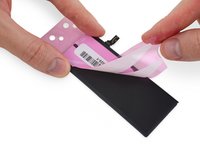
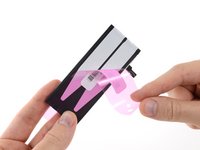
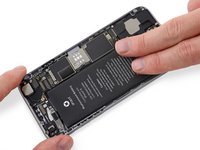
Partendo dall'estremità appuntita delle strisce adesive, stacca la grande pellicola blu che copre le strisce stesse.
-
Se ti succede questo e hai preso le strisce da iFixit, contattaci qui e ti invieremo la sostituzione in un battibaleno.
-
Nel frattempo, puoi temporaneamente rimontare il tuo iPhone con un po 'di nastro biadesivo per tenere ferma la batteria.
-
-


Per riassemblare il tuo iPhone, torna alla guida che hai usato per rimuovere la batteria e segui i passaggi in ordine inverso.
Ricorda di portare la tua vecchia batteria a un riciclatore certificato R2 o e-Stewards.
Annulla: non ho completato questa guida.
Altre 1623 persone hanno completato questa guida.
Un ringraziamento speciale a questi traduttori:
100%


Questi traduttori ci stanno aiutando ad aggiustare il mondo! Vuoi partecipare?
Inizia a tradurre ›


68Commenti sulla guida
I had to read these directions thoroughly three times before proceeding as I didn't want to screw it up on the adhesive. Went slow and it worked just fine
I would say jus watch out as you go from step 4 to step 5 - the white adhesive can become slightly detached from the backing as you push it onto the edge of the battery and then around to the back side. Extreme care here! Very good guide and equipment. Galaxy class!
All was good, aside from the adhesive bunched up when I removed the blue backing and it started to separate from the pink backing. I had to just gingerly make sure it was all straight and kept steady like a heart surgeon until I had it smoothed down as best as possible. It all went well, but I was worried I'd end up with a big stuck ball of white adhesive in the middle of the battery plate, making it all uneven and stupid looking.
What happens if I use a different adhesive than this one?
The iPhone adhesive strips we sell (and the original Apple ones) are special since they have very strong adhesion, but they can be removed easily by pulling on the tabs on the lower edge of the battery. People have had success with our 3M double-sided sticky tape (aka sticker tape), but standard plastic double-sided tape may not have enough strength to hold the battery in place. If you want the strongest adhesive possible, you should use iPhone adhesive strips mentioned above, but if your phone isn't subject to lots of movement, you could get by with some sticker tape.