
Sostituzione Batteria Microsoft Surface 3
Introduzione
Vai al passo 1Per sostituire la batteria, devi prima rimuovere la copertura, l’adesivo sotto alla batteria, e infine rimuovere la batteria per sostituirla.
Cosa ti serve
Ricambi

Strumenti


Mostra di più…
-
-
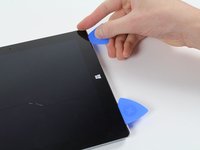
Riscalda un iOpener seguendo le istruzioni riportate nella guida dell'iOpener.
-
Posiziona l'iOpener caldo sui bordi dello schermo. Questo calore indebolirà la resistenza dell'adesivo tra il display e il corpo.
-
-
-
-
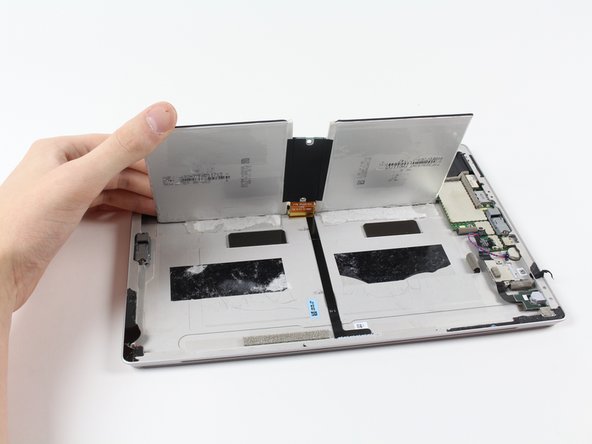
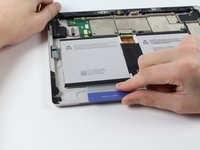
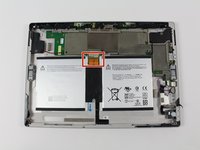
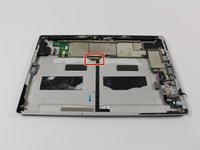
Ora che avete rimosso la copertura del Surface 3, potete iniziare a rimuovere il pacco batteria.
-


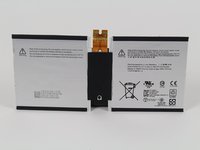
Per riassemblare il dispositivo, segui queste istruzioni in ordine inverso.
Per riassemblare il dispositivo, segui queste istruzioni in ordine inverso.
Annulla: non ho completato questa guida.
Altre 22 persone hanno completato questa guida.
Un ringraziamento speciale a questi traduttori:
100%

Questi traduttori ci stanno aiutando ad aggiustare il mondo! Vuoi partecipare?
Inizia a tradurre ›
Team

Cal Poly, Team 5-12, Maness Fall 2015 Membro di Cal Poly, Team 5-12, Maness Fall 2015
CPSU-MANESS-F15S5G12
4 Membri
22 Guide realizzate
13 Commenti
I followed these instructions without a hitch but now that I'm trying to put the new battery in I can't slide the connector for the new battery back in. It seems like the teeth that are supposed to grab the connector for the battery are too tight so I can't side the director for the battery in. Do you have any advise for this issue that I'm having?
Recently had to complete this repair for a customer. Was in the same boat, couldn’t figure out how to plug the battery back in. And wasn’t paying attention to how the connection was originally, when i pulled the battery. The connector has to slide UNDER the teeth, not above. Meaning loosen the board screws and lift the board slightly, then slide the battery connector in. hopefully this helps others that a stuck with this issue, and iFixit will update this guide.
Hab’s versucht und es hat leider nicht mal in Ansätzen geklappt. Genau wie beschrieben hab ich den iOpener 30 Sekunden lang in der Mikrowelle erhitzt und dann auf die rechte Seite des Geräts gelegt. Nach ein paar Minuten war ich der Meinung es kann losgehen und hab wie beschrieben an der Einbuchtung des Lautsprechers das Glas leicht angehoben und mit dem Plektrum in flachem Winkel angesetzt. Bevor ich noch groß Kraft anwenden konnte hatte ich schon den Sprung und ein ordentliches Stück Glas ist mir weggesprungen. Zunächst dachte ich dass es halb so schlimm sei, denn es hat “nur” den schwarzen Rand erwischt, nicht jedoch das Tochscreen selbst. Naja nach kurzer Zeit ist der Riss gewandert und nachdem die Tochfunktion nicht mehr ging, kamen danach die bunten Streifen…. 300€ kostet der Displaytausch und noch mal 90€ der Akku tausch. Hätte ich gewusst wie unfassbar leicht das Glas springt, hätte ich sofort den Akkutausch machen lassen und nicht selbst Hand angelegt -.-