Salta al contenuto principale
Unisciti alla Community delle riparazioni - Crea un account
Sony Cyber-Shot DSC-W330 LCD Display Replacement

Sony Cyber-Shot DSC-W330 LCD Display Replacement

Hunter Stewart

Hunter Stewart e 3 altri collaboratori

Ultimo aggiornamento il 22 giu 2025

15 minuti
Moderato
Introduzione Migliore

Cosa ti serve

Strumenti

Mostra di più…

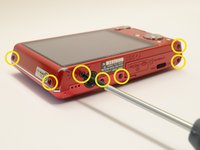
  1. Sony Cyber-Shot DSC-W330 LCD Display Replacement, Outer Casing: passo 1, immagine 1 di 3 Sony Cyber-Shot DSC-W330 LCD Display Replacement, Outer Casing: passo 1, immagine 2 di 3 Sony Cyber-Shot DSC-W330 LCD Display Replacement, Outer Casing: passo 1, immagine 3 di 3
    • Begin by placing the camera flat against a surface and remove the nine (9) black screws. Each screw is of the same length and can be used interchangeably

    • Note: There are two (2) screws on each side, and five (5) on the bottom edge.

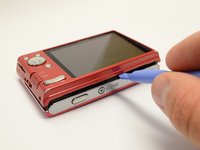
  2. Sony Cyber-Shot DSC-W330 LCD Display Replacement: passo 2, immagine 1 di 3 Sony Cyber-Shot DSC-W330 LCD Display Replacement: passo 2, immagine 2 di 3 Sony Cyber-Shot DSC-W330 LCD Display Replacement: passo 2, immagine 3 di 3
    • Use a plastic opening tool to carefully pry off the front casing.

    • Be careful to not to force the casing off. Simply move around the entire case separating where needed.

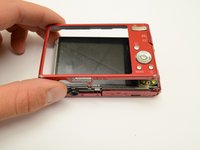
  3. Sony Cyber-Shot DSC-W330 LCD Display Replacement: passo 3, immagine 1 di 3 Sony Cyber-Shot DSC-W330 LCD Display Replacement: passo 3, immagine 2 di 3 Sony Cyber-Shot DSC-W330 LCD Display Replacement: passo 3, immagine 3 di 3
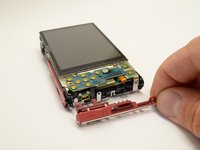
    • Flip the camera over 180 degrees and similarly pry off the rear casing.

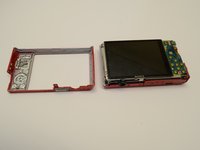
  4. Sony Cyber-Shot DSC-W330 LCD Display Replacement: passo 4, immagine 1 di 3 Sony Cyber-Shot DSC-W330 LCD Display Replacement: passo 4, immagine 2 di 3 Sony Cyber-Shot DSC-W330 LCD Display Replacement: passo 4, immagine 3 di 3
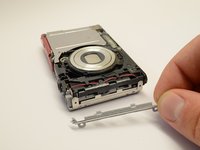
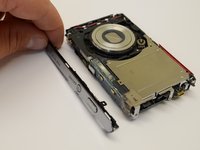
    • Once the outer casings have been removed, the silver side trim should come loose from the camera.

    • Place the camera with the lens facing down. Use the plastic opening tool to pry off the side panel with the USB plug.

    • Note: If you wish to remove the top cover, see the LCD Display Replacement to remove the LCD screen before continuing to Step 5

  5. Sony Cyber-Shot DSC-W330 LCD Display Replacement: passo 5, immagine 1 di 3 Sony Cyber-Shot DSC-W330 LCD Display Replacement: passo 5, immagine 2 di 3 Sony Cyber-Shot DSC-W330 LCD Display Replacement: passo 5, immagine 3 di 3
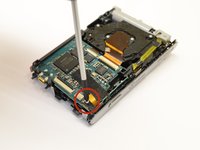
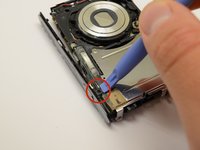
    • Place the camera with the lens facing down. Use the phillips head screwdriver to remove the silver screw in the corner near the photo capture button.

    • Flip the camera over. Use the plastic opening tool to detach the black clip near the capture button.

    • Grasp the top cover and gently remove it from the camera body.

  6. Sony Cyber-Shot DSC-W330 LCD Display Replacement, LCD Display: passo 6, immagine 1 di 3 Sony Cyber-Shot DSC-W330 LCD Display Replacement, LCD Display: passo 6, immagine 2 di 3 Sony Cyber-Shot DSC-W330 LCD Display Replacement, LCD Display: passo 6, immagine 3 di 3
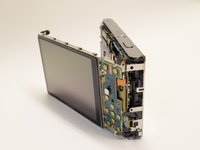
    • After the outer casing is removed, lay the device display side up

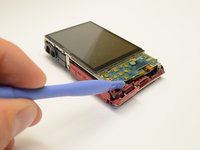
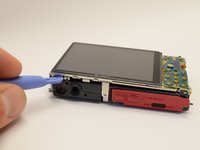
    • Gently pry the LCD screen from the body of the camera.

    • Be careful not to damage the ribbon cables, they are still attached to the camera.

  7. Sony Cyber-Shot DSC-W330 LCD Display Replacement: passo 7, immagine 1 di 3 Sony Cyber-Shot DSC-W330 LCD Display Replacement: passo 7, immagine 2 di 3 Sony Cyber-Shot DSC-W330 LCD Display Replacement: passo 7, immagine 3 di 3
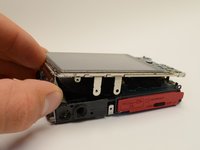
    • Flip the LCD Assembly around the edge of the camera

    • Note: Be careful not to rip the assembly from the camera. It is still attached by the ribbon cables!

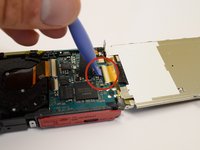
    • Use the plastic opening tool to gently pry up the black tab locking the large ribbon cable to the battery housing.

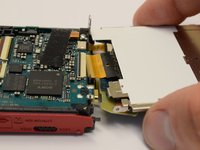
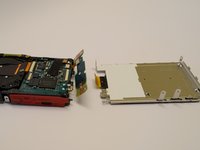
    • Grasp the LCD display with your fingers and gently pull the large ribbon cable out of the connector.

    • The LCD display is now detached from the camera.

Conclusione

To reassemble your device, follow these instructions in reverse order.

Preparati per le riparazioni future

Acquista tutti

Team

Clemson, Team 13-4, Benson Fall 2013 Membro di Clemson, Team 13-4, Benson Fall 2013

CLEM-BENSON-F13S13G4

3 Membri

20 Guide realizzate

1Commento della guida

What LCD screen can i replace it with

Matnor3339 - Replica

Aggiungi Commento

Visualizza Statistiche:

Ultime 24 Ore: 2

Ultimi 7 Giorni: 22

Ultimi 30 Giorni: 54

Tutti i Tempi: 1,883