Introduzione
Use this guide to replace a worn-out or dead battery in your Scuf Reflex.
For your safety, discharge the battery before disassembling your device. This reduces the risk of fire if the battery is accidentally damaged during the repair. If your battery is swollen, take appropriate precautions.
Cosa ti serve
-
-
Before starting repairs, turn off your device and unplug any cables.
-
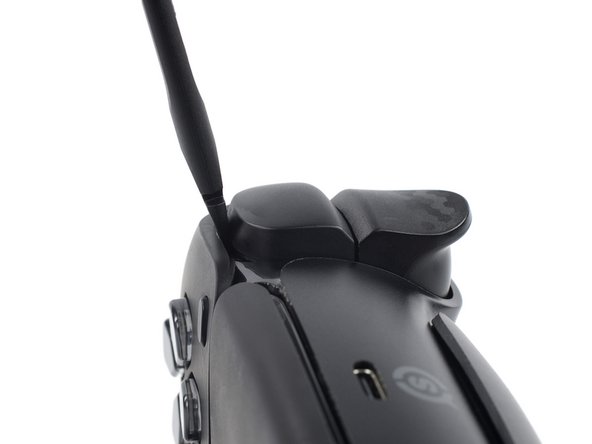
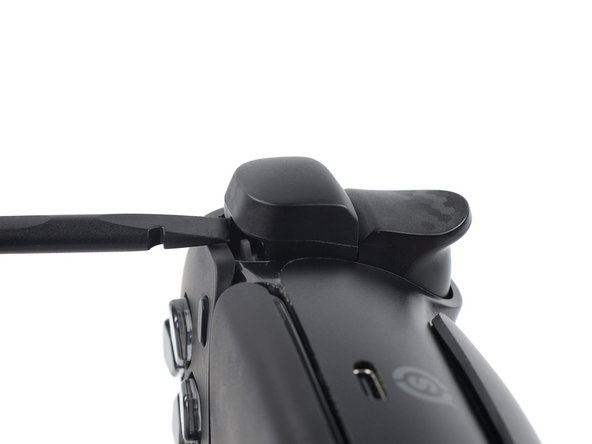
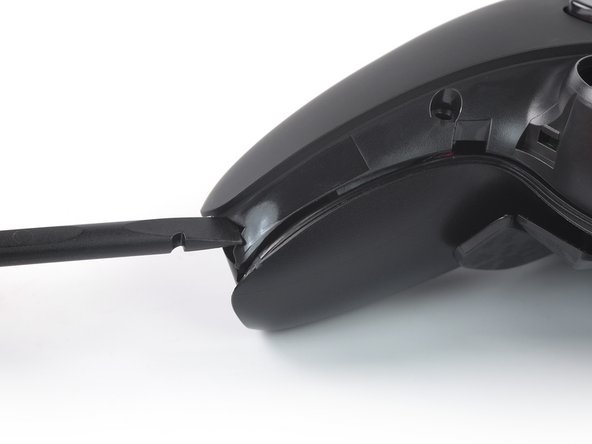
Insert the flat end of a spudger between the faceplate and the R1 bumper.
-
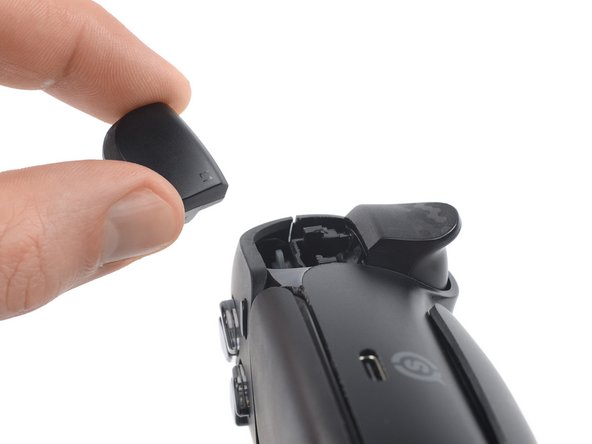
Pry up with the spudger to release the clips securing the bumper.
-
-
-
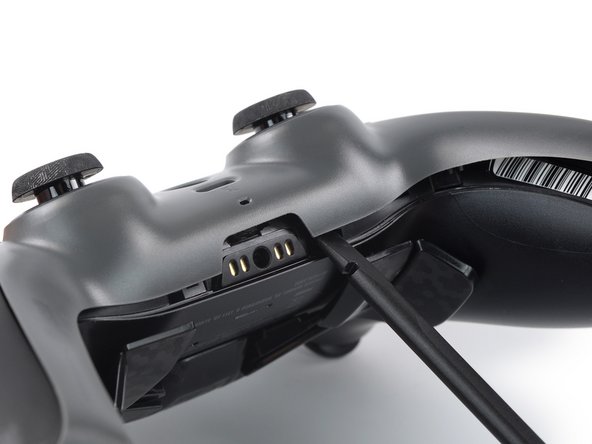
Insert the flat end of a spudger between the faceplate and the L1 bumper.
-
Pry up with the spudger to release the clips securing the bumper.
-
-
-
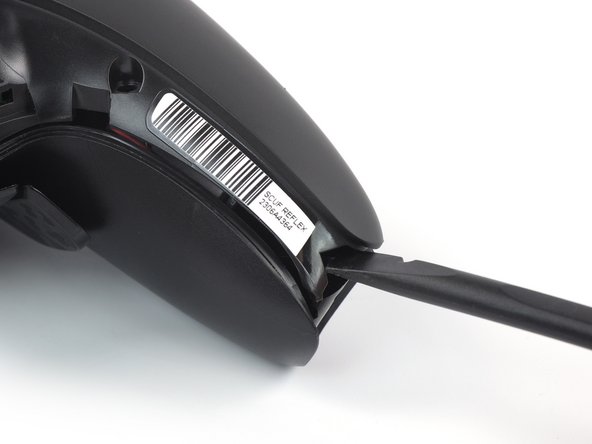
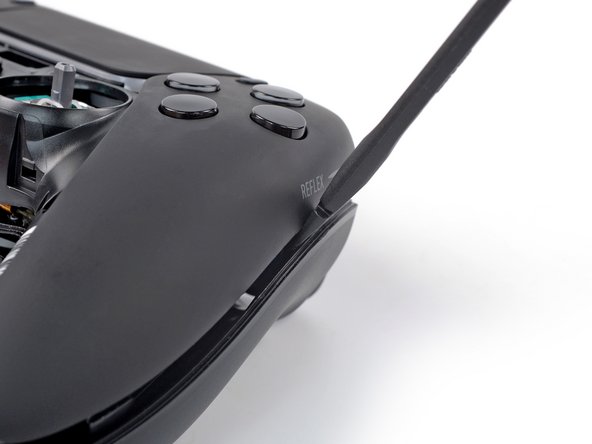
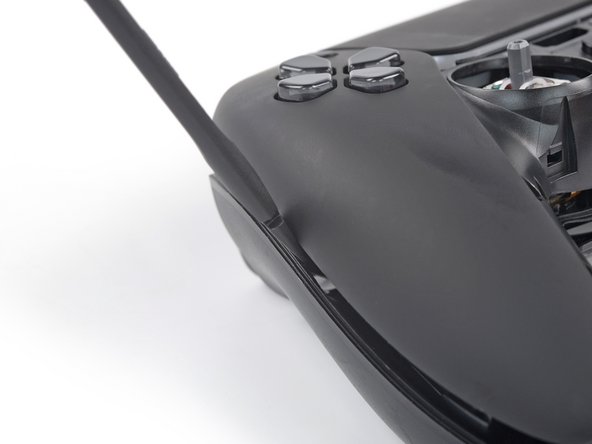
At the bottom tip of the right grip, insert the flat end of a spudger or a clean fingernail between the faceplate trim and the back cover.
-
Pry up to release the faceplate trim’s bottom right clip.
-
-
-
At the bottom tip of the left grip, insert the flat end of a spudger or a clean fingernail between the faceplate trim and the back cover.
-
Pry up to release the faceplate trim’s bottom left clip.
-
-
-
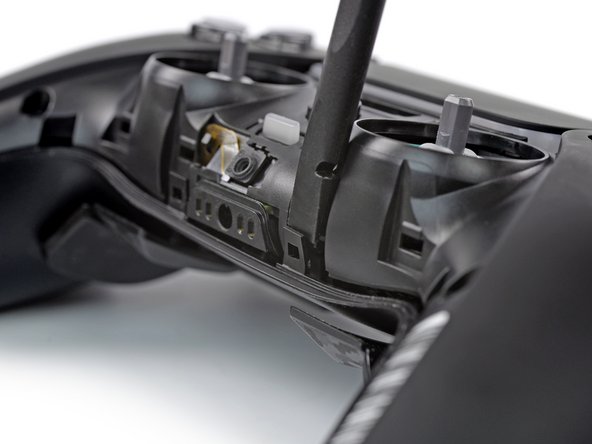
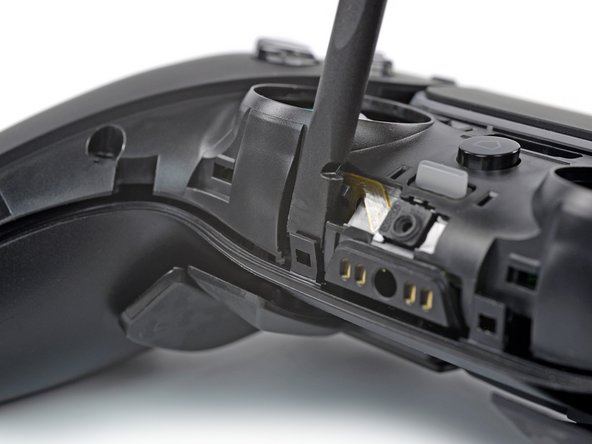
Insert the flat end of a spudger between the faceplate trim and the back cover, next to the headphone jack.
-
Pry up to release the plastic clips securing the center of the faceplate trim.
-
-
-
-
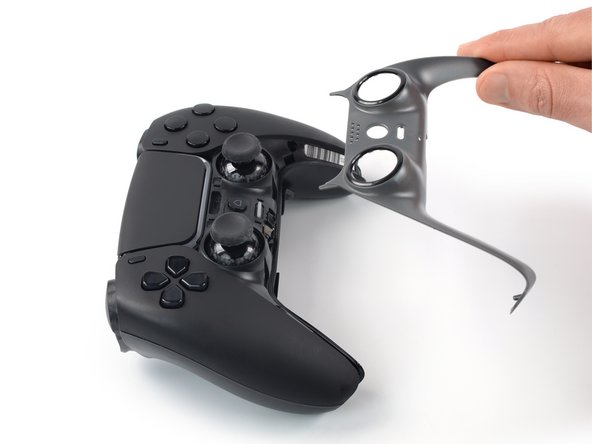
Lift the bottom edge of the faceplate trim and thread it up and over the thumbsticks.
-
Pull the top corners of the faceplate trim out from underneath the faceplate and remove the faceplate trim.
-
-
-
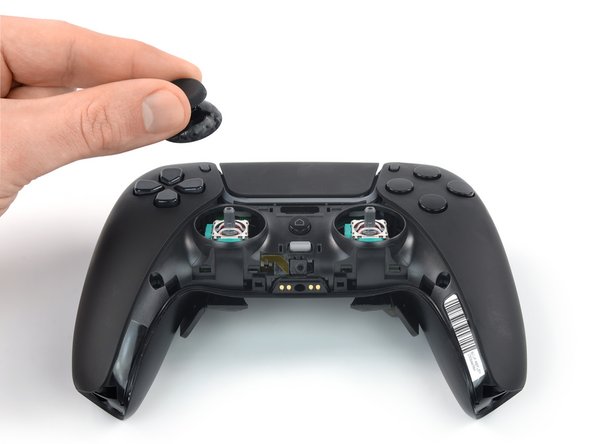
Pull the thumbsticks straight up and off of their joysticks to remove them.
-
-
-
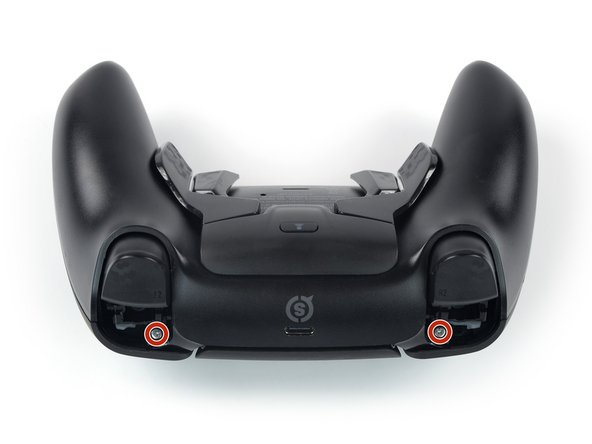
Use a Phillips screwdriver to remove the four 6.5 mm-long screws securing the back cover, two near the triggers and two at the bottoms of the grips.
-
-
-
Insert a spudger underneath the bottom right corner of the faceplate and pry up to release the plastic clip.
-
-
-
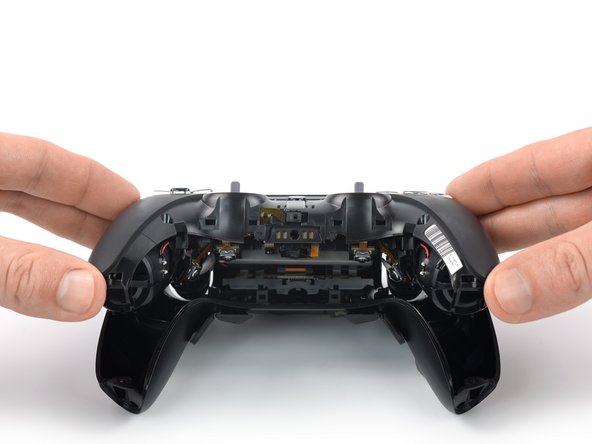
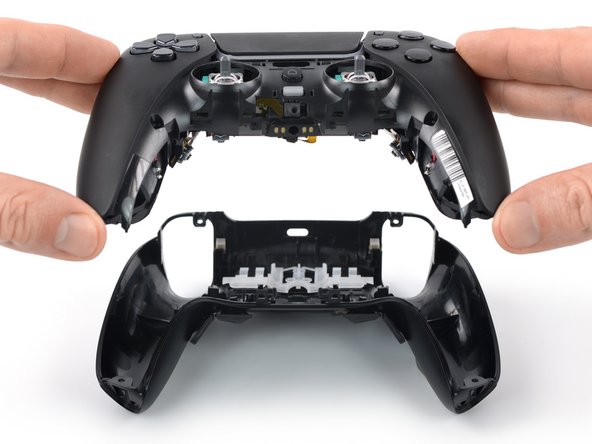
Carefully lift up the bottom of the faceplate assembly.
-
Pull the faceplate assembly down and remove it.
-
-
-
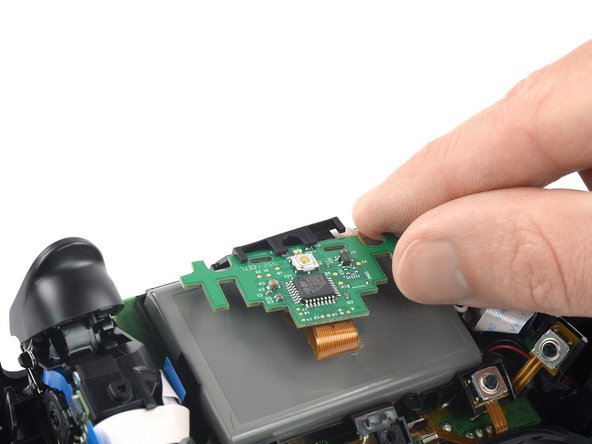
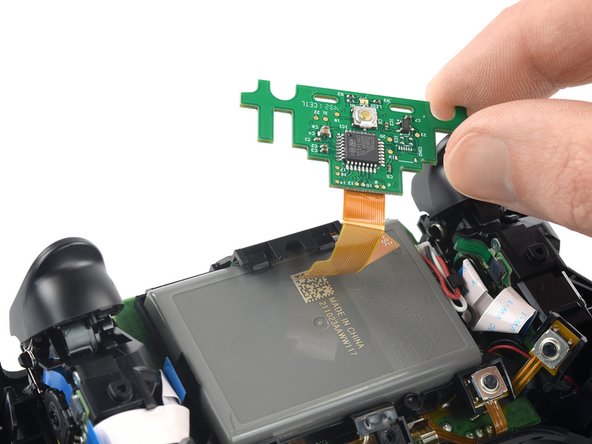
Gently pull the right side of the daughterboard down to release the first plastic clip.
-
Pull the left side of the daughterboard down to release the second clip and free the board.
-
Move the daughterboard to the side to get free access to the battery connector.
-
-
-
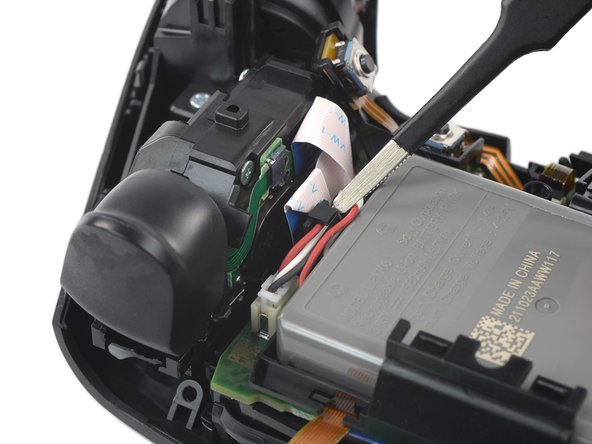
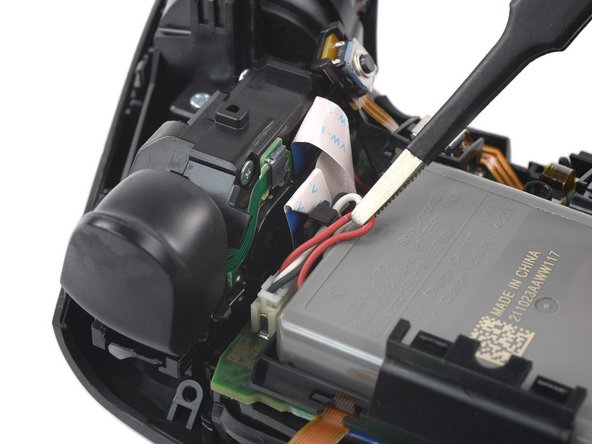
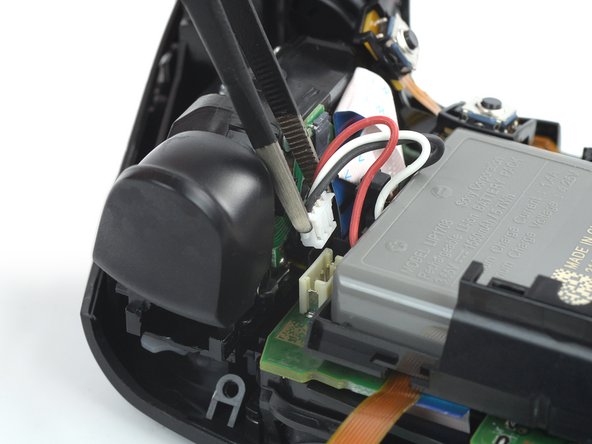
Use tweezers to carefully pull all three battery cables out from under their plastic hook.
-
-
-
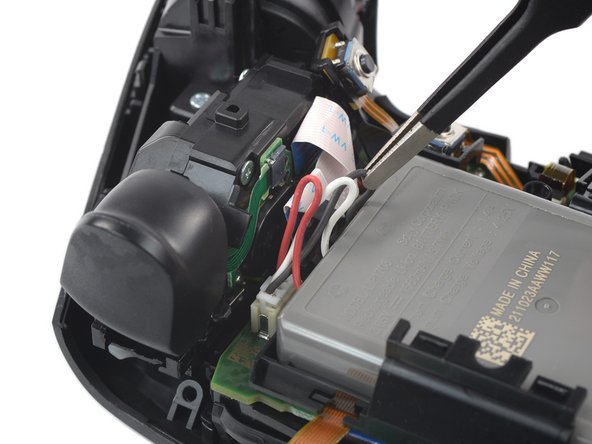
Use a pair of tweezers to pull the battery JST connector straight out of its socket.
-


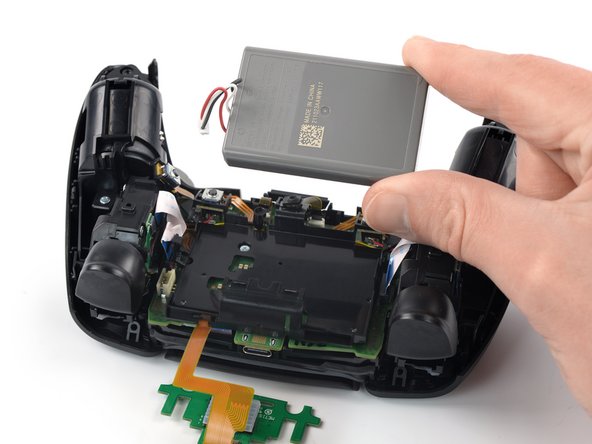
To reassemble your device, follow the instructions in reverse order.
For optimal performance, calibrate your newly installed battery after completing this guide.
Take your e-waste to an R2 or e-Stewards certified recycler.
Repair didn’t go as planned? Try some basic troubleshooting, or ask our Answers community for help.
Annulla: non ho completato questa guida.
Un'altra persona ha completato questa guida.

