Samsung Galaxy Note 3 Rear Facing Camera Replacement
Introduzione
Vai al passo 1This guide shows how to replace the camera.
Cosa ti serve
Ricambi
Strumenti
Mostra di più…
-
-
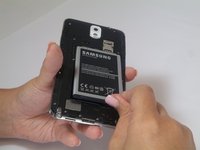
Insert a fingernail or plastic opening tool in the gap between the rear case and the base of the phone.
-
-
-
Slide your fingernail or plastic opening tool along the edge of the rear case.
-
Lift the case gently from the base.
-
-
-
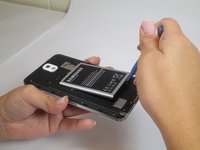
Insert a fingernail or plastic opening tool into the small gap between the battery and the phone base.
-
Lift the battery out of its recess.
-
-
-
Place your fingernail in the groove of the stylus pen.
-
Pull the stylus pen away from the phone.
-
-
-
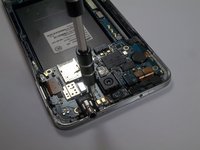
Remove the twelve 4mm Phillips #00 screws from the back chassis.
-
-
-
Insert the plastic opening tool into the Stylus Pen placement holder.
-
Lift the plastic opening tool so that the midframe separates from the base.
-
-
-
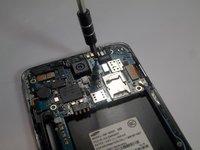
Remove the single screw beside headphone jack.
You can skip this step, it is usseles as this screw doesn’t attach the mother board at all
-
-
Attrezzo utilizzato in questo passaggio:Tweezers$4.99
-
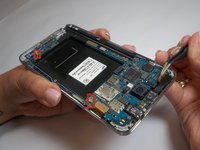
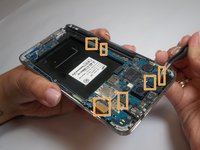
Use tweezers to remove both antenna clips.
-
Use a spudger to disconnect six cable connectors.
-
-
-
Pull up on the motherboard with tweezers.
My mother board is not working what should I do I can't use Bluetooth, WiFi,hotspot or insert sim
My wifi hotspot is not working
-
-
-
Unclip the camera connecting cable using the plastic opening tool from the motherboard
-
Remove loose camera from base
-
To reassemble your device, follow these instructions in reverse order.
To reassemble your device, follow these instructions in reverse order.
Annulla: non ho completato questa guida.
Altre 37 persone hanno completato questa guida.
Preparati per le riparazioni future
Acquista tutti3Commenti sulla guida
Hi
Thanks for the nice instructions
Do you know if I can use a Note 4 camera (or any better!) for my Note 3?
Are they different in connections?
Thanks
I shall be very thankfull for this act of kindness


