
OnePlus X Rear Facing Camera Replacement
Introduzione
Vai al passo 1This guide will show you how to replace the rear-facing camera of the OnePlus X.


-
-
Power off the phone by pressing the button on the right side of the phone, it will be the smaller button.
-
Press and hold the button down for a few seconds, until the option "Power Off" appears on the screen.
-
Select "Power Off" on the screen to turn off the phone.
-
-
-
Insert a SIM card removal tool into the small hole located on the top right corner of the phone, just above the volume buttons.
-
Push the removal tool into the hole and the tray should pop out.
-
Remove the SIM tray from the phone.
There is absolutely no reason to remove the sim tray, we're not removing the motherboard.
-
-
-
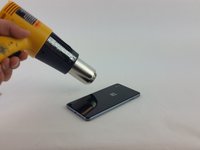
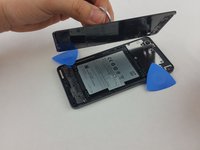
Using a heat gun, apply slow and even heat to the edges of the back panel.
-
While heating the back panel, use a Jimmy to test if the adhesive is soft enough to allow the panel to separate from the device.
-
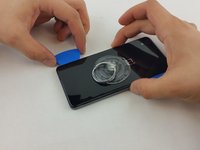
Carefully detach the back panel, using opening picks to hold the panel apart from the device.
-
Once most of the edges are separated from the device, attach a suction cup to the back panel.
-
-
-
-
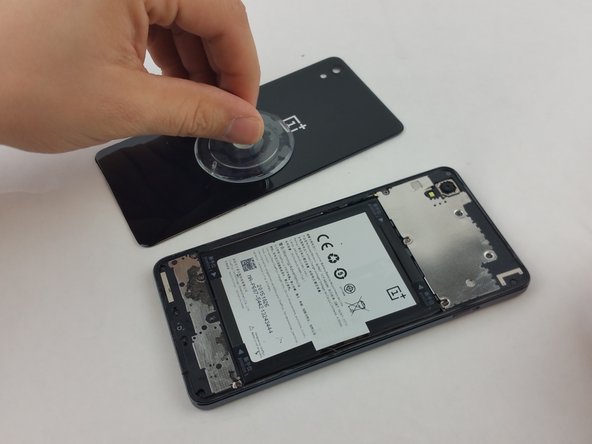
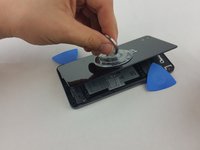
Press the suction cup to the back panel to secure it.
-
With the help of the suction cup, pull up on the panel to completely detach it from the device.
It can't be stressed enough to do this very carefully. I did it very carefully, but not carefully enough. Cracked a corner. Also not just the edges, there's extra adhesive on the lower 2-3 cm's of the back.
Another remark, get in between the black bezel and the back cover, this is a bit unclear on the first picture. Same goes for the front, get in between the bezel and the front assembly.
-
-
-
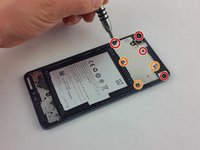
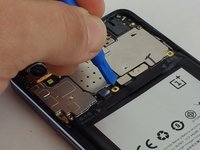
Using a PH000 screwdriver, remove the following seven screws circled with red and orange:
-
Four (longer) PH000 screws
-
Three shorter PH000 screws
-
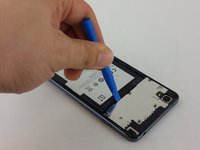
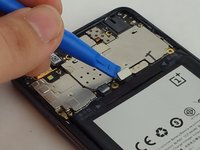
Once all of the screws are removed, proceed to using a plastic spudger to pry the metal cover off.
-
There are two clips near the bottom, right above the battery, so start by prying on the bottom edge of the plate.
Check http://imgur.com/wqD9Dis. Orange circles are the smaller screws (3 out of 7 are smaller than the other 4).
-
-
-
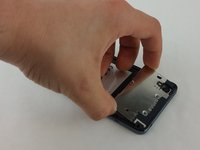
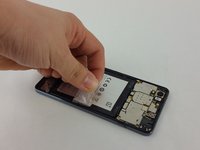
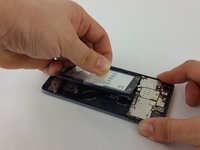
On the battery, locate a clear tab. This will be used to pull the battery out.
-
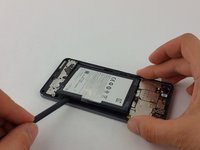
Firmly grasp the clear tab and pull up and away from the phone to remove the battery.
-
Continue to pull slowly on the battery, until it is completely free from the phone.
Strictly speaking, you don't need to remove the battery at all. The connector to the front assembly is underneath the speaker assembly.
I agree it's nearly impossible to remove the battery without damaging it. Even a tiny little bending can lower the capacity. And if you heat it up too much to soften the glue it can explode. Also never use metal tools on the battery in case u break through the protection foil it won't catch fire.
The instructions on the pull tab itself are pretty clear and contradict what's said here!
"Tear from position 1, and then pull out the battery from position 2."
The battery sits in a kind of a black "vest", which is the thing glued to the phone (not the battery itself).
This vest can be "unbuttoned" from the top and bottom sides (position 1, visible on some of the previous pictures).
After that the battery would pop out with much less effort (there is some adhesive in the "vest", but it's much less robust).
What is being depicted here is quite dangerous and unnecessary, as it makes the battery bend heavily.
-
-
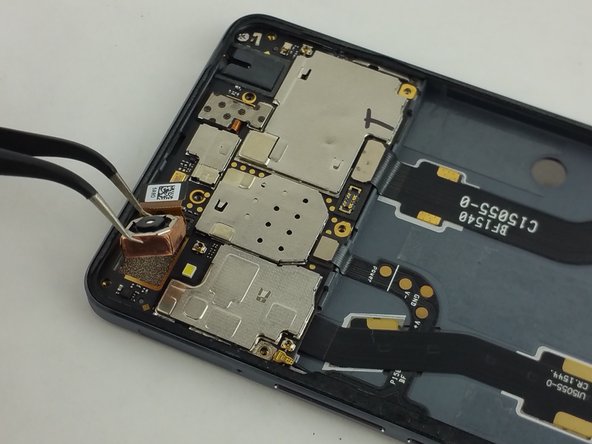
Attrezzo utilizzato in questo passaggio:Tweezers$4.99
-
Locate the camera on the motherboard, near the top-left of the phone.
-
Using a plastic pry tool, gently unclip the cable from the motherboard.
-
After disconnecting the camera, use a pair of precision tweezers to lift the camera and remove it from the phone.
-


To reassemble your device, follow these instructions in reverse order.
To reassemble your device, follow these instructions in reverse order.
Team

USF Tampa, Team 3-6, Wollert Spring 2016 Membro di USF Tampa, Team 3-6, Wollert Spring 2016
USFT-WOLLERT-S16S3G6
2 Membri
10 Guide realizzate