Salta al contenuto principale
Unisciti alla Community delle riparazioni - Crea un account
Nikon 1 J5 LCD Module Replacement

Nikon 1 J5 LCD Module Replacement

Terrance

Terrance e un altro collaboratore

Ultimo aggiornamento il 2 lug 2025

5 minuti
Facile
Guida fornita dalla comunità

Cosa ti serve

Strumenti

  1. Nikon 1 J5 LCD Module Replacement, Remove Micro SD card and Battery: passo 1, immagine 1 di 1
    • Remove Micro SD card and Battery

  2. Nikon 1 J5 LCD Module Replacement: passo 2, immagine 1 di 3 Nikon 1 J5 LCD Module Replacement: passo 2, immagine 2 di 3 Nikon 1 J5 LCD Module Replacement: passo 2, immagine 3 di 3
    • Remove 2 screws

    • Open plastic LCD connector cover

    • Lift FPC connector latch

    • Detach LCD FPC

  3. Nikon 1 J5 LCD Module Replacement, Detail of the FPC connector: passo 3, immagine 1 di 3 Nikon 1 J5 LCD Module Replacement, Detail of the FPC connector: passo 3, immagine 2 di 3 Nikon 1 J5 LCD Module Replacement, Detail of the FPC connector: passo 3, immagine 3 di 3
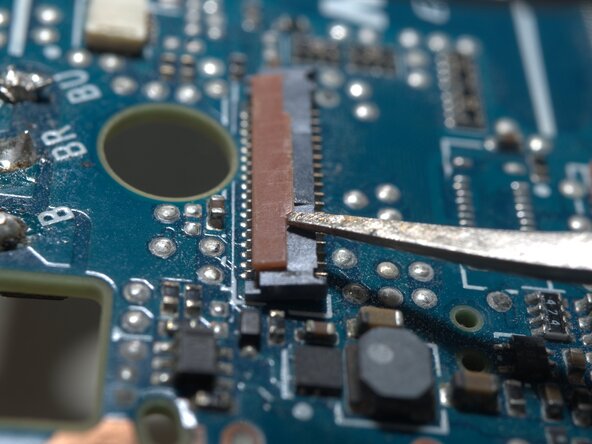
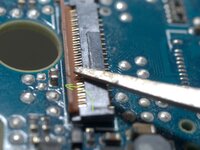
    • The FPC cable is inserted from right side of this photo.

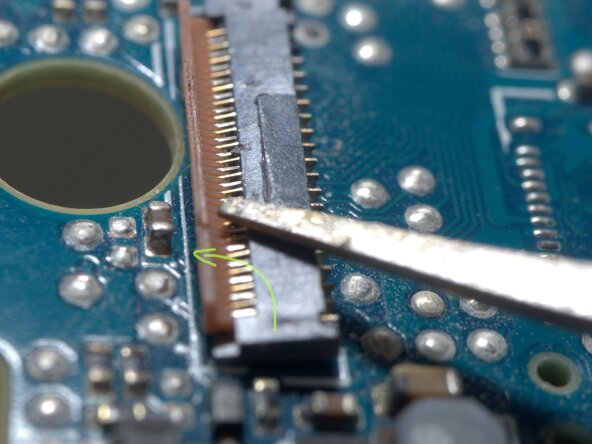
    • Insert a fine tip tweezer or any thin flat tip tool under the latch, and gentally lift it.

    • The latch rotates CCW for about 90 degrees
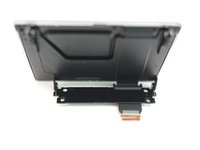
  4. Nikon 1 J5 LCD Module Replacement: passo 4, immagine 1 di 3 Nikon 1 J5 LCD Module Replacement: passo 4, immagine 2 di 3 Nikon 1 J5 LCD Module Replacement: passo 4, immagine 3 di 3
    • Remove 4 screws

    • Remove LCD module

Conclusione

To reassemble your device, follow these instructions in reverse order.

Preparati per le riparazioni future

Acquista tutti

Terrance

Membro da: 11/17/09

6.698 Reputazione

18 Guide realizzate

0Commenti sulla guida

Aggiungi Commento

Visualizza Statistiche:

Ultime 24 Ore: 0

Ultimi 7 Giorni: 2

Ultimi 30 Giorni: 23

Tutti i Tempi: 637