
MSI GE72 6QF Apache Pro Battery Replacement

Introduzione
Vai al passo 1This guide shows how to locate and remove the battery of a MSI GE72 6QF Apache Pro for possible replacement.
Cosa ti serve
Kit di riparazione
Questo kit contiene tutti i ricambi e gli strumenti necessari per completare questa guida.

Ricambi

Strumenti

Mostra di più…
-
-
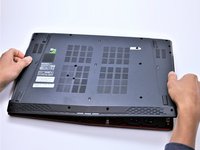
With the laptop closed and upside down, unscrew the nineteen 5.5mm Phillips #1 screws that keep the back cover in place.
-
-
-
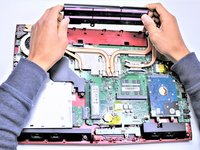
Slide the optical drive out of the laptop.
Good day sir pls am urgently look for the complete cd rom for this laptop msi 1791. Please if u can get some for me text me on 7186034112
Or send me and email rauff191@gmail.com
-
-


To reassemble your device, follow these instructions in reverse order.
To reassemble your device, follow these instructions in reverse order.
Annulla: non ho completato questa guida.
Altre 5 persone hanno completato questa guida.

4Commenti sulla guida
hi there, can we use the laptop without the battery attached? i mean using only the power adaptor straight through the electric plug
yes you can, might drop bit of performance if you have Hybrid power management on, buyed my laptop used its 4 years old now and was used 2 years, dont even checked used battery but removed it and using AC power, just after a while gonna need to replace vents…
also cooling is problem in summers, cut-off some plastics and using cooling pad (recommending with 3+ vents or good airflow)
Faut démonter TOUTES les vis ??? Je vais en perdre la moitié !
Bravo!! plus simple c’était pas possibles?
Dire qu’avant on avait une trappe coulissante d’acces (DELL) ..
Les PC portables MSI ne sont pas les pire à réparer, loin de là !
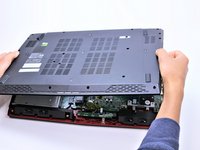
Par expérience, l’étape la plus délicate c’est d’arriver à enlever le capot car il est maintenu par des clips en plastique, après on a accès à pratiquement toutes les pièces sur ce modèle.
Aujourd’hui, les PC portables avec une trappe coulissante existent toujours, mais ils sont cher :)
Brendan -