
MFC-J4410DW Upper Cover Removal
Introduzione
Vai al passo 1This Guide will walk you through disassembling the printer down through the upper cover, which is necessary to access many components.
Cosa ti serve
Strumenti


Mostra di più…
-
-
Open the front access door and remove any cards or cables present. Close the access door.
-
Remove the paper tray.
-
Remove the ink cartridges.
-
Open the printer cover using the finger holds on the sides.
-
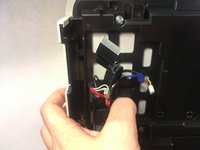
Unplug and remove any cords present under the cover.
-
Remove the LAN port and EXT port caps (if present).
-
-
-
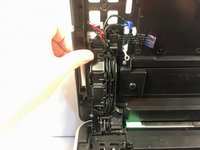
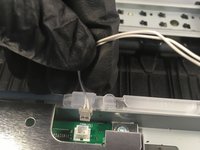
While holding the cover with one hand, pull the hook on the back of the support damper, then remove the damper from the cover.
-
Remove the damper from the support.
-
Turn the support upright and pull it straight out of the printer.
-
-
-
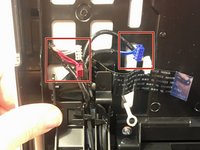
Use your finger or a spudger to unhook the two tabs on the right side of the harness cover by levering it up.
-
Remove the harness cover. There are two tabs on the left side that you have to wiggle free, and one on the front.
-
-
-
Remove the 6 mm Phillips #2 screw from the grounding wire of the ADF motor harness.
-
-
-
-
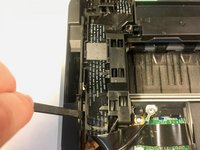
Insert a spudger between the scanner harness holder and frame to release the tab. There is a second tab on the opposite side.
-
Lift the scanner harness holder out of its frame.
-
-
-
Push on the tab to secure the scanner harness holder to the scanner cover.
-
De-route the document detection/document scanning position sensor harness and the ADF motor harness from the scanner harness holder.
-
-
-
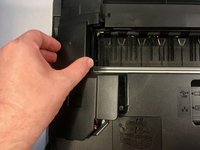
Using both hands, pull the scanner cover to the rear while holding it vertically, then lift it off of the printer.
-
-
-
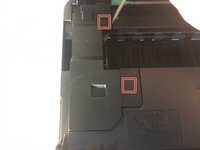
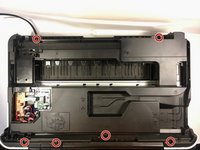
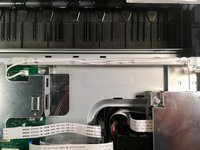
Remove the six 12 mm Phillips #2 screws securing the upper cover to the printer.
-
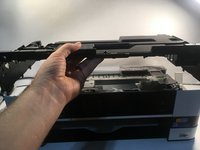
Pull off the upper cover.
-
-
-
Remove the ink absorber full sensor from its socket.
-
De-route the wiring from its harness.
-
-
-
Unclip the ink absorber from the harness by pulling it up and to the right.
-


To reassemble your device, follow these instructions in reverse order.
To reassemble your device, follow these instructions in reverse order.
Annulla: non ho completato questa guida.
Altre 8 persone hanno completato questa guida.
Team

6 Commenti
Muchas gracias me encanta la dedicacion y lo claro que esta hecho el manual.
Calion,
Quite good instructions. However I needed to get to the power supply, and most of this was very useful, because there are 2 screws supporting the power supply you need to take out with the uper cover removed and the fronf left corner moulding removed. But step 14 and 15 are not necessary, and some of the cable disconnections are not needed.
On step 2 also showing the support damper (removed) with an arrow showing the hook on the back of the support damper would have saved lots of time as I had great difficulty with this step.
Thanks again
Ian
I can see how that would be helpful. Feel free to add it!
Calion -
Very good guide
Thanks! Glad it was helpful!
Calion -