
HP 15-da0002dx SSD Replacement
Introduzione
Vai al passo 1If your HP Notebook 15-da0002dx laptop is making ticking sounds, experiences frequent crashes, or if your computer has trouble reading files, saving files, or is generally running slow, the SSD may need to be replaced. The SSD (Solid State Drive) acts as a storage device that reads, writes, and stores data.
Before using this guide, make sure your computer’s issues are not caused by its software. Restart the computer and see of the problems continue. If not, make sure your computer’s operating system is updated.
Before using this guide, power off the computer and wait for the components to cool. Working over a non-carpeted surface will reduce the risk of ESD damage (electrostatic discharge). A non-carpeted surface should not be able to conduct electricity and is connected to a grounded surface. Another way to reduce the risk of ESD damage is by using a plastic tool when removing the battery as plastic does not conduct electricity.
Cosa ti serve
Kit di riparazione
Questi kit contengono tutti i ricambi e gli strumenti necessari per completare questa guida.


Ricambi


Strumenti


Mostra di più…
-
-
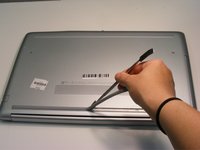
Two plastic feet are located on adjacent sides of the back cover.
-
Peel back the plastic feet using the plastic opening tools.
thanks for posting this writeup. something to take not of, is the rubber strippings (feet) are of two different sizes
- the thicker rubber strip goes on the back side
- the thinner rubber strip goes on/towards the front
-
-
-
-
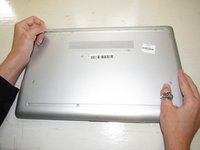
Carefully flip over the computer so the HP label is now facing the ceiling.
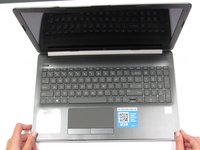
need to Remove the CD rom drive prior to prying the two halves apart. If all the screws are removed from step 2 it should just slide out.
-
-
-
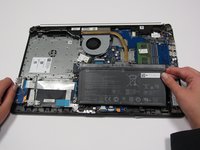
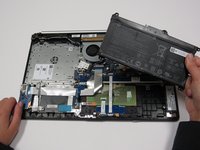
Remove the screws holding the battery in place using a Phillips #1 screwdriver.
-
-
-
Remove the screw holding the SSD in place using the Phillips #1 screwdriver.
Is there a way to add a HDD by the DVD drive and battery (the empty spot that looks like it could fit a 2.5” SATA drive but needs soldering)?
-


To reassemble your device, follow these instructions in reverse order.
To reassemble your device, follow these instructions in reverse order.
Annulla: non ho completato questa guida.
Altre 3 persone hanno completato questa guida.
Team

University of Alabama, Team S2-G8, Bedsole Fall 2019 Membro di University of Alabama, Team S2-G8, Bedsole Fall 2019
UA-BEDSOLE-F19S2G8
4 Membri
6 Guide realizzate
1Commento della guida
sir
can we add a hdd of 1tb also without replacing ssd???
Your instructions worked perfectly. My machine had a 1 TB sata drive 5400 rpm and I replaced it with a Kingston ssd and cloned it prior to installing. Works perfectly.
The rubber feet on the computer cracked but was able to stick them back on. May need to be glued if they come off. Thank You, Irwin
Irwin - Replica