
Fujifilm FinePix Z1 LCD Screen Replacement
Introduzione
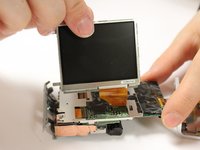
Vai al passo 1The LCD screen on the Fujifilm FinePix Z1 is durable but in unfortunate events can still be damaged. If the screen has had water damaged or has been cracked in some way, this guide will aid in removing the screen and replacing it with a new one.
Cosa ti serve
Strumenti


Mostra di più…
-
-
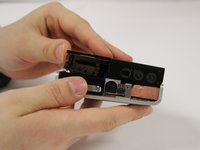
Ensure that the camera is charged and not on PowerSave mode.
-
If the camera is charged and on, a faulty LCD Screen could be caused by a scratch or water damage. Also, trauma to the camera could cause the screen to shatter. In any of these cases, the screen will need to be replaced.
-
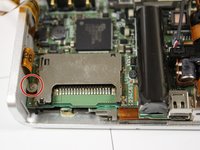
Make sure that the orange thin cable is appropriately attached.
-
-


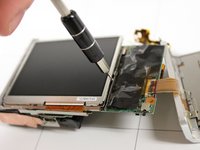
To reassemble your device, follow these instructions in reverse order.
To reassemble your device, follow these instructions in reverse order.
Team

Baylor, Team S2-G4, Johnson Spring 2018 Membro di Baylor, Team S2-G4, Johnson Spring 2018
BU-JOHNSON-S18S2G4
3 Membri
8 Guide realizzate