
Canon EOS 5D Mark II Front Panel Replacement
Introduzione
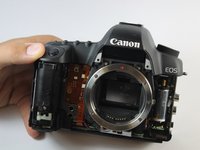
Vai al passo 1This guide will show users how to remove the front panel. It is necessary to remove the front panel in order to remove the top panel and access many internal components.
Cosa ti serve


-
-
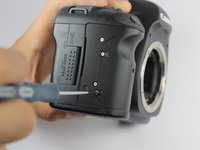
Peel back the rubber cover above the in/out ports to reveal two screw heads.
-
-
-
Remove both 5.4 mm screws using a Phillips #0.
I just accidentally stripped one of those screws. Is there anything I can do or am I...screwed?
-
-
-
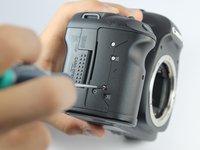
Remove each 6.3 mm screw on either side of the viewfinder using a Phillips #0 screwdriver.
Use Phillips #00 screwdriver.
-
-
-
-
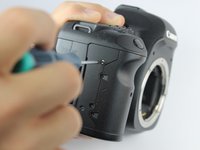
Remove each data ribbon cable from the motherboard by applying pressure down towards the motherboard and gently sliding your thumb upwards on the slot where the cable meets the motherboard. This will raise a very small clip that locks the cable in place.
-
The back panel is now free from the rest of the device.
-
-
Attrezzo utilizzato in questo passaggio:Tweezers$4.99
-
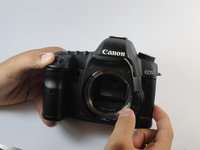
Using tweezers, pull out the wire attaching the front panel to the motherboard.
-


To reassemble your device, follow these instructions in reverse order.
To reassemble your device, follow these instructions in reverse order.
Annulla: non ho completato questa guida.
Altre 14 persone hanno completato questa guida.
Team

USF Tampa, Team 1-6, Hickman Fall 2014 Membro di USF Tampa, Team 1-6, Hickman Fall 2014
USFT-HICKMAN-F14S1G6
3 Membri
16 Guide realizzate