
Asus Chromebook C300M Screen Replacement
Introduzione
Vai al passo 1Laptops are in many ways essential in our modern society, yet they can be quite expensive! Most basic laptops on the market today range from $300 USD to $1500 USD. You never know when you will drop or somehow crack the screen on your laptop, and this can be an expensive mistake. Nobody wants to spend that much money on a new laptop because of a cracked screen, especially when a repair can save them over half of that cost. This guide will help you replace a damaged or broken display assembly in your ASUS Chromebook C300M. It will take you through a step-by-step process for the removal and replacement of your laptop’s screen, but as a quick tip, it is recommended to wear gloves while handling the screen so that no oils can affect the materials. With the help of this guide, you will have your laptop back and running better than ever while still having enough money to buy some ice cream to celebrate your success!
Cosa ti serve
Strumenti


Mostra di più…
-
-
-
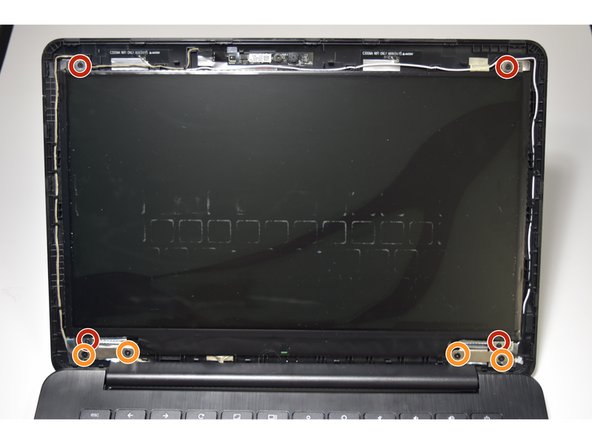
Wedge the tip of a plastic opening tool between the outer casing and inner screen liner.
-
Use the tool to pry all the way around the case, including the bottom side near the hinge, until the case is completely separated.
-
-
Attrezzo utilizzato in questo passaggio:Tweezers$3.99
-
Take the metal angled tweezers to detach the connector from the back of the screen.
-


To reassemble your device, follow these instructions in reverse order.
To reassemble your device, follow these instructions in reverse order.
Annulla: non ho completato questa guida.
Altre 10 persone hanno completato questa guida.
Team

University of Tampa, Team 1-1, Whiteside Fall 2015 Membro di University of Tampa, Team 1-1, Whiteside Fall 2015
UT-WHITESIDE-F15S1G1
3 Membri
8 Guide realizzate
3Commenti sulla guida
I’m having some real trouble getting the inner screen liner back on. I can’t seem to get it to hook under the plastic around the hinge mechanism. If you have completed this repair and could offer any advice on this aspect of it I would greatly appreciate it. Thanks!
I found the answer on YouTube (https://www.youtube.com/watch?v=fWYr8CfZ...). Turns out there is a much easier method to replace the screen the doesn’t require unscrewing the bottom of the Chromebook at all. You just remove the hinge cover and screen liner, swap out the screen then replace the screen liner and hinge cover.
I used this guide to fix the cable running to the screen. Turns out Asus had installed the cable over the hinge and not under as with the antennae.