Salta al contenuto principale
Ambient Weather WS-1001-Wifi LCD Screen Replacement

Ambient Weather WS-1001-Wifi LCD Screen Replacement

Jeremiah Miskimen

Jeremiah Miskimen e 4 altri collaboratori

Ultimo aggiornamento il January 3, 2018

10 - 15 minuti
Moderato

Introduzione

Vai al passo 1

In this repair guide, we will be replacing the LCD screen. This will need to be replaced if the screen is cracked or unresponsive when the device is powered on. For this fix you will need a Philips #1 screwdriver and a small plastic tool to remove the ribbon cable and pry the plastic covering open. It is imperative to carefully remove the ribbon cable because it is connected to the circuit board that powers the system. This guide is fairly simple and requires a minimal amount of time.

Good Luck!

Cosa ti serve

Strumenti

Mostra di più…

  1. Ambient Weather WS-1001-Wifi LCD Screen Replacement, LCD Screen: passo 1, immagine 1 di 1
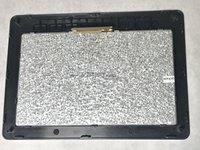
    • First, you will need to remove all four M2x1-7 screws (7mm length) located on the back of the device. This should be done using a Phillips #1 screw driver.

  2. Ambient Weather WS-1001-Wifi LCD Screen Replacement: passo 2, immagine 1 di 1
    • From the side of the device use the plastic opening tool to pry the gray front casing from the rear black casing.

    • The ribbon cable is attached inside so the two pieces will not come completely apart. See step 3.

  3. Ambient Weather WS-1001-Wifi LCD Screen Replacement: passo 3, immagine 1 di 1
    • Using a plastic opening tool, carefully press the black bar towards the ribbon and away from the white bar in order to release it.

    • The ribbon cable should come out and be attached to the back of the LCD screen resulting in two separate pieces.

  4. Ambient Weather WS-1001-Wifi LCD Screen Replacement: passo 4, immagine 1 di 2 Ambient Weather WS-1001-Wifi LCD Screen Replacement: passo 4, immagine 2 di 2
    • Next, you need to remove the LCD screen from the front casing.

    • Push on the front of the LCD screen to pop it out as seen in picture 2.

Conclusione

To reassemble your device, follow these instructions in reverse order.

Team

IUPUI, Team S1-G2, Harley Fall 2017 Membro di IUPUI, Team S1-G2, Harley Fall 2017

IUPUI-HARLEY-F17S1G2

4 Membri

3 Guide realizzate

2Commenti sulla guida

Pretty useless guide since this is all pretty self explanatory with no reference on where to get a replacement or even a part number

Jared Dykstra - Replica

Exactly right.

j drag -

Aggiungi Commento

Visualizza Statistiche:

Ultime 24 Ore: 0

Ultimi 7 Giorni: 1

Ultimi 30 Giorni: 2

Tutti i Tempi: 395