
Amazon Echo Show Back Cover Replacement

Introduzione
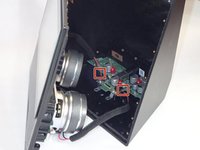
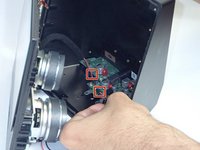
Vai al passo 1Most replacement guides will require you to open up the Alexa to access components, so following this guide will let you access the internal components quickly and safely.
Cosa ti serve
Strumenti


To reassemble your device, follow these instructions in reverse order.
To reassemble your device, follow these instructions in reverse order.
Preparati per le riparazioni future
Acquista tutti


Team

University of South Florida St. Petersburg, Team S1-G3, Stowe Fall 2018 Membro di University of South Florida St. Petersburg, Team S1-G3, Stowe Fall 2018
USFSP-STOWE-F18S1G3
4 Membri
6 Guide realizzate
2Commenti sulla guida
this particular guide originally only had the prerequisite guide portion, so the steps to replace the top buttons were repeated across every single guide we had. I adjusted the prerequisite guide to include the separation of the two halves and moved the top button replacement guide to its own page. As this is still a private guide, it won’t be published unless we approve it.
This article has been flagged as the prerequisite guide for a few of our articles, so I ended up altering it to be such. However, the ones that are not linked to this one, I added a few steps.