
Amazon Echo Dot 2nd Generation 4-in-1 WiFi/Bluetooth/FM/GPS Replacement
Introduzione
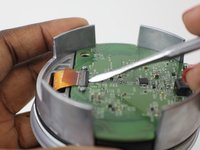
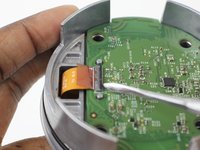
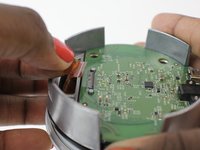
Vai al passo 1Use this guide to replace the 4-in-1 WiFi/Bluetooth/FM/GPS board on the Amazon Echo Dot 2nd generation. The 4-in-1 is located on the motherboard, so the whole board must be replaced, rather than replacing each individual component.
Cosa ti serve
Strumenti


Mostra di più…
-
-
Power off and unplug the echo
-
Using the plastic opening tool, peel off the rubber layer on the bottom of the echo
-
-


To reassemble your device, follow these instructions in reverse order.
To reassemble your device, follow these instructions in reverse order.
Annulla: non ho completato questa guida.
Altre 7 persone hanno completato questa guida.
Team

USF Tampa, Team S1-G3, Leahy Fall 2017 Membro di USF Tampa, Team S1-G3, Leahy Fall 2017
USFT-LEAHY-F17S1G3
3 Membri
12 Guide realizzate
2Commenti sulla guida
Where can I find the part my dot won’t connect and I have been going crazy trying to find the motherboard
I wish to recommend not removing the adhesive layer if you plan to reassemble this Echo Dot. I would suggest poking holes to reach the four screws instead. Then reassembly can reuse the same adhesive layer.