Introduzione
Vai al passo 1This teardown is an attempt to fill in some much needed understanding of the inner workings of the 3xx Scooba tank. The tank is welded together and is mostly unrepairable. Fortunately, there is not much that can go wrong with the tank. When inspecting a Scooba, the only deal breaker on the tank is whether or not the solution valve is intact. If the Solution Valve is wrecked, the tank is garbage until some enterprising repair person can cut out the valve area on a CNC machine and make a part that can be glued into place.
-
-
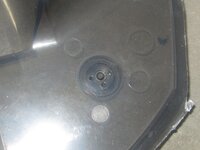
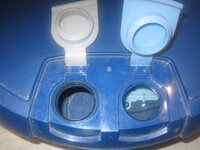
The Solution valve is where fluid leaves the Clean water tank and enters the Scooba. The first picture is is of a good tank. Notice the rubber gasket and the gray cap at the bottom of the valve. A filter screen is also visible.
-
The second photo is a wrecked tank. Parts can be seen in the tank. A sharp rattle like screws hitting plastic will be noticeable if the tank is shook. There will always be a dull thunking rattle.
-
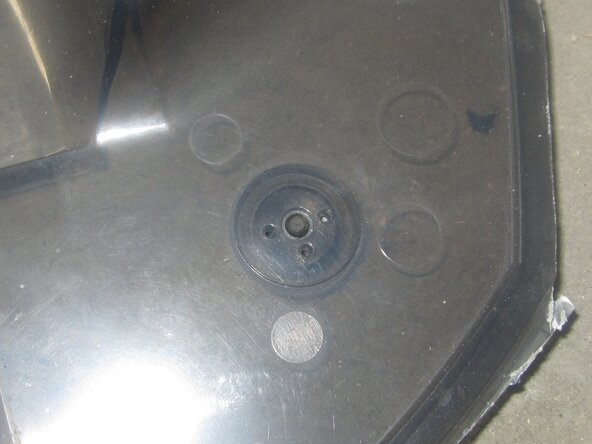
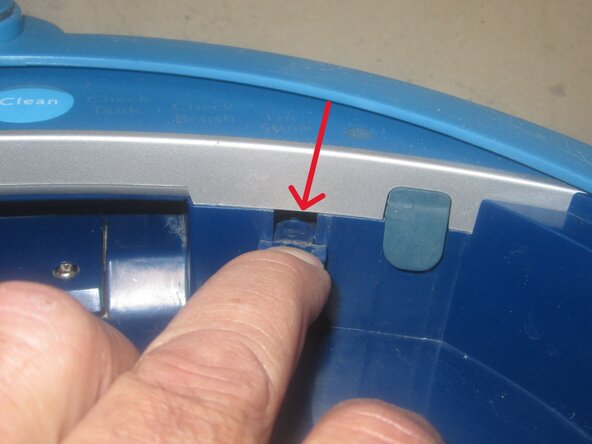
The third photo is the port on the Scooba. If the tank comes down on this port just off center, the valve can be pushed into the tank, and the tank becomes useless. Always make sure the tank is seated squarely in the tank receiver when closing the tank onto the Scooba.
-
-
-
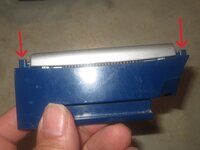
The initial cuts were made along the red line and then on the seam on the back of the tank. IF I were to do this again, I would cut about 1/8" below the seam on the back of the tank.
-
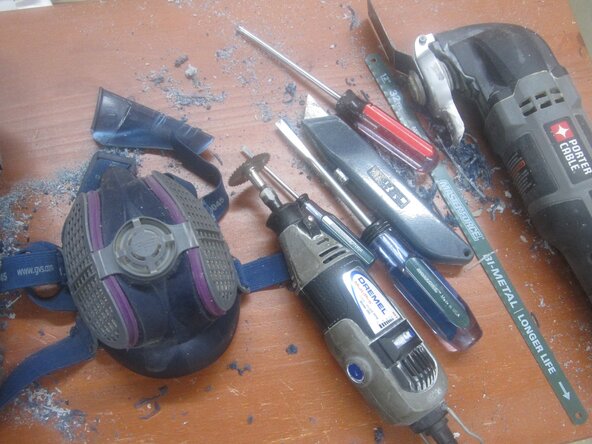
The second photo is the tools I used. The dust mask is a MUST HAVE and the Dremel with the rotary saw got the most use.
-
Not shown is eye protection because I am wearing it. If you do this, plastic bits will be flying all over.
-
-
-
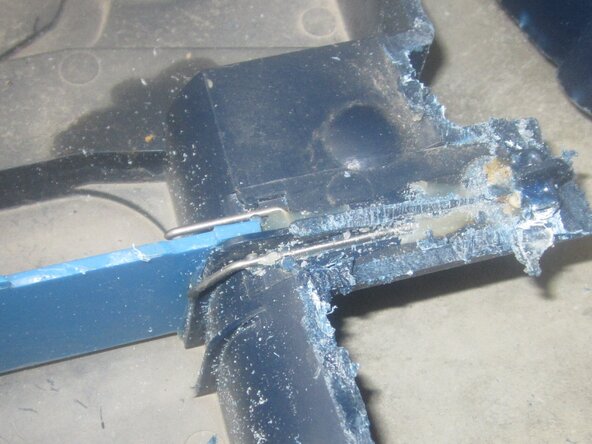
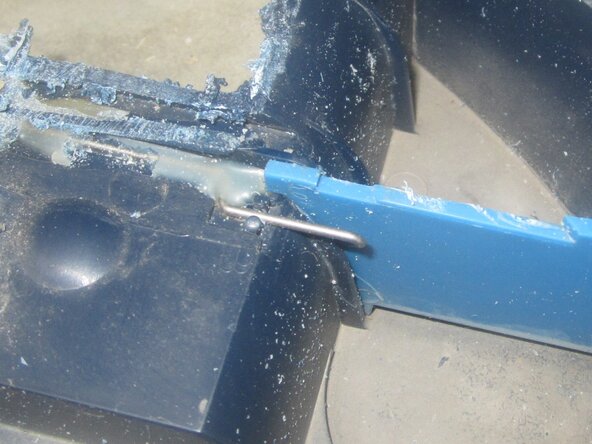
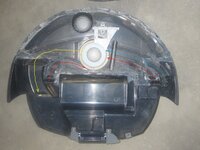
After the cuts of Step 2 are made, we find ourselves in the dirty water tank. There is a Ball Check valve (blue arrows) and the Dirty Tank Full Sensor (red arrow).
-
The purpose of the Ball Check valve will be covered in the next step.
-
The Dirty tank Full sensor is just two Stainless Steel wires that extend into the top of the dirty water tank. The wires are separated by a light blue plastic divider that has an opening on the bottom of the tank. Electrons can flow from one wire to the other thru the dirty water once the tank is full.
-
-
-
-
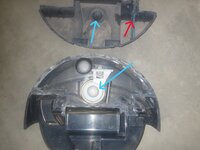
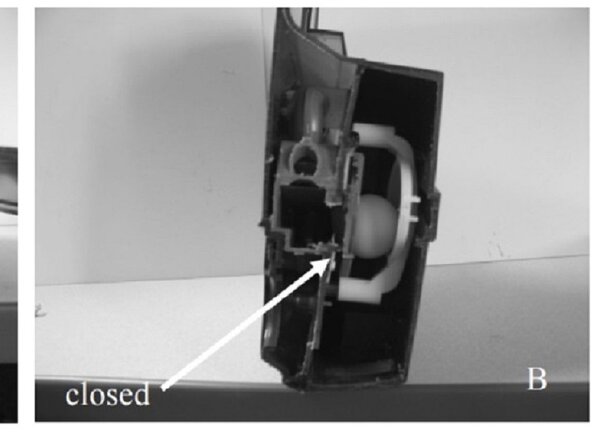
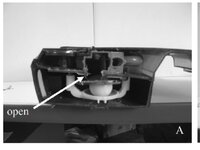
The first two images are the only two pictures of the internal details of the tank that I am aware of. They come from page 16 of iRobot's Service Manual for the Scooba.
-
When the tank is in the horizontal position (first picture), the flap can hang down. When the tank is held vertically (second picture), the ball rolls to the edge of the area it is contained in and pushes the Flap Valve shut. The ball weighs about 78 grams so fairly heavy for its size.
-
The chamber above the flap valve is effectively a Dust Cyclone which we will examine in the next step...
-
-
-
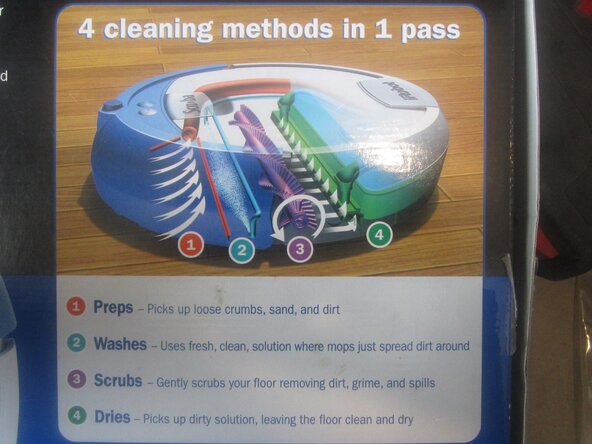
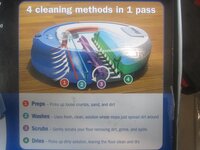
The blue line and arrow is the path of the air that is sucked in from the vacuum port. It enters the chamber above the Flap Valve. (Underneath from this view because the tank is upside down.) This is the #1 Preps of iRobot's diagram for the Scooba.
-
The Red lines with arrows is the air path from the #4 Dries of iRobot's diagram.
-
The Yellow line is the air that is being sucked into the Filter screen. From there, it goes to the suction fan and is then exhausted from the Scooba by the left wheel. Some of the air is also diverted to the #1 Preps to blow dirt towards the vacuum port.
-
-
-
This is the top view of the clean water tank. There is a connection between the front and back parts of the tank. It can be seen in the previous step. Red and Blue lines cross it on the right side of the picture.
-
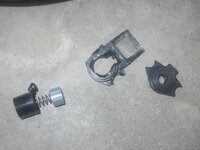
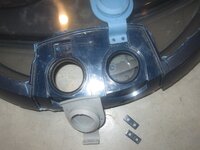
The second picture is the infamous Solution Valve that was wrecked. I laid the pieces parts kind of how they would go together in the tank. The center black plastic part was shattered.
-
The third picture is a little flap valve that allows air to flow into the empty water tank as it empties. If the Scooba struggles to empty the clean water tank and the pump initially seems to be working, you can push a paperclip into three little holes to loosen this flap.
-
-
-
There is a magnet on the outside of the tank.
-
The raised plastic around the magnet pushes down a spring loaded plunger on the Scooba core. The magnet is detected by a Hall Effect Sensor in the Keyboard. If the tank isn't securely latched, the plunger pushes the tank up and the magnet is pushed away from the sensor.
-
-
-
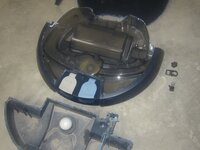
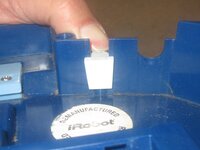
The tank was wrecked so what good can come from this? We can salvage the handle and use it on a Scooba tank with a wrecked handle but a good Solution Valve. First step is to remove the two screws on the bottom of the tank
-
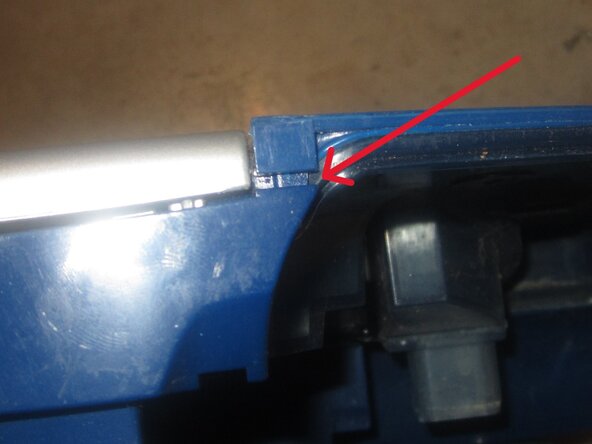
Next, use a flat blade screwdriver to pry the RIGHT side of the tank handle so the little tab can be cleared and the handle can swing forward slightly. Then pry on the LEFT side and the handle can be rolled out.
-
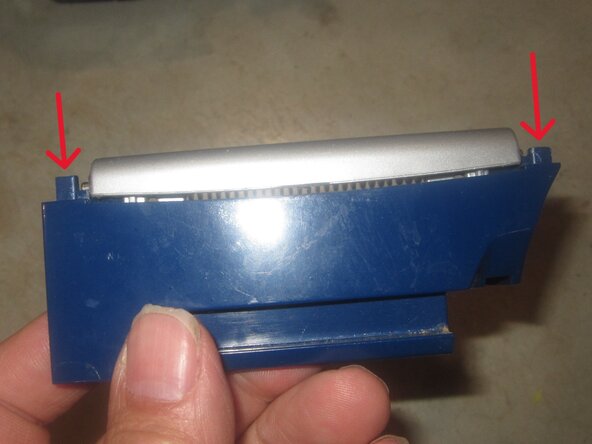
Here is the handle looking from the front of the tank. Notice the difference in the lengths of the right and left tabs that lock into the tank.
-
-
-
The tank covers can be salvaged by center punching the 4 plastic pins and drilling them very shallowly with a 9/64" drill. Try not to nick the rectangular bits.
-
Gently pry off the rectangular plastic washers and the covers should easily pull free.
-
The same procedure can be done for the tank these covers are going onto. A dab of hot glue could hold everything in place.
-