
Toshiba TECRA R940 Keyboard Replacement
Introduzione
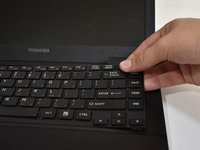
Vai al passo 1The keyboard requires more disassembly than what may seem obvious, Luckily, this laptops keyboard is one piece and easily replaceable.
Cosa ti serve


-
-
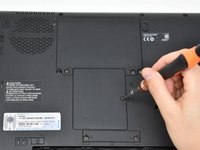
Unscrew the single screw on the RAM access panel using a Phillips #0 screwdriver.
-
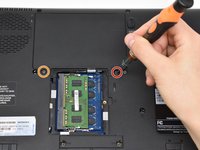
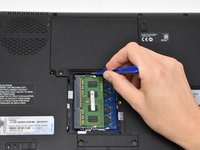
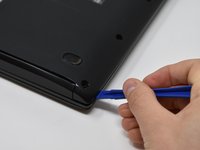
Use a plastic opening tool to pry off the access panel.
-
-
-
Remove twelve 5.5 mm screws from the main back cover using a Phillips #0 screwdriver.
-
Remove three 11 mm screws from main back cover and mini access panel using a Phillips #0 screwdriver.
-
Remove two 9.5 mm screws from the main back cover using a Phillips #0 screwdriver.
The lower two orange screws are definitely not 11mm - that would prevent the keyboard re-seating, as I discovered.
I suggest 5.5mm. A cover is shown between them; - my R940 (and virtually identical R840) has lost that.
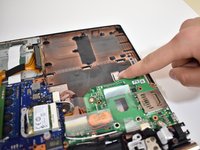
Underneath it is a docking connector.
I have a working R940 & R840, but also a few other R840 in only slight distress (screen hinge screws, a couple missing SATA connector).
So while I might not be able to tell now where those misplaced 11mm screws should go, I will be able to inspect the other untouched ones, and update this note.
-
-
-
-
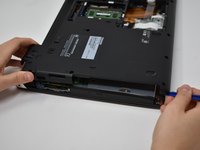
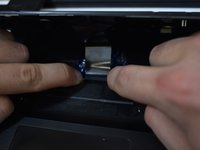
Remove two 2.5 mm screws from the side of the optical drive using a Phillips #0 screwdriver.
-
-
-
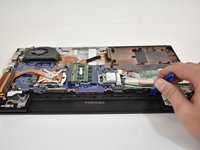
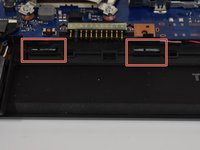
Move the 4 small tabs, that are placed along the empty battery space, in the direction of where the battery pack would be. They should stay unhooked without having to hold them.
-


To reassemble your device, follow these instructions in reverse order.
To reassemble your device, follow these instructions in reverse order.
Team

Central Washington University, Team S1-G5, Pengilly Fall 2018 Membro di Central Washington University, Team S1-G5, Pengilly Fall 2018
CWU-PENGILLY-F18S1G5
3 Membri
21 Guide realizzate
2Commenti sulla guida
To replace the keyboard you only need to remove one screw (marked KB) on the underside of the laptop. The keyboard can then be easily removed by taking off the plastic bezel by the top row of keys and unclipping from there. Literally a 5 minute job without the need to fully disassemble.
Bravo! You are 100% right
Thanks to your advice, I got rid of unnecessary and unnecessary disassembly work.