Salta al contenuto principale

Toshiba Satellite L655D-S5095 Screen Replacement

Cosa ti serve

  1. Toshiba Satellite L655D-S5095 Screen Replacement, Battery: passo 1, immagine 1 di 3 Toshiba Satellite L655D-S5095 Screen Replacement, Battery: passo 1, immagine 2 di 3 Toshiba Satellite L655D-S5095 Screen Replacement, Battery: passo 1, immagine 3 di 3
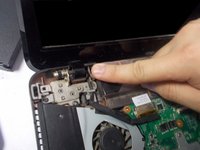
    • Locate the battery locks on the bottom of the laptop.

    • Slide the right lock outwards, until it locks into place.

    • Slide and hold the left lock outwards and hold it in place.

  2. Toshiba Satellite L655D-S5095 Screen Replacement: passo 2, immagine 1 di 1
    • While holding the lock in place, slide the battery out towards you.

  3. Toshiba Satellite L655D-S5095 Screen Replacement, Keyboard: passo 3, immagine 1 di 1
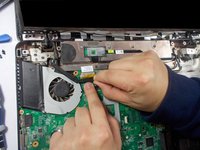
    • Using a #1 Phillips screwdriver, remove the 5.8 mm screw in the battery slot.

  4. Toshiba Satellite L655D-S5095 Screen Replacement: passo 4, immagine 1 di 1
    • Use a plastic opening tool to pry off the plastic panel above the keyboard.

  5. Toshiba Satellite L655D-S5095 Screen Replacement: passo 5, immagine 1 di 2 Toshiba Satellite L655D-S5095 Screen Replacement: passo 5, immagine 2 di 2
    • Unscrew the four 3.7 mm screws at the top of the keyboard using a #1 Phillips screwdriver.

  6. Toshiba Satellite L655D-S5095 Screen Replacement: passo 6, immagine 1 di 1
    • Slowly lift the keyboard out, up and towards the screen.

    • Do not try to remove the keyboard completely because it is still attached to the motherboard.

  7. Toshiba Satellite L655D-S5095 Screen Replacement: passo 7, immagine 1 di 1
    • Using a plastic opening tool, flip the ZIF connector up to release the ribbon and the keyboard.

  8. Toshiba Satellite L655D-S5095 Screen Replacement, Screen: passo 8, immagine 1 di 2 Toshiba Satellite L655D-S5095 Screen Replacement, Screen: passo 8, immagine 2 di 2
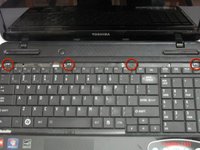
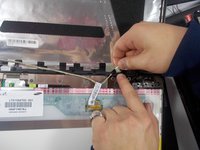
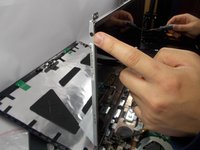
    • Remove stickers from four corners of laptop.

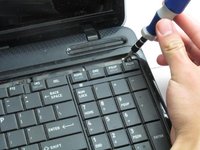
    • Remove screws underneath stickers.

  9. Toshiba Satellite L655D-S5095 Screen Replacement: passo 9, immagine 1 di 2 Toshiba Satellite L655D-S5095 Screen Replacement: passo 9, immagine 2 di 2
    • Use plastic opening tool to pry the hinges off.

    • Remove the screen cover.

    • Unscrew the six screws on the bottom of the screen near the top of the hinges.

  10. Toshiba Satellite L655D-S5095 Screen Replacement: passo 10, immagine 1 di 2 Toshiba Satellite L655D-S5095 Screen Replacement: passo 10, immagine 2 di 2
    • Remove cable located next to the fan.

    • Fold down screen without screen back cover to remove cable as shown.

  11. Toshiba Satellite L655D-S5095 Screen Replacement: passo 11, immagine 1 di 2 Toshiba Satellite L655D-S5095 Screen Replacement: passo 11, immagine 2 di 2
    • Unscrew both screws on each side of the screen.

    • Remove the screen.

Conclusione

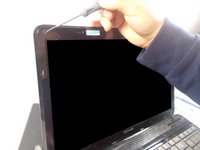
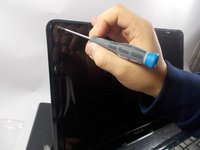
To reassemble your device, follow these instructions in reverse order.

Altre 2 persone hanno completato questa guida.

Un commento

Que éxito esta pagina , muy gran trabajo, soy de Perú y creo que este tipo de trabajos son muy bien valorados, saludos a la distancia.

Korregan - Replica

Aggiungi Commento

Visualizza Statistiche:

Ultime 24 Ore: 0

Ultimi 7 Giorni: 0

Ultimi 30 Giorni: 1

Tutti i Tempi: 2,228