Salta al contenuto principale

Toshiba Satellite L505D-GS6000 RAM Replacement

Cosa ti serve

  1. Toshiba Satellite L505D-GS6000 RAM Replacement, Battery: passo 1, immagine 1 di 2 Toshiba Satellite L505D-GS6000 RAM Replacement, Battery: passo 1, immagine 2 di 2
    • Shut down the computer and disconnect all cables.

    • Flip the computer over so that the bottom is facing up.

    • Slide right switch above the battery so that it is in the rightwards position.

  2. Toshiba Satellite L505D-GS6000 RAM Replacement: passo 2, immagine 1 di 1
    • Push and hold the left-most switch in the leftward position.

    • While holding the left switch in position, lift up on the battery from the groove in the casing and remove.

  3. Toshiba Satellite L505D-GS6000 RAM Replacement, RAM: passo 3, immagine 1 di 2 Toshiba Satellite L505D-GS6000 RAM Replacement, RAM: passo 3, immagine 2 di 2
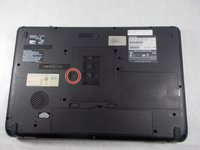
    • Place the laptop upside down so the bottom is facing up and the side that opens is facing you.

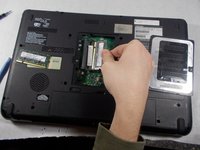
    • In the middle of the laptop there is a panel held down by one 6 mm screw, remove that screw using a Phillips #0 screwdriver.

    • Place the screw down in a place that you will not lose it.

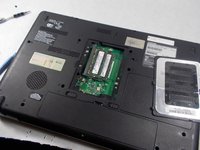
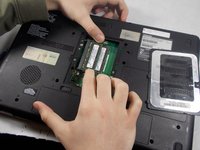
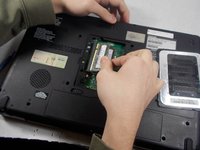
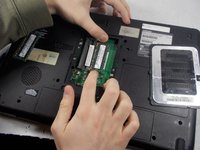
    • Remove the RAM cover.

  4. Toshiba Satellite L505D-GS6000 RAM Replacement: passo 4, immagine 1 di 2 Toshiba Satellite L505D-GS6000 RAM Replacement: passo 4, immagine 2 di 2
    • The unlock the RAM push out on the metal pieces touching the RAM on the bottom and top side until it clicks

    • Once you do that gently slide the ram out and place it to the side.

    • Be gentle as to not damage any of the pieces within the laptop, excessive force could break the RAM slots and require more repairs.

  5. Toshiba Satellite L505D-GS6000 RAM Replacement: passo 5, immagine 1 di 2 Toshiba Satellite L505D-GS6000 RAM Replacement: passo 5, immagine 2 di 2
    • You’ll need to do the same as the top for the bottom set of RAM, so gently push outward on the metal pieces above and below the RAM.

    • Again be gentle when following these steps as you could could cause more damage than you’re able to fix.

    • Gently slide the RAM out from the slot.

Conclusione

To reassemble your device, follow these instructions in reverse order.

Un'altra persona ha completato questa guida.

0 Commenti

Aggiungi Commento

Visualizza Statistiche:

Ultime 24 Ore: 0

Ultimi 7 Giorni: 1

Ultimi 30 Giorni: 4

Tutti i Tempi: 385