Salta al contenuto principale
Toshiba Satellite 1415-S105 Optical Drive Replacement

Toshiba Satellite 1415-S105 Optical Drive Replacement

Kiril Lange

Kiril Lange e un altro collaboratore

Ultimo aggiornamento il April 29, 2023

10 - 15 minuti
Facile

Introduzione

Vai al passo 1

An optical drive allows your computer to read and write to media such as CDs and DVDs. Upgrading or replacing your drive may be necessary to get the most out of your laptop.

Cosa ti serve

Strumenti

  • Phillips #0 Screwdriver
    Phillips #0 Screwdriver
  • iFixit Opening Tool
    iFixit Opening Tool
  • Spudger
    Spudger

Mostra di più…

  1. Toshiba Satellite 1415-S105 Optical Drive Replacement, Battery: passo 1, immagine 1 di 1
    • The battery is located on the front right corner of the laptop.

  2. Toshiba Satellite 1415-S105 Optical Drive Replacement: passo 2, immagine 1 di 1
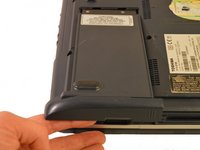
    • With one finger on the raised grip, slide the latch towards the front of the laptop.

  3. Toshiba Satellite 1415-S105 Optical Drive Replacement: passo 3, immagine 1 di 2 Toshiba Satellite 1415-S105 Optical Drive Replacement: passo 3, immagine 2 di 2
    • Pull the battery out towards the side.

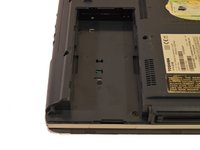
  4. Toshiba Satellite 1415-S105 Optical Drive Replacement: passo 4, immagine 1 di 2 Toshiba Satellite 1415-S105 Optical Drive Replacement: passo 4, immagine 2 di 2
    • Lift the battery straight up, out of the computer.

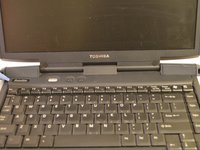
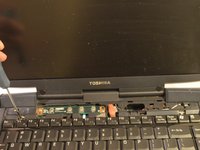
  5. Toshiba Satellite 1415-S105 Optical Drive Replacement, Keyboard: passo 5, immagine 1 di 3 Toshiba Satellite 1415-S105 Optical Drive Replacement, Keyboard: passo 5, immagine 2 di 3 Toshiba Satellite 1415-S105 Optical Drive Replacement, Keyboard: passo 5, immagine 3 di 3
    • Using a set of case opening tools, pry open the left and right sides of the black plastic strip above the keyboard.

    • Fully detach the strip.

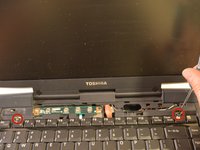
  6. Toshiba Satellite 1415-S105 Optical Drive Replacement: passo 6, immagine 1 di 2 Toshiba Satellite 1415-S105 Optical Drive Replacement: passo 6, immagine 2 di 2
    • Unscrew the two screws near the top of the keyboard.

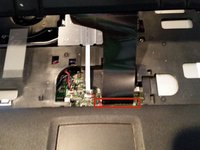
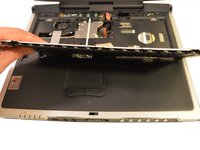
  7. Toshiba Satellite 1415-S105 Optical Drive Replacement: passo 7, immagine 1 di 2 Toshiba Satellite 1415-S105 Optical Drive Replacement: passo 7, immagine 2 di 2
    • Lift the keyboard by holding the middle top of the keyboard.

    • The keyboard is still connected by a ribbon cable to the motherboard.

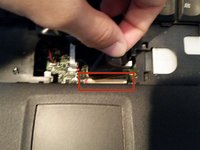
  8. Toshiba Satellite 1415-S105 Optical Drive Replacement: passo 8, immagine 1 di 3 Toshiba Satellite 1415-S105 Optical Drive Replacement: passo 8, immagine 2 di 3 Toshiba Satellite 1415-S105 Optical Drive Replacement: passo 8, immagine 3 di 3
    • Carefully pull upwards on the ribbon cable to detach.

    • Remove keyboard.

  9. Toshiba Satellite 1415-S105 Optical Drive Replacement, Optical Drive: passo 9, immagine 1 di 1
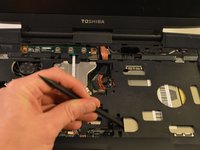
    • Unscrew the screw located on the left side of the optical drive near the heat sink cover in the middle of the laptop.

  10. Toshiba Satellite 1415-S105 Optical Drive Replacement: passo 10, immagine 1 di 3 Toshiba Satellite 1415-S105 Optical Drive Replacement: passo 10, immagine 2 di 3 Toshiba Satellite 1415-S105 Optical Drive Replacement: passo 10, immagine 3 di 3
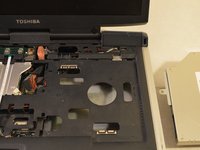
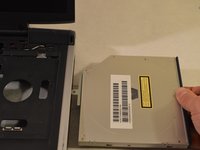
    • Using spudger, push the optical drive out to the right.

Conclusione

To reassemble your device, follow these instructions in reverse order.

Kiril Lange

Membro da: 09/22/14

943 Reputazione

9 Guide realizzate

Team

USF Tampa, Team 3-2, Brown Fall 2014 Membro di USF Tampa, Team 3-2, Brown Fall 2014

USFT-BROWN-F14S3G2

3 Membri

27 Guide realizzate

0Commenti sulla guida

Aggiungi Commento

Visualizza Statistiche:

Ultime 24 Ore: 0

Ultimi 7 Giorni: 3

Ultimi 30 Giorni: 7

Tutti i Tempi: 218