Salta al contenuto principale

Tennis Racquet Grip Tape Replacement

Cosa ti serve

  1. Tennis Racquet Grip Tape Replacement, Tennis Racket Grip Tape: passo 1, immagine 1 di 2 Tennis Racquet Grip Tape Replacement, Tennis Racket Grip Tape: passo 1, immagine 2 di 2
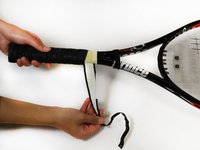
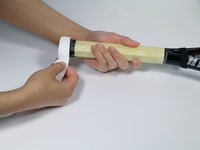
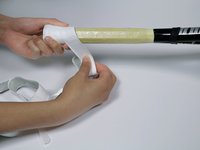
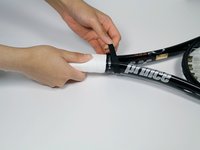
    • Pull the rubber collar towards the tennis racquet head off the handle.

  2. Tennis Racquet Grip Tape Replacement: passo 2, immagine 1 di 1
    • Unwrap the tape on the tennis racquet handle top.

  3. Tennis Racquet Grip Tape Replacement: passo 3, immagine 1 di 3 Tennis Racquet Grip Tape Replacement: passo 3, immagine 2 di 3 Tennis Racquet Grip Tape Replacement: passo 3, immagine 3 di 3
    • Remove the old grip.

    • Some older tennis racquets may have a few staples holding the grip to the buttcap. Use the staple remover to take them out.

  4. Tennis Racquet Grip Tape Replacement: passo 4, immagine 1 di 1
    • Peel off 6 inches of the paper backing covering the adhesive from the replacement grip.

  5. Tennis Racquet Grip Tape Replacement: passo 5, immagine 1 di 2 Tennis Racquet Grip Tape Replacement: passo 5, immagine 2 di 2
    • Face the racquet so the buttcap is towards you.

    • If you are left-handed, wrap the tape towards the right. This method is what is used in the photos.

    • If you are right-handed, wrap the tape towards the left

    • Wrap the grip flush with the buttcap base.

  6. Tennis Racquet Grip Tape Replacement: passo 6, immagine 1 di 2 Tennis Racquet Grip Tape Replacement: passo 6, immagine 2 di 2
    • Wrap the handle at a steady incline, peeling off the backing 6 inches at a time.

    • Stop wrapping just before you finish wrapping the handle.

    • The handle is the off color or unpainted portion below the tennis racquet head.

  7. Tennis Racquet Grip Tape Replacement: passo 7, immagine 1 di 2 Tennis Racquet Grip Tape Replacement: passo 7, immagine 2 di 2
    • Wrap the handle top with the backing on.

    • Mark a horizontal line parallel to the buttcap around the grip.

  8. Tennis Racquet Grip Tape Replacement: passo 8, immagine 1 di 1
    • Cut along the marked line using either scissors or a knife.

    • Cutting with scissors is significantly easier, however if you do not have scissors that can cut the grip, a knife will work.

  9. Tennis Racquet Grip Tape Replacement: passo 9, immagine 1 di 1
    • Remove the backing and finish wrapping the replacement grip.

  10. Tennis Racquet Grip Tape Replacement: passo 10, immagine 1 di 1
    • Wrap the tape that comes with the grip around the handle halfway on the racquet and halfway on the grip.

  11. Tennis Racquet Grip Tape Replacement: passo 11, immagine 1 di 2 Tennis Racquet Grip Tape Replacement: passo 11, immagine 2 di 2
    • Complete your fix by pulling the rubber collar back to its original location.

    • If you do not wish to add an overgrip, skip step 12.

  12. Tennis Racquet Grip Tape Replacement: passo 12, immagine 1 di 1
    • Pull the collar up off the handle.

    • Repeat steps 4 - 11 to apply the overgrip.

Conclusione

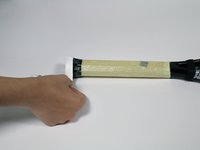
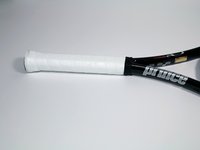
Congratulations, your racquet grip is now fixed and you can go out and continue playing!

Altre 6 persone hanno completato questa guida.

Team

UC Davis, Team S3-G1, Coad Spring 2017 Membro di UC Davis, Team S3-G1, Coad Spring 2017

UCD-COAD-S17S3G1

3 Membri

2 Guide realizzate

4 Commenti

Thank you I’ve found particularly useful the, then obvious when you think about it, comment that left handed setup is different to the right handed one!

Sam Curti - Replica

now this was helpfull, What's the difference between Eastern grip and Continental grip? Are they basically the same grip?

JACKSON RYAN - Replica

This guide about tennis grip was worth reading and helped to develop my skills to the next level.

Tennis Unit - Replica

I use this tennis guide, it’s quite worthy.

Rondaromero - Replica

Aggiungi Commento

Visualizza Statistiche:

Ultime 24 Ore: 1

Ultimi 7 Giorni: 12

Ultimi 30 Giorni: 80

Tutti i Tempi: 18,203