Salta al contenuto principale
TOSHIBA Satellite E45W-C4200X Motherboard Replacement

TOSHIBA Satellite E45W-C4200X Motherboard Replacement

Tim Guilbeault

Tim Guilbeault e 3 altri collaboratori

Ultimo aggiornamento il March 7, 2024

45 minuti
Moderato

Introduzione

Vai al passo 1

This guide will walk you through the necessary steps for replacing the motherboard in your Toshiba Satelite E45W-C4200X.

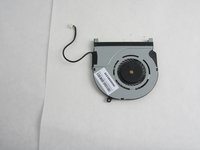
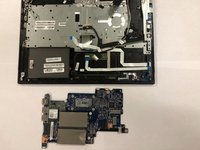
The motherboard is arguably the most important component in the laptop. This printed circuit board contains all the main components that operate your computer.

Before using this guide, make sure to review the troubleshooting page oftentimes, the battery can be fixed without replacing it.

If possible, back up your computer to an external hard drive before this replacement. Make sure to power off your laptop completely and disconnect from any external power source prior to beginning the replacement.

Cosa ti serve

Ricambi

Strumenti

Mostra di più…

  1. TOSHIBA Satellite E45W-C4200X Motherboard Replacement, Cooling Fan: passo 1, immagine 1 di 2 TOSHIBA Satellite E45W-C4200X Motherboard Replacement, Cooling Fan: passo 1, immagine 2 di 2
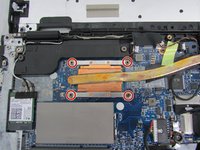
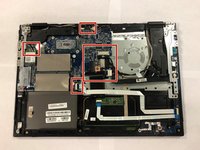
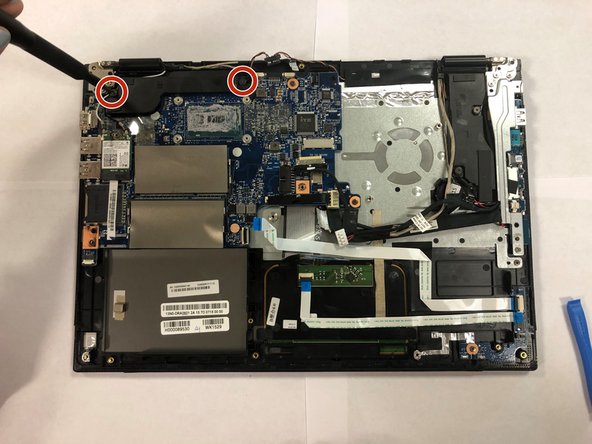
    • Using the phillips #1 screwdriver, remove the ten 1 mm screws from the back panel of the device.

  2. TOSHIBA Satellite E45W-C4200X Motherboard Replacement: passo 2, immagine 1 di 2 TOSHIBA Satellite E45W-C4200X Motherboard Replacement: passo 2, immagine 2 di 2
    • Use plastic opening tool to separate the back cover from the laptop.

    • Go slowly and be careful as the plastic can crack.

    • It is recommend that you start from a corner and run the tool along the edge.

  3. TOSHIBA Satellite E45W-C4200X Motherboard Replacement: passo 3, immagine 1 di 2 TOSHIBA Satellite E45W-C4200X Motherboard Replacement: passo 3, immagine 2 di 2
    • Remove the four .5 mm screws that secure the heat sink using a Phillips #1 screwdriver.

  4. TOSHIBA Satellite E45W-C4200X Motherboard Replacement: passo 4, immagine 1 di 2 TOSHIBA Satellite E45W-C4200X Motherboard Replacement: passo 4, immagine 2 di 2
    • Remove the two 1 mm screws that secure the cooling fan using a Phillips #1 screwdriver.

  5. TOSHIBA Satellite E45W-C4200X Motherboard Replacement: passo 5, immagine 1 di 2 TOSHIBA Satellite E45W-C4200X Motherboard Replacement: passo 5, immagine 2 di 2
    • Disconnect the fan cord from the harness.

    • Remove the cooling fan and heat sink from the laptop.

  6. TOSHIBA Satellite E45W-C4200X Motherboard Replacement: passo 6, immagine 1 di 3 TOSHIBA Satellite E45W-C4200X Motherboard Replacement: passo 6, immagine 2 di 3 TOSHIBA Satellite E45W-C4200X Motherboard Replacement: passo 6, immagine 3 di 3
    • Carefully peel off the tape holding the heat sink onto the cooling fan.

    • Peel carefully as the tape goes around all four sides.

    • Remove the cooling fan from the heat sink.

  7. TOSHIBA Satellite E45W-C4200X Motherboard Replacement, Motherboard: passo 7, immagine 1 di 2 TOSHIBA Satellite E45W-C4200X Motherboard Replacement, Motherboard: passo 7, immagine 2 di 2
    Attrezzo utilizzato in questo passaggio:
    Anti-Static Wrist Strap
    $7.95
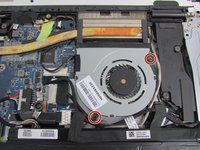
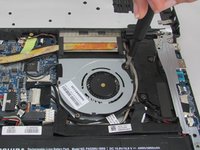
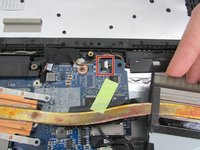
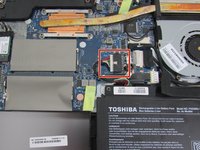
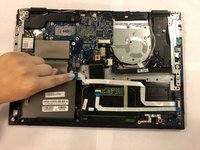
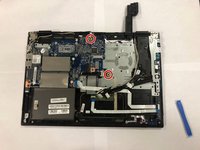
    • Unplug the connection to the battery.

    • Mark sure you are using the anti-static wrist strap for the duration of this replacement.

  8. TOSHIBA Satellite E45W-C4200X Motherboard Replacement: passo 8, immagine 1 di 3 TOSHIBA Satellite E45W-C4200X Motherboard Replacement: passo 8, immagine 2 di 3 TOSHIBA Satellite E45W-C4200X Motherboard Replacement: passo 8, immagine 3 di 3
    • Remove all remaining external wire harnesses from the circuit board.

    • It is recommended that you use labels or take pictures of the wires you remove to assist in the re-connection.

  9. TOSHIBA Satellite E45W-C4200X Motherboard Replacement: passo 9, immagine 1 di 1
    • Remove the three screws from the metal bracket on the left side of the circuit board using a Phillips #1 screwdriver.

    • Remove the bracket.

  10. TOSHIBA Satellite E45W-C4200X Motherboard Replacement: passo 10, immagine 1 di 3 TOSHIBA Satellite E45W-C4200X Motherboard Replacement: passo 10, immagine 2 di 3 TOSHIBA Satellite E45W-C4200X Motherboard Replacement: passo 10, immagine 3 di 3
    • Remove the two screws from the black plastic cover using a Phillips #1 screwdriver.

    • Remove the black plastic cover.

  11. TOSHIBA Satellite E45W-C4200X Motherboard Replacement: passo 11, immagine 1 di 2 TOSHIBA Satellite E45W-C4200X Motherboard Replacement: passo 11, immagine 2 di 2
    • Using a Phillips #1 screwdriver, remove the remaining two screws holding the circuit board in place.

    • Carefully remove the motherboard from the device.

Conclusione

To reassemble your device, follow these instructions in reverse order.

Un commento

Could you help me to know the values for this piece? My motherboard has burned it, and I could not find the schematic; I guess it is an inductor. But I'm just learning about this. I hope that you can help me.

Regards.

https://ibb.co/TKCGPpF

Developer Paridin - Replica

Aggiungi Commento

Visualizza Statistiche:

Ultime 24 Ore: 0

Ultimi 7 Giorni: 3

Ultimi 30 Giorni: 7

Tutti i Tempi: 1,051