
Spin Master Boxer Remote Trigger Buttons Replacement
Introduzione
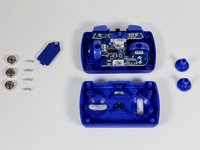
Vai al passo 1If you need to replace either one of the two top buttons, or trigger buttons, on the remote for the Spin Master Boxer Bot, follow this guide. If you only wanted access to replacing remote joysticks, this guide will work as well. To follow this replacement guide you will need Size 00 Philips Screwdriver, as well as a flat metal opening tool, the Jimmy.
Cosa ti serve


-
-
Lay the remote flat on your work space, with joysticks facing you.
-
-


To reassemble your device, follow these instructions in reverse order.
To reassemble your device, follow these instructions in reverse order.
Team

Cal Poly, Team S1-G1, Maness Spring 2019 Membro di Cal Poly, Team S1-G1, Maness Spring 2019
CPSU-MANESS-S19S1G1
4 Membri
10 Guide realizzate