Introduzione
Per rimuovere lo schermo di un iMac occorre tagliare l'adesivo con un attrezzo di apertura specifico per iMac. Dopo che avrai completato la riparazione, dovrai seguire la nostra guida alle strisce adesive per eliminare il vecchio adesivo e sostituirlo con delle nuove strisce.
Cosa ti serve
-
-
Con il perno libero di muoversi, l'iMac sarà sbilanciato e sarà difficile lavorarci sopra. Le riparazioni possono essere fatte con l'iMac a faccia in giù, ma sono più veloci e facili con un cuneo di supporto per iMac.
-
Se stai usando il Cuneo iFixit di cartone di supporto dell'iMac. segui queste informazioni per montarlo.
-
-
-
-
Posiziona l'iMac a faccia in su sopra un tavolo.
-
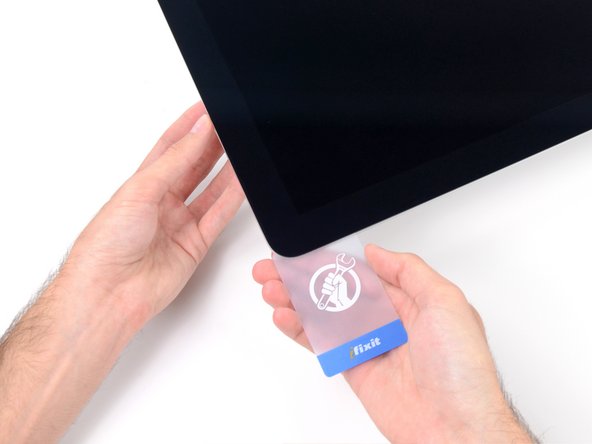
Partendo dall'angolo superiore destro, inserisci una scheda di plastica tra il display e il telaio.
-
-
-
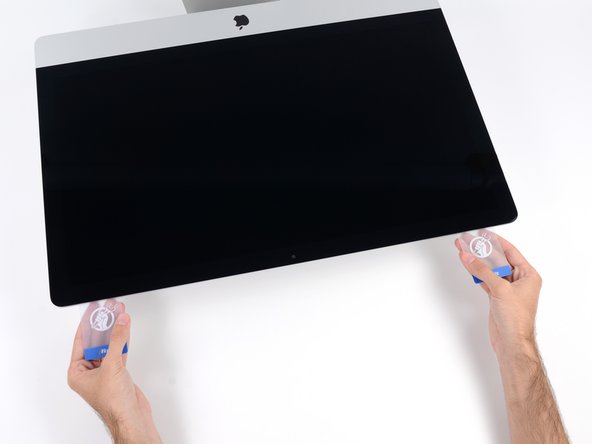
Con le schede inserite come mostrato vicino agli angoli, torci delicatamente le schede stesse per allargare la fessura tra display e scocca.
-
Se c'è ancora qualche punto che sembra incollato e non vuole separarsi, smetti di torcere le schede e usane una per tagliare l'adesivo in quel punto.
-
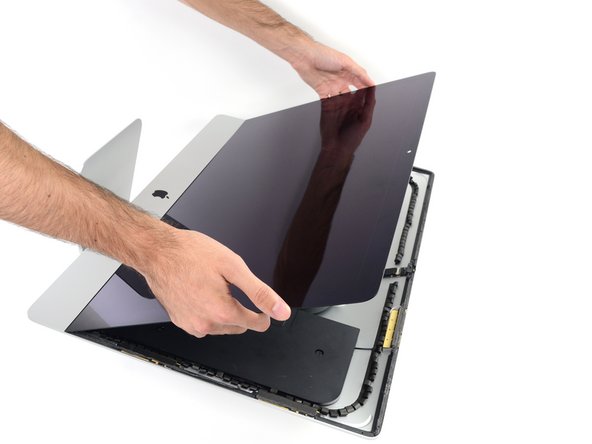
Comincia a sollevare dalla scocca la parte superiore dello schermo.
-
-
-
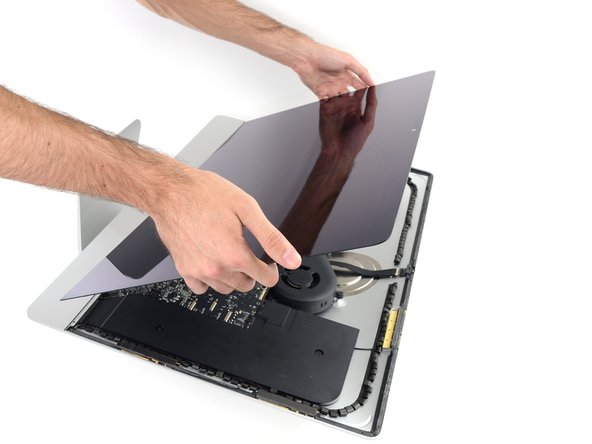
Se c'è un cavo sotto un nastro adesivo, tira via sempre il nastro adesivo prima di tutto.
-
Se il cavo è incollato al telaio, usa un iOpener riscaldato o un asciugacapelli per ammorbidire la colla. Dopo potrai inserire un plettro sotto il cavo per liberarlo. Non tirare mai direttamente connettori delicati.
-
Fai scorrere un plettro sotto i cuscinetti ammortizzatori per separarli dal display e tirali via delicatamente. Potresti aver bisogno di nastro biadesivo per riattaccarli sul nuovo display.
-
Per riassemblare il dispositivo, segui le istruzioni nell'ordine inverso e usa la nostra Guida alle Strisce Adesive per riattaccare lo schermo al vetro.
Porta i tuoi rifiuti elettronici a un riciclatore certificato R2 o e-Stewards.
La riparazione non è andata secondo i piani? Prova la risoluzione di base dei problemi, o chiedi alla nostra Comunità Risposte per trovare aiuto.
Annulla: non ho completato questa guida.
Altre 43 persone hanno completato questa guida.
Un ringraziamento speciale a questi traduttori:
100%
Daniele Carminati ci sta aiutando ad aggiustare il mondo! Vuoi partecipare?
Inizia a tradurre ›
12 Commenti
I'd like to note, that it is in no way necessary to save the wedge for when the screen is removed. In fact, the wedge is used when removing the LCD, because the rear housing may tilt when removing it, and the wedge counters this.
So, for your own sake, DO NOT lay down the iMac, but in stead, leave it standing upright, with the wedge in place, when removing the display, and let it stay there until you're done with servicing your iMac.
Also, from step 18 through 22, the iMac needs to be standing upright, NOT lying down, as you can easily damage the glass when lifting it like that.
Since there is not antenna wire to cut around the frame, I used a razor blade and and stopped at the camera and it worked like a charm. Where the guide used the card on the bottom edge for the final cut, I used a razor blade also and it only took one cut verses going back and forth with a card.
When I used a tool, the adhesive kept sticking together again as the guide mentions. The razor cut the adhesive down the center itself, so it was one easy pass and on sticky adhesive.
If you take a small chip out of the glass on the edge or crack, just get cell phone protector and cut it to size. You can also go to home depot and they have a glass specific crazy glue that you can first put in the crack or chip (do not put on the casing part. I cleaned with crazy glue first). Use a razor to get the glue into the crack, let dry and then clean off and put on the screen protector. I used rubbing alcohol first to clean the glass and chip area.
Not a perfect solution, but better than $700+ for a display.
When you cutting the edge you can also put some books under the display part to keep it level and easy to go around as you cut. If you cut the bottom all the way with the razor, you will have a clean cut and you can pull it towards you while the unit is as described in the guide steps 18-22. I do not like the idea of standing up the unit as there is more pressure on the bottom edge of the glass from the displaly


